White Sound Defense 5.56 Muzzle Device Shim Kits

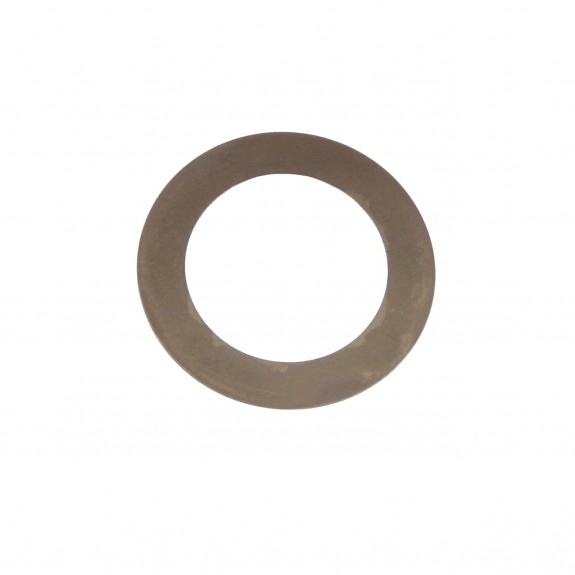
I ditched crush washers and peel washers years ago in favor of shims. Crush washers are too easy to install slightly crooked (which is the reason many suppressor manufacturers warn against them for suppressor mounts) and peel washers are just a pain to deal with. Shims, like the new ones from White Sound Defense, go a long way toward ensuring a straight muzzle device install and are very easy to deal with.

FCX_MDS_050005_001__03307.1430171210.1280.1280

The White Sound Defense 5.56 Muzzle Device Shim Kits are unique in that they have a slight cone shape which helps naturally align the entire stack of shims. Each one adjusts the orientation of the muzzle device by about 1/8th of a turn. This has a natural torque setting effect, allowing you to stack your washers until you are within 1/8th a turn of the desired orientation when hand tight and then tighten with a wrench to proper alignment and torque.

These shims are well made, from good materials (hardened stainless steel), and they are extremely easy to use. Check them out at White Sound Defense.

Faxon Firearms “Gunner” Profile AR-15 Barrels

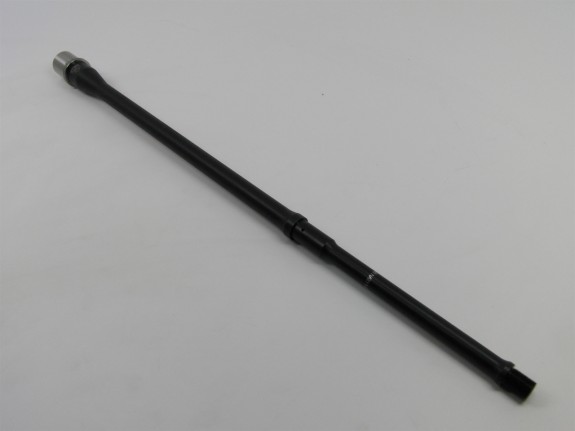
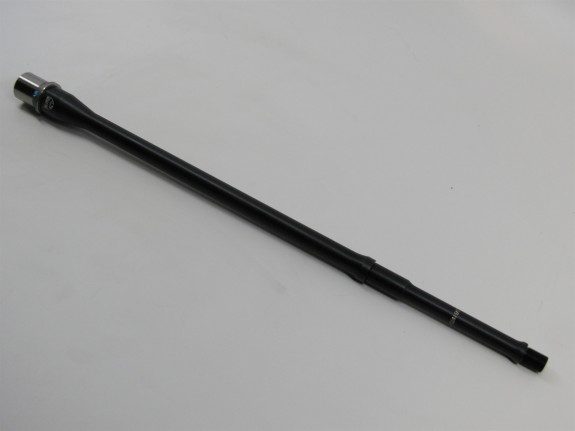
Faxon Firearms is making a name for themselves in the AR-15 barrel market by offering good quality barrels at very competitive prices and by not being afraid to try some new things. They are listening to potential customers and making some very unique barrels. The most recent evidence of that is their new Gunner profile barrels.

The Gunner profile has a tapered profile under the hand guards, a .625 gas block diameter, and is turned down to a lightweight profile in front of the gas block. It is sort of like a “SOCOM” profile barrel except thinner. These are initially available in 18″ and 20″ lengths which makes them some of the new lighter weight options available in these lengths. Eventually, Faxon will be offering them in 14.5″ and 16″ length as well.

0000784_20_556_ar_15_4150_black_qpq_gunner_light_rifle_gas 0000780_18_556_ar_15_4150_black_qpq_gunner_light_rifle_gas

Specs:

  • Barrel Material: 4150 CMV Steel
  • Barrel Type: Button Rifled
  • Barrel Caliber: 5.56
  • Barrel Twist: 1:8
  • Barrel Length: 18” or 20″
  • Barrel Profile: “Gunner” Hybrid/Light/Pencil
  • Barrel Gas System: Rifle
  • Inside Finish: QPQ Nitride
  • Outside Finish: QPQ Nitride
  • Muzzle Thread: 1/2-28 TPI (Threads Per Inch)
  • Gas Block Diameter: .625″ (1.1″ Journal)
  • Gas Port Diameter: TBD
  • Barrel Extension: M4
  • Weight: 1.46 lbs (18″) 1.55 lbs (20″)
  • Magnetic Particle Inspected!

Sage Dynamics Edition PWS DI Rifle (SD-1)

The new SD-1 Rifle from Sage Dynamics and PWS offers a lot of features along with a heaping helping of training. There have been many special edition rifles with instructor’s names on them before and some of them even came with training vouchers. However, the SD-1 comes with three vouchers for training with Aaron Cowen of Sage Dynamics. Three!

sage pws sd-1

The rifle itself is very well appointed. It is built around a PWS DI carbine with some nice options hand picked by Aaron.

  • PWS DI 16″ barrel, Isonite QPQ® treated. 1:8 twist

  • .223 Wylde chamber

  • PWS FSC556 Muzzle Device (still one of the best comps on the market)

  • Gemtech Suppressed Bolt Carrier Group

  • CMC Flat Profile 3.5 Pound Single Stage Trigger

  • PWS Enhanced Buffer Tube

  • PWS Lightweight 15″ Keymod rail

  • 7075 aluminum upper and lower receiver

  • Magpul MOE grip

  • Magpul STR Stock

  • Magpul BUS Sights

  • Kryptek Typhon finish with Sage logo lower and “SD-1” marked upper

MSM Inserts

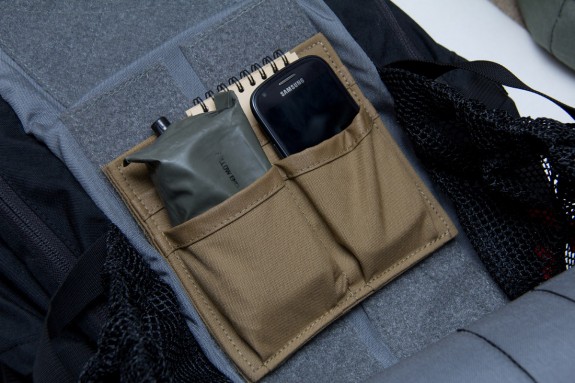
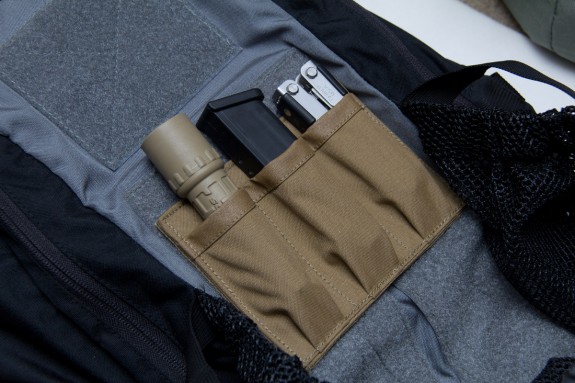
Mil-Spec Monkey has released two simple, new Velcro backed inserts. Both are made in the USA by Tactical Tailor. They are affordable and designed for versatility so it doesn’t cost you are arm and a leg to make use of the loop lining in your bag or pack.

msm-gp-insert-003

The MSM GP Insert has three pockets for organizing gear. The two billowed pockets on the front are sized for things like cell phones, GPS units, small notepads, and similarly sized items. There is a slip pocket behind the billowed pockets that can be used for items that are flat in shape. The MSM GP Insert measures approximately 6.5″ x 6″.

msm-multitool-insert-003

The MSM Multitool Insert features 3 billowed pockets. It is designed to hold items like flashlights, multitools, pistol mags, folding knives, and similarly sized objects. The MSM Multitool Insert measures approximately 6.5″ x 4.75″.

Set Up Your RDS Magnifier for Success

It wasn’t long after Aimpoint released their 3X Magnifier that I had one in hand. I basically waited to purchase mine just long enough for LaRue Tactical to come out with their LT755 QD Pivot Mount. Since that time, the magnifier concept has lost some of its cache likely due to the improved low power variable magnification optics that proliferate now and a better understanding of some of the shortcomings that are inherent to RDS magnifiers. Those shortcomings include narrow field of view (which isn’t that bad), significant extra weight, increased distortion of some red dot sights, and a clumsy transition between mounted and unmounted.

There were times in the last several years where I was tempted to sell my magnifier but I could never quite bring myself to do it mostly because, in spite of its flaws, it still does something that no other optic set up can. It offers useable magnification along side true non-magnified performance. As good as 1-4X and 1-6X optics have become, there is still a difference between the 1X setting of these low magnification variables and a quality RDS (see this previous article).

Now that I have literally years behind an RDS and magnifier setup, I have found that there are really three keys to making them work for me. That means there are three keys to mitigating the main drawbacks of the concept and all three are pretty simple.

JTT-Magnifier-Carbine

Choose a Good Mount

The mount is probably the single most important factor in ensuring that you have a good magnifier experience. I dislike mounts that require the magnifier be removed from the rifle in order to use the RDS by itself. I don’t want to have to worry about stowing my magnifier on my gear.

Choose a mount that allows you to quickly move the magnifier out of your field of view while keeping it attached to the rifle or remove it all together. I like the LaRue Tactical LT755 but there are other choices.

Choose the Right RDS

I use Aimpoints almost exclusively on my carbines and as much as I love them, I admit that not all of them work well (for me) in front of a magnifier. I first used the magnifier behind an Aimpoint Comp ML3 with a 2 MOA dot reasoning that the finer aiming point would be beneficial and it worked well for me but I saw some distortion of the red dot. I later tried it behind several Aimpoint Micros and Comp M4s but found that the dot turned into a series of star bursts or several dots swimming around each other when magnified. This may not happen for all users but it happened for me.

It turns out that the best combination that I have found so far is a Comp ML3 with the 4MOA dot. For whatever reason, I see Aimpoint’s 4 MOA dots much more clearly. This combination gives me a razor sharp aiming point and makes hits out to 300 yards very easy which is really all I can ask from this set up.

Whichever RDS you prefer, spend some time figuring out what works best in front of the magnifier.

Shed Weight from the Front of Your Carbine

Using an RDS and magnifier set up means having two optics and two mounts on your rifle. The capability that this setup offers comes at a fairly steep cost in weight. The best way I have found to mitigate this is the shed weight from your carbine, concentrating specifically on the front end.

The weight of the magnifier sits toward the rear of the receiver. You can really counteract the heavy overall feeling that this lends a carbine by reducing weight at the front. Choose a lighter barrel profile and a lighter hand guard. I think that in order to get the most out of a RDS and magnifier setup, you really need to build the carbine with this setup in mind.

You don’t have to go crazy. A lighter medium profile or pencil barrel and lightweight extended hand guard will make a big difference in how your carbine feels. It will also greatly reduce the overall weight. You should be able to build a carbine that weighs around 7-7.5 pounds (and feels lighter because of where the weight is) without much trouble at all.

If you have a magnifier and are thinking of giving up on it, gives these three tips a try before you boot it to the curb. If you are thinking of trying a magnifier, make sure to set yourself up for success. There really is a strong upside to this set up but it takes a little fore thought to get the most out of it.

Powered by WordPress. Designed by Woo Themes