Archive | Reviews

Review: MSM Wrap Holster and Wrap Multi Pouch

I have used a number of Velcro backed holsters and magazine pouches over the years. I have even made my own. The most versatile that I have found to date are the Wrap Holster and Wrap Multi Pouches from MILSPEC Monkey (MSM).

Overview

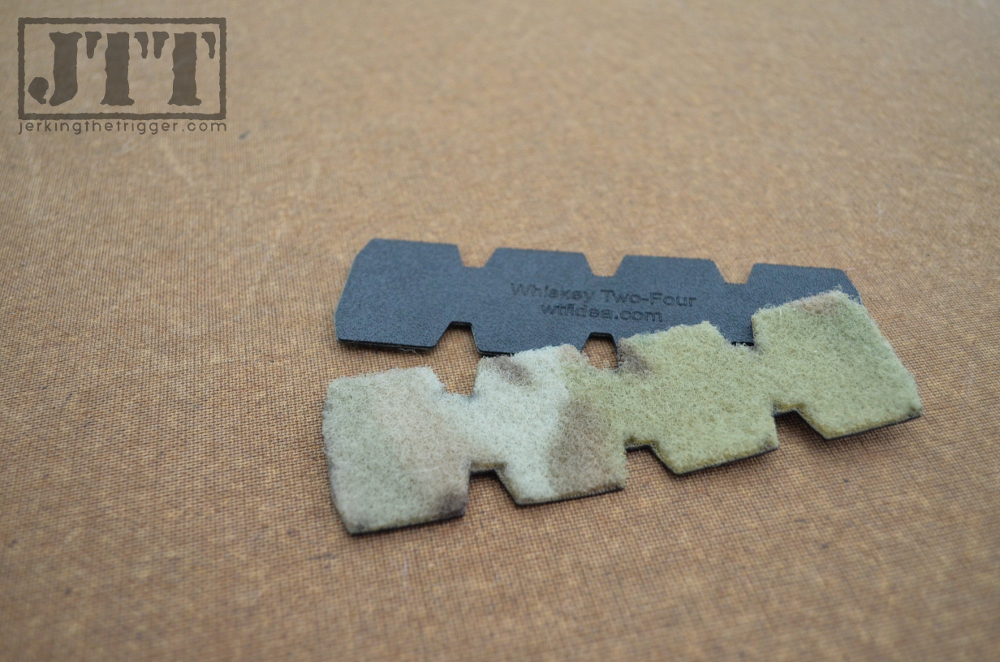
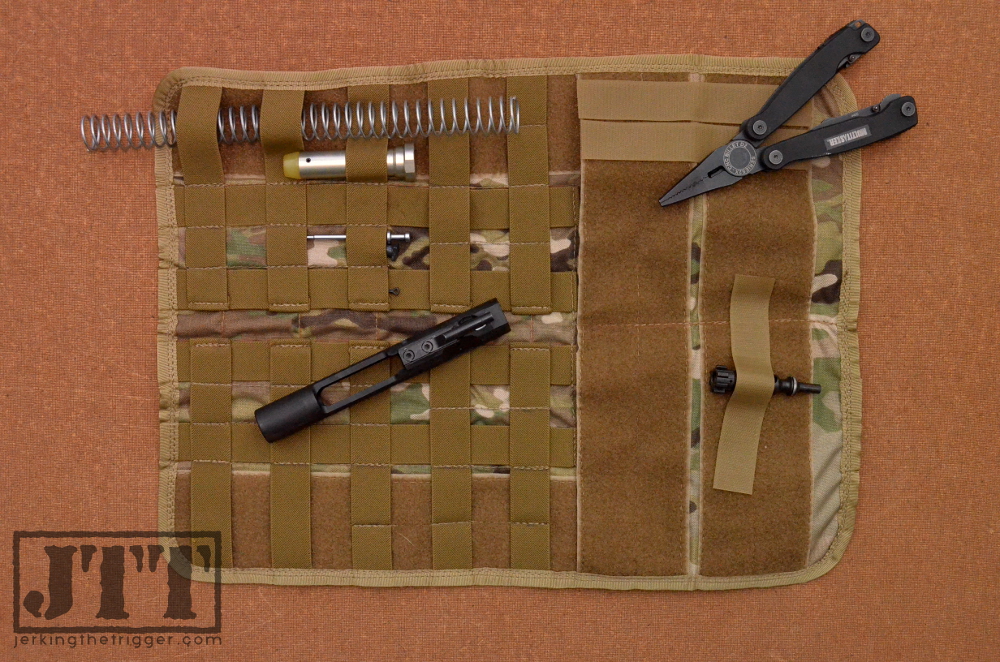
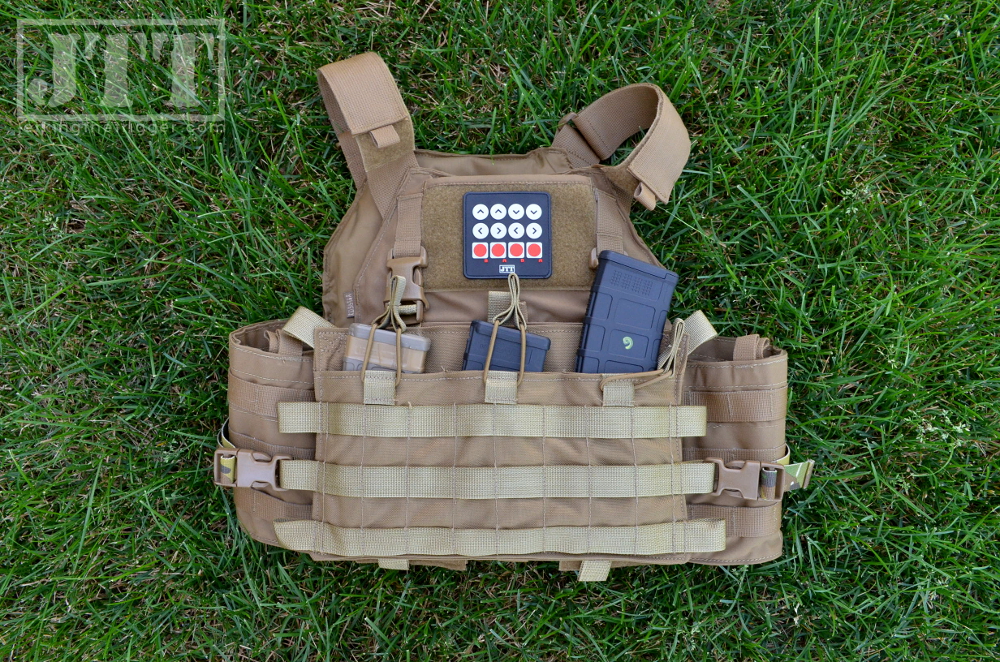
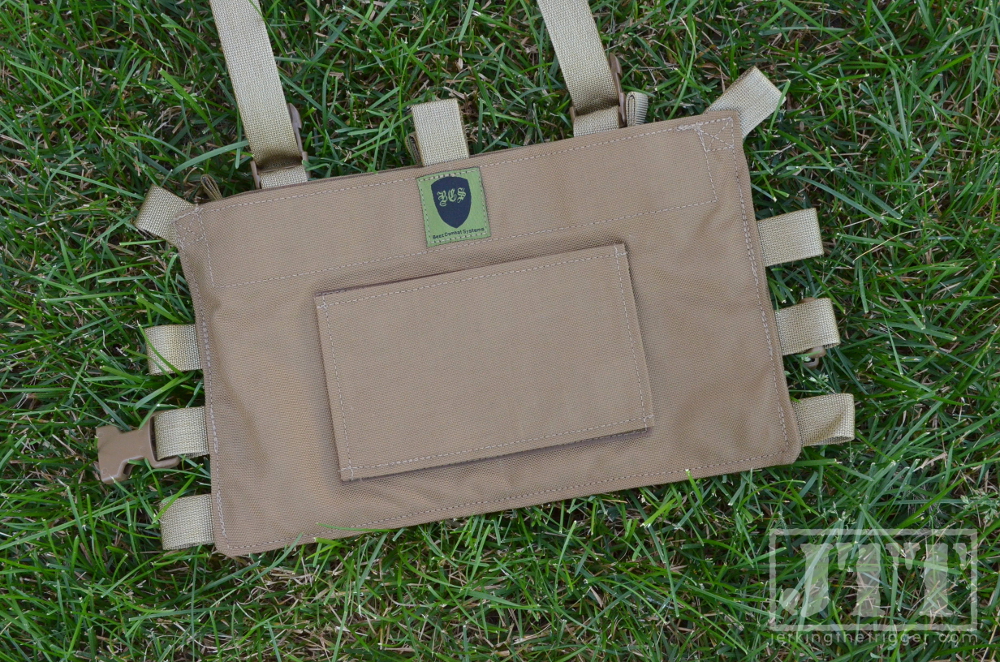
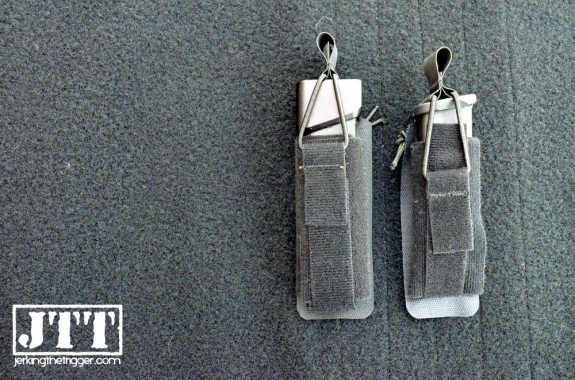
MSM’s Wrap accessories are pretty simple and both the Holster and Multi Pouches share a common feature set. They are made almost entirely of Velcro One Wrap which is magical stuff that sticks to itself like… well, like Velcro. This is the secret to the Wrap accessories’ versatility. You can basically origami your way into any shape you need to carry whatever you want by simply moving the parts around to fit the payload.

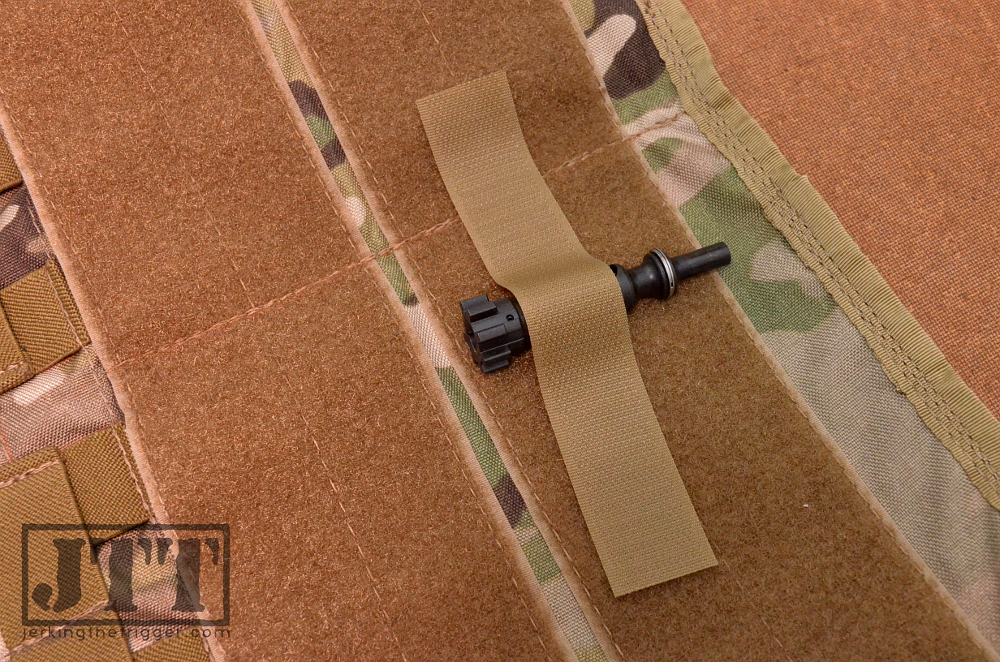
Each Wrap accessory also comes with a bungee retainer that is easy to add, remove, or adjust for length.

MSM Wrap G19 with LightMSM Wrap Handgun Mags

Observations from Use

The use of One Wrap for these accessories works out so well. One Wrap makes these pouches incredibly adjustable and extremely versatile because of all the different ways you can configure them. All of that is great but what really surprised me (in a good way) is that One Wrap is somewhat rigid – more rigid than what many universal holsters are made from. That rigidity makes it extremely easy to draw and reholster because the Wrap accessories hold their shape. It really is a very good material for this application.

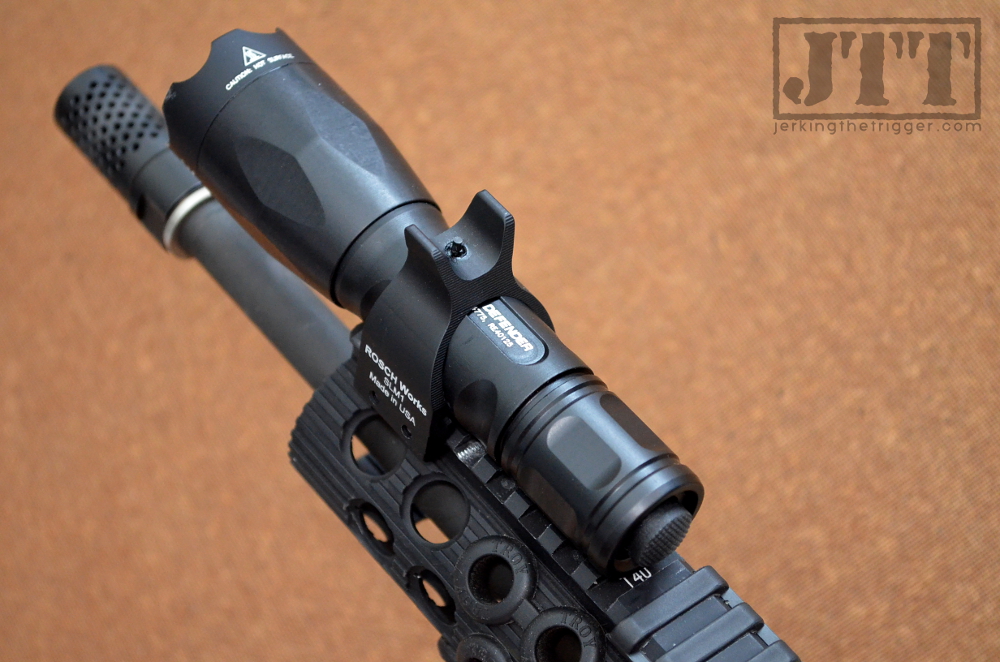
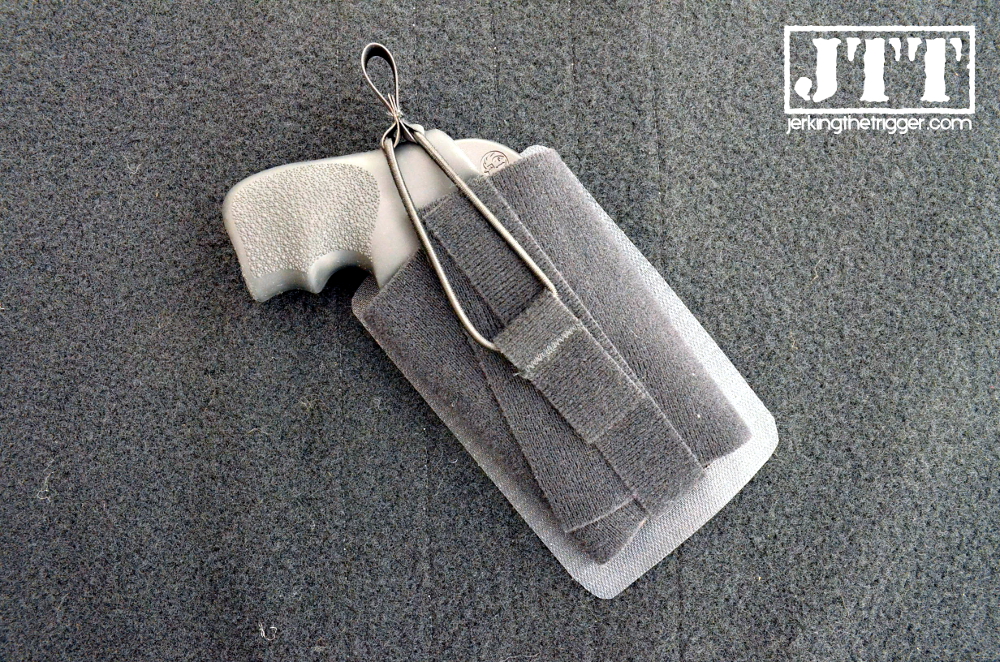
The Wrap Holster is excellent for use with handgun mounted lights. Few universal type Velcro backed holsters work well with lights. Many will allow them to fit but unless they holster is long enough and rigid enough, the light or front sight will snag on the bottom of the holster during the draw. Again, the slight rigidity of the One Wrap material is a boon here as it prevents the light from being accidentally activated in your bag.

MSM Wrap AR Mag MSM Wrap Compact Revolver

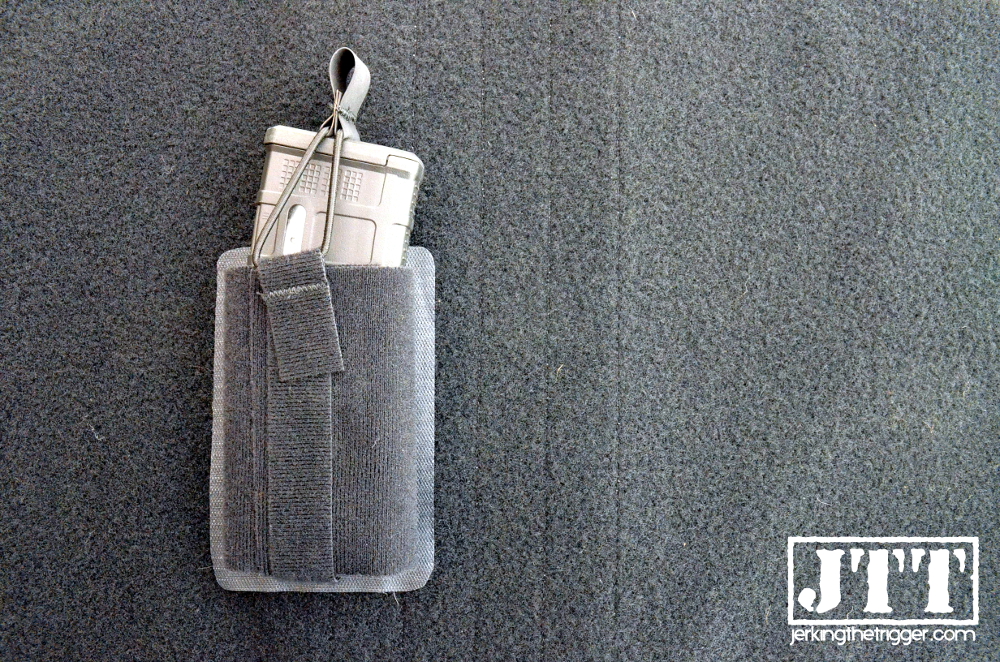
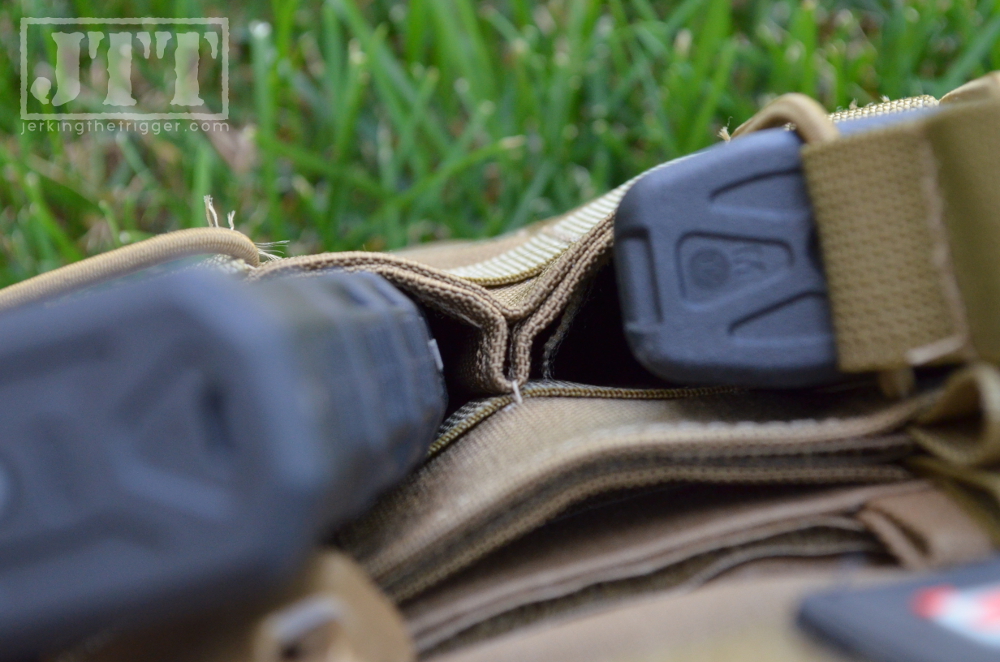
The Multi Wrap Pouches work for handgun magazines of just about any length. They are ideal for longer magazines from full-size handguns. If you have a shorter magazine (Glock 19 and shorter), you will have be careful to draw the bottom of the pouch very tight to limit how deep the magazines sit. MSM may want to consider a shorter version in the future but I was able to make them work.

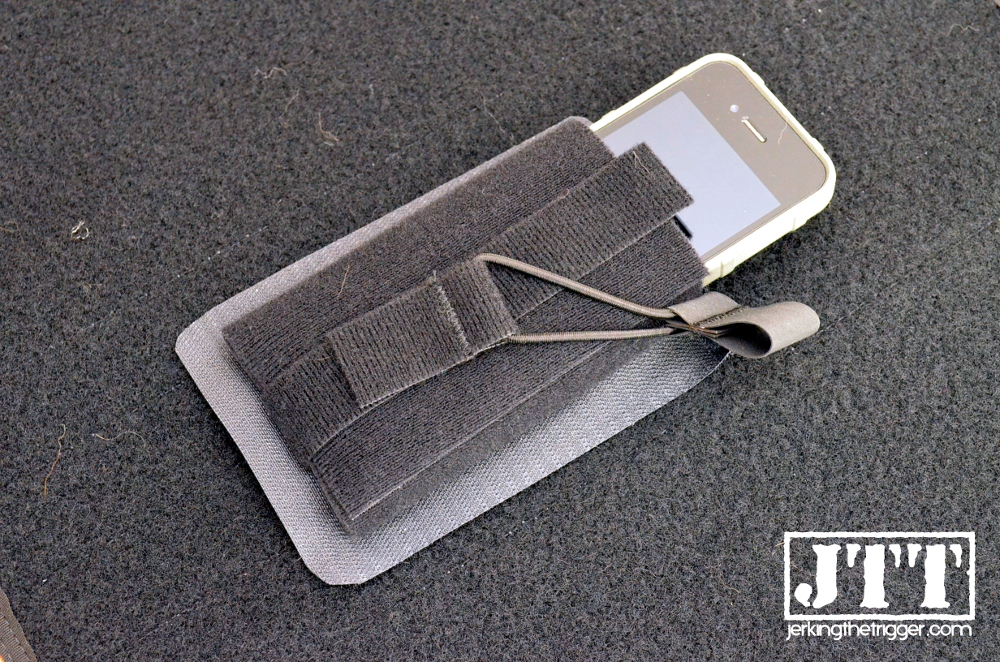
I was able to configure the Wrap Holster to work for everything from a Glock 21 with light to S&W J-frame in terms of handguns. You can set the retention as tight or loose as you want. You can easily set the Wrap accessories tight enough that you don’t need the bungee retainer for most items though it will be more difficult to insert the item. The Wrap Holster also works very well for AR-15 magazines, cell phones, Altoid tin style survival kits and other small containers, smaller battery backups for your electronics, GPS units, communication handsets, and more.

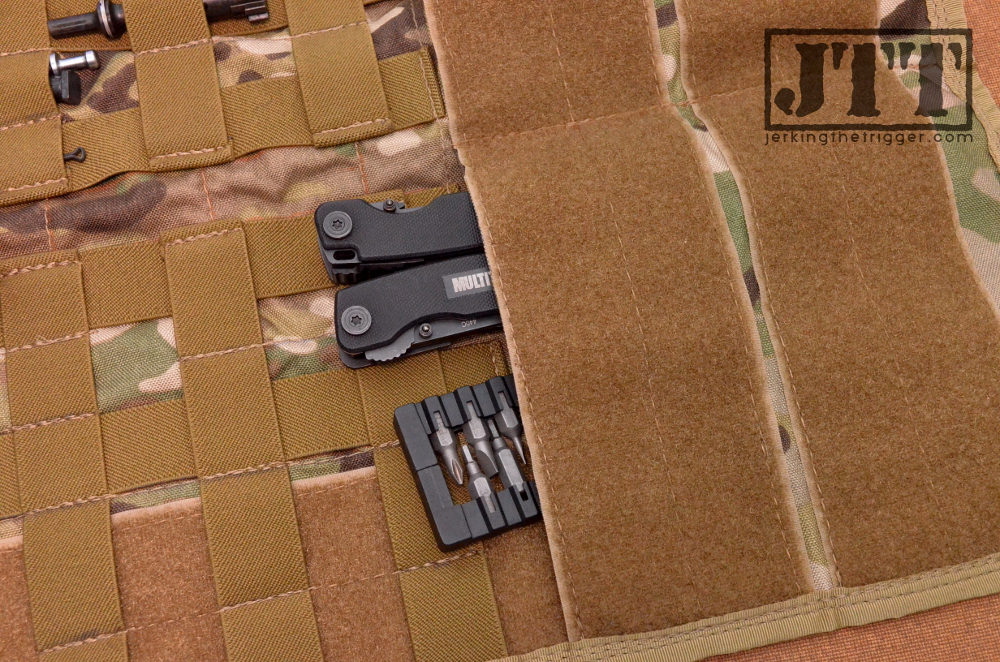
The Wrap Multi Pouches are dynamite for handgun mags, multi-tools, flashlights, Snickers Bars (You’re not yourself when you’re hungry!), and more.

MSM Wrap Smart Phone

Wrap Up

The Wrap Holster and Wrap Multi Pouch are as versatile as any piece of gear I have tried. One Wrap is a great material for this application in obvious ways and in ways that I didn’t envision until I tried them. MSM hit these out of the park.

Check out the Wrap accessories at MILSPEC Monkey.

Review: Whiskey Two-Four Loop Anywhere

Loop Anywhere from Whiskey Two-Four (WTF) is a simple way to add loop material (Velcro) to any MOLLE compatible surface. It also happens to be one of those pieces of gear that you always seem to find new uses for.

Whiskey_Two_Four_Loop_Anywhere

Overview

Loop Anywhere is elegantly simple. It consists of a piece of loop material (the fuzzy side of Velcro) that is laminated to a piece of thin, semi-rigid plastic. it is then laser cut to shape. It is available in a number of sizes based on the number of PALS columns that you need to span.

It’s unique shape makes it very easy to install between rows of PALS webbing. You just tuck the tabs into the webbing above and below. It takes just seconds to install a 4 column size Loop Anywhere once you have the hang of it.

Observations from Use

The most important thing that I wanted to verify when I first laid hands on Loop Anywhere was that it was secure. It just tucks into the webbing so I was concerned that if it was easy to install, it would be too easy to remove. I was happy to find that it is actually very secure, especially when the spacing on the PALS platform you attach it to is in spec. It takes intentional action to remove it once installed.

Whiskey_Two_Four_Loop_Anywhere_Installed

I also wanted to see how it handled imperfect PALS grids. Most gear is still hand sewn by a craftsman with a sewing machine and the spacing on the PALS webbing can vary a bit. The best maker minimize this but it is a reality. Loop Anywhere’s tabs are tapered and I found that they handle quite a bit of variation in the grid because of that.

Loop Anwhere’s backing is thin enough that you can cut it with a pair of sturdy scissors. This is handy if you want to trim a piece to fit in a spot that has an abbreviated row of PALS webbing. There is no real need to trim to it to fit between pouches because it can actually share PALS columns with other pouches.

The obvious use for Loop Anywhere is for adding ID to items like plate carriers that may not come with sewn on loop material. It works very well for this and is perfectly sized for name tapes. I also found it very useful for adding loop material to the front of an IFAK so I could add a small red cross patch to indicate the contents.

If you have large patches that you want to mount, you can use multiple Loop Anywhere panels to create a large loop field. Large patches can span the PALS webbing and should hold fairly securely but care should be taken to really press them down into the loop material to make sure they are set. This works for the standard 2×3″ sized patches that are so common.

My favorite use for them is to help convert a plate carrier to accept clip on chest rigs and panels like the TLMP from Beez Combat Systems. I have a Mayflower APC that I like quite a bit but it is an earlier version that lacks loop material on the cummerbund flap to mate with the hook material on the best of mountable chest rigs. Loop Anywhere allows me to quickly add loop material right where I need it on the flap.

Whiskey_Two_Four_Loop_Anywhere_on_PC

I think the best thing about Loop Anywhere is its flexibility. It can be used in so many ways and so many places. If I was a gear maker I might even explore designing it into the gear I make. Instead of sewing loop material into fixed positions on a plate carrier or backpack, Loop Anywhere panels could be provided so the user can place the loop where they need it or remove it if they don’t. So much of gear these days is modular and this could be used to add another layer.

Wrap Up

Loop Anywhere is a well designed and well executed product that is easy to use and easy to find uses for. Check out Whiskey Two-Four. You can pick up Loop Anywhere from Whiskey Two-Four’s Amazon store.

Whiskey_Two_Four_Loop_Anywhere_with_Patch

Alternate Use for the OSOE Vehicle Visor Cover

OSOE makes something they call the Vehicle Visor Cover. I call it my mobile workbench. Sure, it works great in the way it was intended which is to be wrapped around your vehicle’s sun visor where it can serve to collect and organize gear that you want readily at hand. However, for the last year I have been using mine as a sort of mobile workbench for the range and I doubt I will ever mount it on a visor again.

OSOE Vehicle Visor Panel Work Space

I have a lot of gear pass through my hands to test. This often requires installing, uninstalling, and diagnosing problems right on the range. Whenever it is time to break out the tools and start working on items with small parts, there is the potential for loss of said small parts. The smart shooter will have some sort of solution on hand to mitigate this which is where some sort of portable workbench comes in.

The Vehicle Visor Cover has several features that make it excel as a mobile workbench. Some of these features were obvious to me when I first laid eyes on it and some I have realized through spending time using it in this way.

OSOE Vehicle Visor Panel Work Space Folded

It can be folded readily and doesn’t take up much space. It’s about the size of a soda can when folded. That is important if you already have a stuffed range bag or if you are just going to try to wedge it into the same case as whatever firearms you happen to be taking to the range. Since there is no set way that it folds, it can be folded or rolled in any way you need to fit the available space.

It has about 14 million elastic loops of varying size on it. These are great for retaining small parts that you don’t want rolling off the rickety old shooting benches that every range in America has. I use them to retain small springs, AR-15 bolts, magazine base plates, tools, or whatever else I don’t want rolling off into the grass never to be seen again. You can also attach MOLLE compatible pouches to the elastic loops so it is easy to add a multitool pouch or other useful tools.

OSOE Vehicle Visor Panel Work Space Up Close

The Vehicle Visor Cover comes with 3 pieces of 1” wide Velcro which are meant to be used to secure the cover to your vehicle’s visor. However, they also work very well for securing gear to the large Velcro field on one side of the panel. These can be used to secure larger objects like multitools.

OSOE Vehicle Visor Panel Work Space Velcro Strips in Use

There is also 2 large pockets behind the Velcro field that are good for storing items that you will likely use with the panel like a punch or two, picks, cleaning brushes, or whatever else you might need to fix a problem on the range. Additionally, I like to keep a magnet or two in this pocket so I can stick small metal parts right to the panel.

OSOE Vehicle Visor Panel Work Space Pocket

Between the elastic loops, Velcro retainers, and large slip pockets, you’ll never lose a small part on the range again. The Vehicle Visor Cover works so well as mobile workbench, you would think it was designed to be one.

Review: Beez Combat Systems TLMP

It is becoming increasingly common for plate carriers to have the capability to attach various chest rigs and panels to the front plate pocket. This type of set up allows the wearer to purchase a mostly slick plate carrier (PC) which they can scale up, scale down, or configure for different weapons by simply swapping the chest rig or panel.

Beez Combat System’s (BCS) Tactical Load Mount Platform (TLMP) is one such panel that is designed for these plate carrier set ups. BCS spent a lot of time designing a lot of versatility into these panels and it shows.

BCS TLMP

Overview

The TLMP is constructed from 1000D Cordura Nylon and is offered in 17 different color/camo options! It can be had in 4 different configurations based on the number and type of magazines you need to carry: 3 AR mags, 4 AR mags, 3 AK mags, and 4 AK mags.

The subject of this review is the 3 AR mag version of the TLMP. It has three of the integrated magazine pouches that BCS is known for arrayed across the panel. Unlike most pouches of this type, the pouches are completely independent and there is no way for stowed mags to contact each other. Each pouch has a removable/adjustable bungee retainer with pull tab.

BCS TLMP Pouches

The front of the TLMP has a large 8 column by 3 row PALS webbing field. There is an integrated, hook and loop secured map pouches in the body of the TLMP.

You should be able to adapt the TLMP to just about any PC with a Velocity Systems/Mayflower R&C style attachment system. It features 2 vertical straps with plenty of excess webbing to adjust the height for use with the QASM buckles found on the front plate pocket of compatible PCs. There are 2 diagonal webbing loops at the top corners of the TLMP for use with a chest rig harness. There are 3 webbing loops on each side (6 total) for use with SwiftClips or a similar solution. Finally, the TLMP features a hook material field on the back to minimize unwanted movement on compatible PCs.

Observations from Use

As with everything from BCS that I have laid hands on, the TLMP is well made. Every place that webbing is joined to the body of the TLMP has large box stiches or heavy bar tacks when a box stitch is not possible. Due to the design of there mag pouch, the TLMP is at least 2 layers of 1000D Cordura nylon thick in all wear areas. The overall impression is that it will last for a long, long time.

BCS TLMP Mounted

I used the TLMP on the front of a Velocity System LWPC most of the time and found it to be a great fit for that PC. It also worked well on my Mayflower R&C APC though that PC lacks the loop field on the cummerbund flap to secure it as well as it could be. I also used buckles from my spares box and Mayflower R&C H-harness to adapt the TLMP into a stand alone chest rig. It is simply a matter of threading on the correct hardware. You can configure it a number of ways with just a few repair buckles.

I prefer a fairly deep magazine pouch so that there is some retention even if the bungee retainer is not in use. BCS never disappoints me here. Their pouches are deep enough to retain mags fairly aggressively even with the bungee retain in place. If you have ever lost or broken a retainer, you can appreciate that. They are actually deep enough that they work pretty well for PMAG 40s.

The design of BCS’s mag pouch necessitates that this panel will be a bit wider than most 3 mag shingles but it is still a near perfect fit for the cummerbund flap found on all my PCs. While it may be wider, the pouch design always makes their gear feel slimmer and lower in profile. This design also creates a single, uninterrupted PALS field on the front of the panel.

There are a lot of different webbing loops projecting out from the TLMP. I would suggest using it a few times to figure out which mounting options work best for you and then trimming off the attachment points that you won’t use or securing them out of the way with tape or zip ties.

BCS TLMP Back

Here is a tip for those of you who like to use a chest rig or panel’s integral map pouch as a sort of admin pouch. The TLMP comes with a very nice cover for the hook field on the back. I usually just store it in the map pouch when it I don’t need it. However, if you will need to access the map pouch frequently, you can use the cover to block the hook and loop closure that it can be opened quickly and quietly.

Wrap Up

The TLMP is well made, offers a ton of PALS real estate, and very adaptable. Check out the TLMP at Beez Combat Systems.

Review: ROSCH Works SLM1

The ROSCH Works SLM1 is a product that fans of 12 o’clock mounted lights have been anticipating for a long time. I am happy to say it is finally here and it is excellent.

ROSCH Works SLM1

Overview

The SLM1 is a light mount with an integrated front sight. This combination allows users to mount a traditional handheld tactical light on the top rail of an extended free-float rail in the optimal position. It absolves the user of trying to figure out where to place both a light and separate front sight.

The SLM1 is machined from 7075 T6 aluminum (sight and hardware are steel) that has a black hard anodized finish. The SLM1 weighs just .8 ounces on its own. It is designed to fit any light with a 1” (+- .005”) diameter though lights like the Surefire Fury series and 6PX work best due to the flats and inset machined into their bodies (more on this later).

ROSCH Works SLM1 Top Down

Observations from Use

The bottom line up front is that the SLM1 works and it works well. I have been waiting for a mount like this for years and I am not disappointed.

Mounting the SLM1 is fairly straight forward. It attaches to the rail via two steel cross bolts. You do need to take just a bit of care with your placement on the rail. If the like you are using has a large, flared bezel like the Surefire P2X Fury that I used, you will have to mount the light far enough forward that the bezel can stick out beyond the end of the rail so that the bezel can clear the rail. You would likely be placing it out at the end of the rail anyway since that is the optimal place for a 12 o’clock mounted light. Just don’t think you are going to be able to mount a light with a large bezel anywhere along the top rail.

ROSCH Works SLM1 Rail Clearance

Adjusting the front sight elevation is easy but it does require tools. You simply loosen the lock screw with the provided wrench and then use the provided front sight tool to raise or lower the front sight post by twisting it. Once you have set the desired height, retighten the lock screw.

I mentioned previously that lights with flats and insets machined into their bodies will work best. This is for the purposes of adjusting elevation at the front sight post. ROSCH Works really had to squeeze everything into a small space in order to create a mount that would 1) hold a 1” diameter light and 2) place the front sight at the correct height. As a result, the front sight might need to be able to drop below the top of the light ring to allow for enough elevation adjustment. The inset or flat on the body of the light allows the front sight to drop lower, thus raising the point of impact higher.

I should note that many lights say they are 1” diameter lights when they are actually as much as .1” larger or smaller. The design challenge of fitting the light and front sight into a very small space dictated that the SLM1 has very tight tolerances. When ROSCH Works says it is for 1” diameter lights, they mean it. This mount does not have as much wiggle room as most so if you are going to stray from the recommended Surefire lights, it would wise to check the diameter of the light you intend to use with calipers.

Like the SL1 before it, ROSCH Works manages to make SLM1 a pretty darn good front sight in its own right. It is very finely adjustable and it features a front sight post that is finer than most with a slight taper. The front sight post is protected by wings that flare out like a standard front sight tower.

ROSCH Works SLM1 Angle

The SLM1 does little to obstruct the view through an optic. It barely encroaches the field of view even with smaller optics like the Aimpoint T1. It basically looks no different than having a fixed front sight base though if you use a light with a large bezel, you may see just a bit of the bezel below and on either side of the front sight. I have been using the SLM1 with a Surefire P2X Defender which has a very large bezel with no issues.

While the SLM1 will work for any truly 1” diameter light, the Surefire Fury series seems especially well suited to the task. The beam is very well balanced between flood and throw and the switch is positive and easy to use in this position. I like the EAG or Defender version since they have a single 500 lumen output mode and a forward clicky switch. The SLM1/Surefire Fury combo is a thing of beauty.

I especially like how the SLM1 saves weight and space! At just .8 ounces, it weighs less than most front sights alone! When you add in the fact that it is your light mount too, the weight savings are impressive. The set up as shown weighs 6.5 ounces which is very light for a 2 cell light with mount and front sight.

Wrap Up

ROSCH Works has a real winner on their hands here. Packing everything into such a small package took a bit of wizardry. That wizardry comes with limitations but this mount is sturdy, lightweight, functional, and it brings great options like the Surefire Fury to 12 o’clock light users. I can’t help but feel this is an important development for 12 o’clock mounted lights and probably weapon lights in general.

Check out the SLM1 at ROSCH Works. Stay tuned for news on their soon to be released Surefire E-Series version.

Click here for more information on 12 o’clock mounted lights.

Powered by WordPress. Designed by Woo Themes