Archive | Reviews

Review: ROSCH Works SLM1

The ROSCH Works SLM1 is a product that fans of 12 o’clock mounted lights have been anticipating for a long time. I am happy to say it is finally here and it is excellent.

ROSCH Works SLM1

Overview

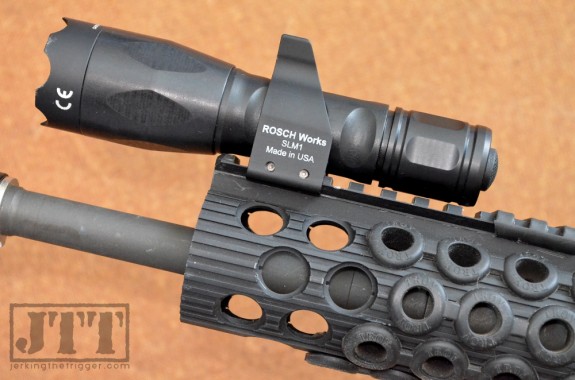
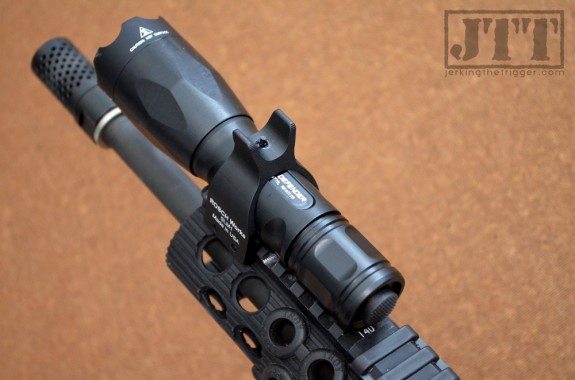
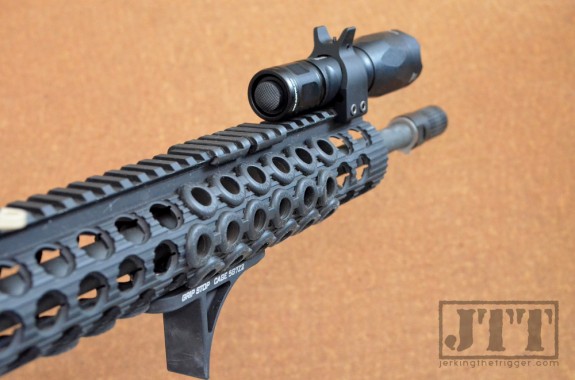
The SLM1 is a light mount with an integrated front sight. This combination allows users to mount a traditional handheld tactical light on the top rail of an extended free-float rail in the optimal position. It absolves the user of trying to figure out where to place both a light and separate front sight.

The SLM1 is machined from 7075 T6 aluminum (sight and hardware are steel) that has a black hard anodized finish. The SLM1 weighs just .8 ounces on its own. It is designed to fit any light with a 1” (+- .005”) diameter though lights like the Surefire Fury series and 6PX work best due to the flats and inset machined into their bodies (more on this later).

ROSCH Works SLM1 Top Down

Observations from Use

The bottom line up front is that the SLM1 works and it works well. I have been waiting for a mount like this for years and I am not disappointed.

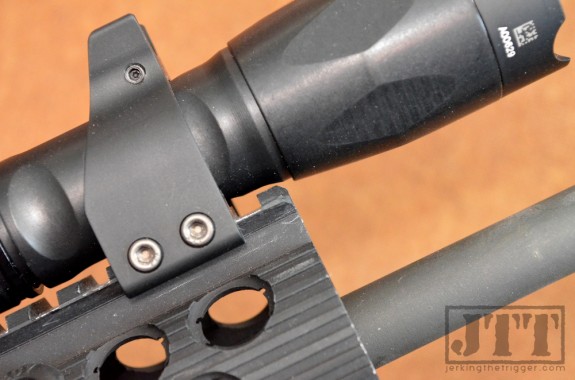
Mounting the SLM1 is fairly straight forward. It attaches to the rail via two steel cross bolts. You do need to take just a bit of care with your placement on the rail. If the like you are using has a large, flared bezel like the Surefire P2X Fury that I used, you will have to mount the light far enough forward that the bezel can stick out beyond the end of the rail so that the bezel can clear the rail. You would likely be placing it out at the end of the rail anyway since that is the optimal place for a 12 o’clock mounted light. Just don’t think you are going to be able to mount a light with a large bezel anywhere along the top rail.

ROSCH Works SLM1 Rail Clearance

Adjusting the front sight elevation is easy but it does require tools. You simply loosen the lock screw with the provided wrench and then use the provided front sight tool to raise or lower the front sight post by twisting it. Once you have set the desired height, retighten the lock screw.

I mentioned previously that lights with flats and insets machined into their bodies will work best. This is for the purposes of adjusting elevation at the front sight post. ROSCH Works really had to squeeze everything into a small space in order to create a mount that would 1) hold a 1” diameter light and 2) place the front sight at the correct height. As a result, the front sight might need to be able to drop below the top of the light ring to allow for enough elevation adjustment. The inset or flat on the body of the light allows the front sight to drop lower, thus raising the point of impact higher.

I should note that many lights say they are 1” diameter lights when they are actually as much as .1” larger or smaller. The design challenge of fitting the light and front sight into a very small space dictated that the SLM1 has very tight tolerances. When ROSCH Works says it is for 1” diameter lights, they mean it. This mount does not have as much wiggle room as most so if you are going to stray from the recommended Surefire lights, it would wise to check the diameter of the light you intend to use with calipers.

Like the SL1 before it, ROSCH Works manages to make SLM1 a pretty darn good front sight in its own right. It is very finely adjustable and it features a front sight post that is finer than most with a slight taper. The front sight post is protected by wings that flare out like a standard front sight tower.

ROSCH Works SLM1 Angle

The SLM1 does little to obstruct the view through an optic. It barely encroaches the field of view even with smaller optics like the Aimpoint T1. It basically looks no different than having a fixed front sight base though if you use a light with a large bezel, you may see just a bit of the bezel below and on either side of the front sight. I have been using the SLM1 with a Surefire P2X Defender which has a very large bezel with no issues.

While the SLM1 will work for any truly 1” diameter light, the Surefire Fury series seems especially well suited to the task. The beam is very well balanced between flood and throw and the switch is positive and easy to use in this position. I like the EAG or Defender version since they have a single 500 lumen output mode and a forward clicky switch. The SLM1/Surefire Fury combo is a thing of beauty.

I especially like how the SLM1 saves weight and space! At just .8 ounces, it weighs less than most front sights alone! When you add in the fact that it is your light mount too, the weight savings are impressive. The set up as shown weighs 6.5 ounces which is very light for a 2 cell light with mount and front sight.

Wrap Up

ROSCH Works has a real winner on their hands here. Packing everything into such a small package took a bit of wizardry. That wizardry comes with limitations but this mount is sturdy, lightweight, functional, and it brings great options like the Surefire Fury to 12 o’clock light users. I can’t help but feel this is an important development for 12 o’clock mounted lights and probably weapon lights in general.

Check out the SLM1 at ROSCH Works. Stay tuned for news on their soon to be released Surefire E-Series version.

Click here for more information on 12 o’clock mounted lights.

Review: ALG Defense EMR

The ALG Defense EMR (Ergonomic Modular Rail) will redefine what you expect from a value priced, AR-15 free float hand guard. This rail is impressive by the numbers but they don’t tell the whole story. It’s even slimmer, lighter, and more affordable than you think!

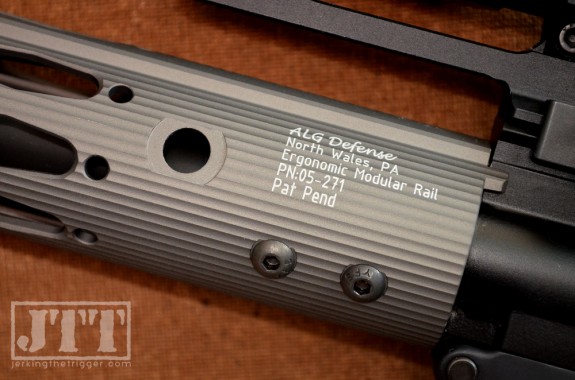
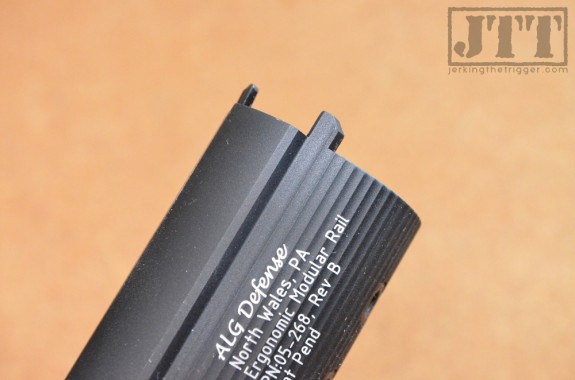
ALG Defense EMR Marking

Overview

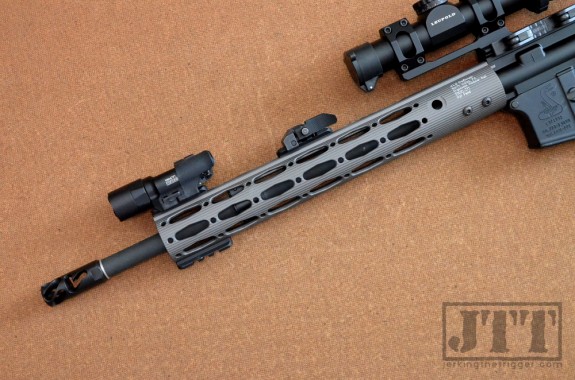
The EMR is a modular, slick-sided tube style, free float rail for AR-15 pattern rifles. It is available in 3 lengths – 10”, 12”, and 13” – and 4 colors – Black, Desert Dirt, Gray, and Purple (very, very purple).

There are several slick sided, tube style free float rails on the market but the EMR takes the concept a step further by removing the top rail completely. There is only a low, rounded rib that runs the entire length of the rail in the place of the top rail.

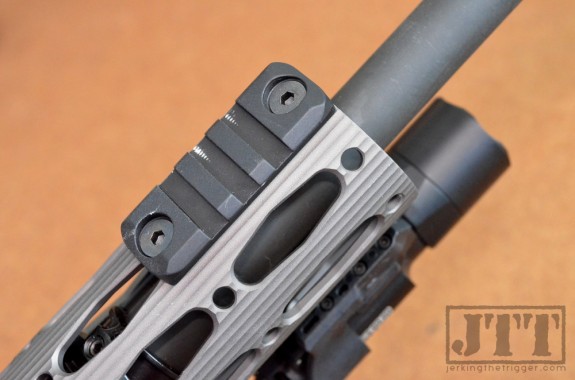
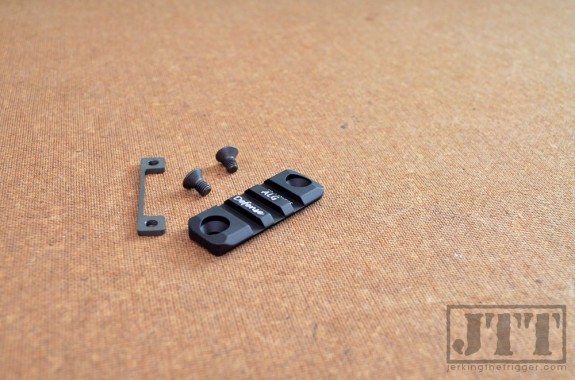
The provided rail sections can be attached along the entire exterior surface of the rail including a short section of “Co-Witness Rail” that can be placed on the top rib to match the height of the upper receiver rail. 3 sections of rail are included (2×2” side rails, and 1×2” co-witness rail).

The EMR also comes everything necessary to mount the rail including an aluminum barrel nut, barrel nut shim kit, mounting screws, and a custom barrel nut wrench. It features a rotation limited QD sling swivel socket on the right and left side of the rail.

ALG Defense EMR 13 Gray

Observations from Use

I was initially struck with the quality of the EMR. The tolerances between the rail and barrel nut are so sight that the rail makes a sort of sucking sound when it pulled off the barrel nut. It isn’t overly tight or hard to slide off, just perfectly mated. The included wrench fits the barrel nut perfectly. The surface texture is as easy on the eyes as it is on the hands. Every potentially sharp edge has been broken for comfort. The finish is smooth and even. The EMR basically just oozes quality and attention to detail in a way that you wouldn’t expect a rail that costs as little as $135 could. This isn’t a nice rail at this price. This is nice rail at any price.

The EMR feels great in the hand. The entire rail has a lightly ribbed texture that is surprisingly grippy when coupled with the matte anodized finish. I can’t find a single sharp edge. The top rib that stands in for a 12 o’clock rail makes this rail feel very slim in the hand and is ideal for those of you who like a thumb over grip. I find that I can grip this rail very aggressively with a thumb over grip without discomfort.

The outside diameter specs (1.75”) on the rail don’t tell the whole story of how slim it really is in the hand. Most rails have a top rail which is not included in the diameter measurement that manufacturers list. I own some very slim rails that let me wrap my hand around the rail so that my thumb and pinky finger touch – these are usually listed with an outside diameter of around 1.5” inches. When I do the same test with the EMR, I can actually overlap my thumb and pinky finger. The EMR’s lack of top rail makes it functionally, one of the slimmest rails on the market.

ALG Defense EMR Rail Section Attached ALG Defense EMR Rail Section and Hardware

It also happens to be one of the lighter rails on the market. The 10” version weighs just 8.96 ounces. That is light but not jaw droppingly so. However, that number becomes much more impressive when you realize it includes the barrel nut and integrated right and left side sling mounts! Those integrated sling mounts save weight and money down stream.

The EMR is the easiest to install free-float rail with a proprietary barrel nut that I have ever used thanks to the included wrench and color-coded shim kit. The wrench has several witness marks on it that, when used in the manner prescribed in the instructions, tell you exactly which shim combination to use.

I took a few moments to read the instructions (clip a corner off my man card) and then proceeded to install the rail with my bare hands without the aid of a vice (put that corner back on my man card!). I am not saying that every rail will install as easily as mine did or that you should even try to do it without a vice, but I was able to do it.

The rail sections are easy to install and uninstall. It is easiest to install them when the tube is removed from the carbine but it is doable with the tube installed. The included backing plates are clever in a simple kind of way. They are one piece so both rail mounting screws go into the same backing plate. They are also skeletonized aggressively to reduce weight and potential interference with barrel parts.

My only issues with the EMR centered around the co-witness rails. The first issue that I faced was that I wanted to have both a 12 o’clock mounted light and a front sight. The included rails are too short to accommodate both. It is tempting to say ALG Defense should make a longer co-witness rail available but that would trample the great, top-rail-free ergonomics of the EMR. I just begged ALG Defense to sell me an additional co-witness rail until they tired of me and relented. Problem solved. It would be nice if the rail sections were offered on their website as accessories.

EDIT: Never let it be said that ALG Defense doesn’t listen to customers. The rail sections are now available separately on their website!

ALG Defense EMR Rotation Limiters

The other issue that I had was that the co-witness rail backing panel contacted my low profile gas block. It turns out that the particular gas block I was using was not as low profile as I thought. This was solved by switching to a Geissele Automatics Low-Profile Super Gas Block. I suspect that most low profile blocks will work but just keep in mind that there may not be a lot of interior space between the gas block and rail backer if you want to attach a rail directly over the gas block. I certainly can’t hold incompatibility with one of the larger low profile gas blocks against the EMR.

I don’t have any way to quantify it but the EMR feels more rigid than most slick-sided rails. It feels more like a quad rail in how rigid it is. I am not an engineer but I suspect that is due to one piece extrusion construction of the tube, the very long barrel nut, and the tight fit between the nut and the tube. The tube mounts to the barrel nut via 6 screws arranged in two rings of three screws. The two rings are able to be spaced fairly far apart thanks to the length of the barrel nut which I suspect adds to the rigidity of the entire system.

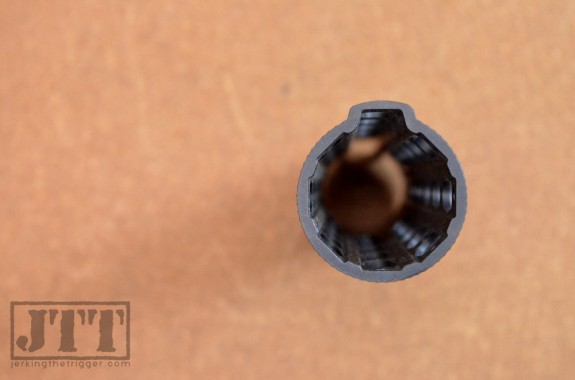
ALG Defense EMR Interior

Wrap Up

The numbers simply don’t tell the whole story when it comes to the EMR. The quality and design is better than the price would indicate. It is functionally slimmer than rails with smaller outside diameters on paper. The weight is more impressive than it appears at first glance since it includes the barrel nut and sling mounts. By the numbers alone, this is a great rail for the money. When you actually put hands on one, I think you’ll agree that the EMR isn’t just a great rail for the money… It’s just a great rail.

Check out the EMR at ALG Defense.

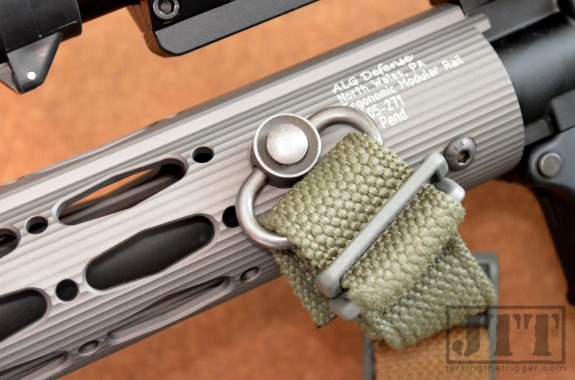
ALG Defense EMR Sling Mount

Review: V7 Weapons Systems Ultra-Light Forward Assist

Uppers with no forward assist have become popular with those who are trying to trim weight from their favorite AR-15 and yet, I can’t bring myself to go without one. I can already hear you telling me why I don’t need a forward assist. I know why I don’t need one and probably even shouldn’t use it in certain situations and yet, I still think it is nice to have. So, what is a guy like me who wants to save weight but not get rid of the forward assist all together to do? You check out the V7 Weapon Systems Ultra-Light Forward Assist.

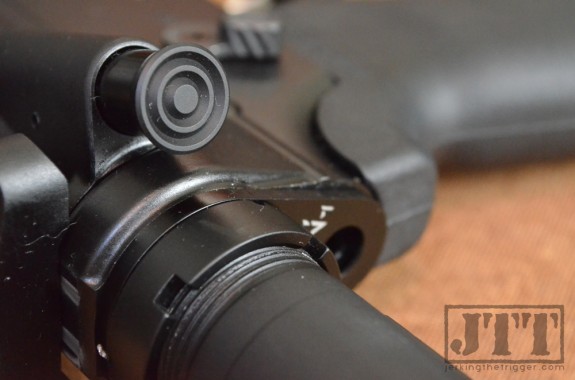
V7 Weapon Systems Forward Assist 3

Overview

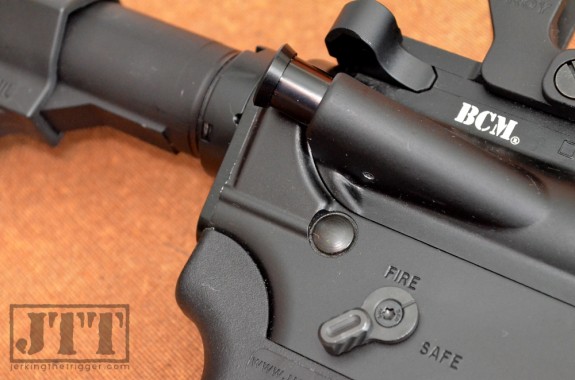
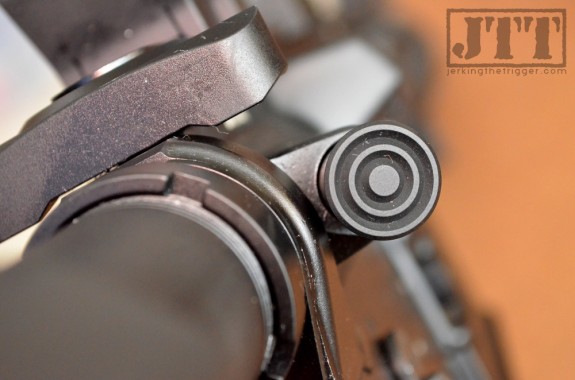
The V7 Weapon Systems Ultra-Light Forward Assist looks like a typical forward assist at a glance. The biggest difference is that V7, as they tend to do, replaces as many of the forward assist’s steel components with hard coat anodized 7075 T6 aluminum as possible. In fact, the only steel left is in the small hinged tooth that actually engages the BCG. This part is hardened 4140 steel.

The result is a forward assist that weighs just 9.2 grams compared to 22 grams for a standard forward assist.

V7 Weapon Systems Forward Assist2

Observations from Use

You could save a lot more weight by just swapping your upper with a slick-sided upper but, if you just can’t let go of your forward assist, then the The V7 Weapon Systems Ultra-Light Forward Assist can shed some weight. It won’t save much weight but, when used in conjunction with other weight saving measures, it can be part of an overall weight reduction strategy.

There isn’t much to report about how the Ultra-Light Forward Assist functions. It works like a forward assist should. That is a good thing.

As far as any concern with replacing steel parts with aluminum, I would say it is a complete non-issue. I typically only use the forward assist in an administrative way which is to say I use it to follow up a press check. This isn’t exactly going to put a lot of stress on the part and it is hard to imagine what you could do with a forward assist that would really stress it. The Ultra-Light Forward Assist is made of steel in the one place that it needs to be which is where it engages the BCG.

I should also mention that, in terms of fit and finish, the Ultra-Light Forward Assist is excellent which I have come to expect from V7 Weapon Systems.

V7 Weapon Systems Forward Assist 1

Wrap Up

If you are on a quest to shave excess weight from your carbine down to the last gram and you just can’t live without a forward assist, the Ultra-Light Forward Assist is for you.

Check out the Ultra-Light Forward Assist at V7 Weapon Systems.

Review: Vigilant Gear Micro SERE Kit

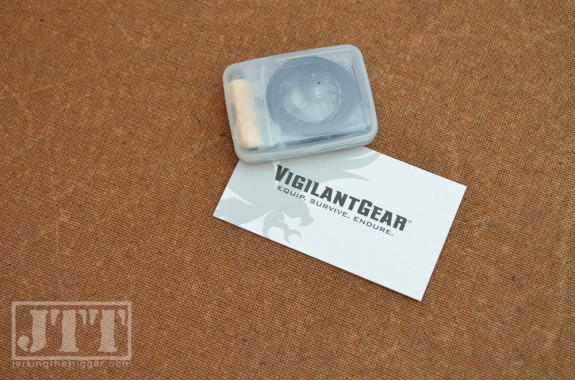
I am not sure I have ever had more fun reviewing an item as I had with the Micro SERE Kit from Vigilant Gear. However, this kit isn’t all about fun. It actually packs a lot of serious capability into a very small package. How small? Small enough that you can completely cover it with a business card. In fact, you can almost cover 2 of them with a single business card!

Vigilant Gear Micro SERE Kit

Overview

The Vigilant Gear Micro SERE Kit (MSK) packs several contents into a very small package. Those contents manage to cover a lot of bases despite their small size.

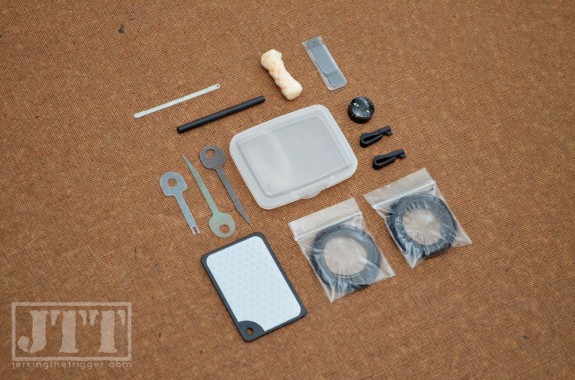
The MSK contains:

  • Plastic Storage Case (2.3″ x 1.8″ x 0.5″)
  • (1) Mini Survival Mirror with IR panel
  • (2) Polymer Handcuff Key
  • (1) Ceramic Razor Blade
  • (1) Tinder Quick Firestarting Tab
  • (1) 14mm (Grade AA) Luminous Button Compass
  • (1) 6ft Length of 188LB Kevlar Cordage
  • (1) 6ft Length of Stainless Steel, Nylon Coated Leader Wire
  • (1) Spring Steel Split-Pawl Handcuff Shim
  • (1) Quick Stick Bypass Tool
  • (1) EZ Decoder Bypass Tool
  • (1) Micro Escape Tool
  • (1) Ferrocerium Rod

You can also add an optional Bogota Titan Nano Entry Toolset at the point of purchase.

Vigilant Gear Micro SERE Kit Contents

Observations from Use

There is a lot of ground to cover here. I will address each of the components individually, though likely not in the depth that they would merit as individual review items. Once the individual items have been addressed, I will speak to the kit as a whole.

Contents

The case itself is great. It is compact and seems durable. I have opened and closed it countless times while testing all the various items and the clasp has help up. It’s clear, frosted plastic construction gives you a glimpse of the contents at a glance. It is ideal for this application.

The signal mirror works well enough for such a small, light signal mirror. The reflective side is protected with clear plastic film which I recommend keeping in place until you need to use it and then retaining. I have had good luck sticking it back in place after testing. Normally, I would say remove the film so you don’t have to in an emergency but in a small kit like this the film protects the mirror’s surface while it is stowed with the other items. The reflective side (it looks like SOLAS tape or something similar) gives you low/no light capability and was a smart addition by Vigilant Gear. The mirror has a lanyard hole which is handy for a couple reasons. First, if you are actively trying to be found, you can hang the mirror around your neck with some cord so it is readily available and second, it acts as a sight for the two handed signal mirror aiming method.

Vigilant Gear Micro SERE Kit TIHK

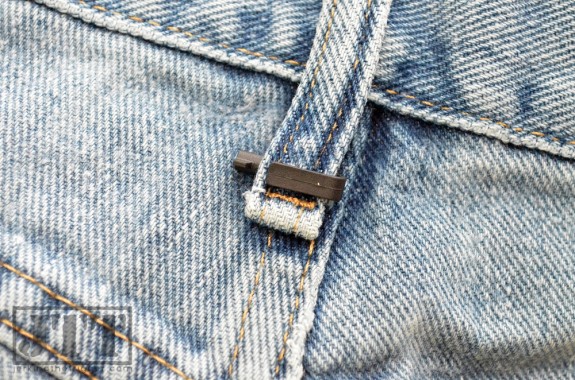
The kit includes 2 TIHKs. These are currently the best discreet handcuff keys on the market by virtue of their small, integrated clip that allows them to be carried discreetly in a number of locations. They work especially well stowed on the rear belt loop of your pants. They work GREAT on most handcuffs but I wish they were just a hair longer so that they worked better with ASP cuffs which are quite common. The ASP cuff has a plastic housing that makes the keyway just a bit deeper. The TIHK will open them but you really have to press it into the keyway which can be difficult to do behind your back.

Vigilant Gear Micro SERE Kit Cutting Implements

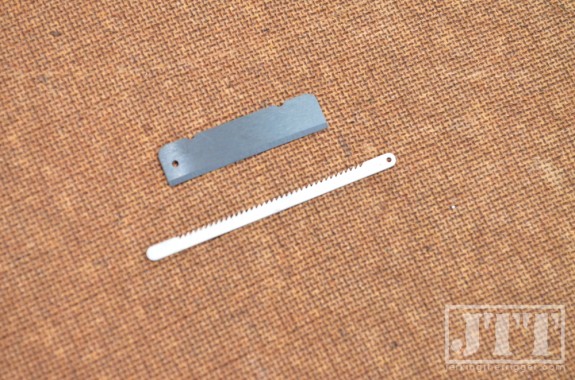
The ceramic razor blade is pretty rudimentary as a cutting tool. It is sufficient for cutting some cordage thanks to its somewhat toothy edge but it is not especially sharp and it is difficult to hold. These are the concessions you make with such a small kit. It does come packed in its own tiny sleeve which is nice for preventing it from scratching/cutting the other items in the kit.

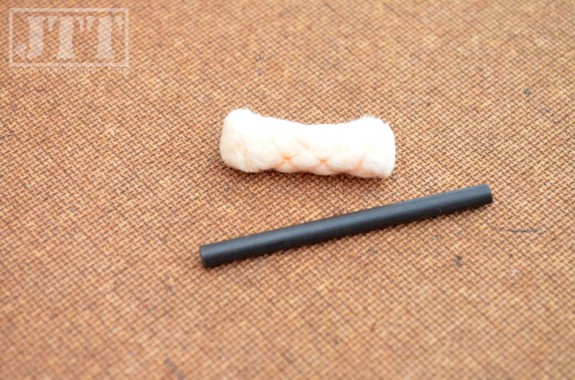
People have been starting fires with Tinder Quick fire starting tabs for years because they work. You may even be able to split this tab for multiple uses depending on conditions and skill level. This is a very nice addition to the kit because it covers one of the most basic needs in a survival situation – heat.

Vigilant Gear Micro SERE Kit Fire Starters

The included button compass is one of the nicest I have seen. Some button compasses easily reverse polarity, develop bubbles, and have hash mark covered dials which is strange because they are really only good for cardinal directions. This one developed no bubbles, held its polarity in all testing, and is easily readable. It’s an excellent little compass.

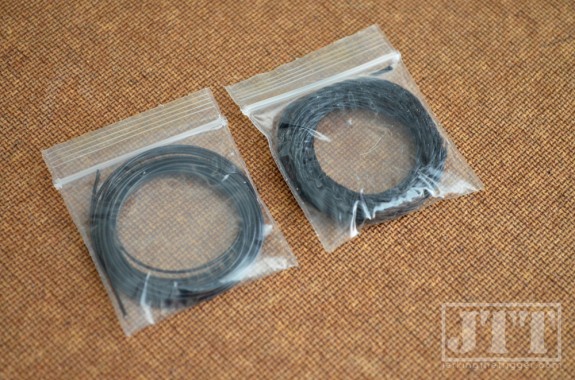
The MSK includes 6 feet of coiled Kevlar cordage with a 188 pound break strength. This can be pulled apart into multiple smaller strands which are strong enough for lashing sticks for shelter and thin enough to improvise fishing line. It can also be improvised into a saw for cutting plastic like PVC pipe or zip tie style restraints. This is the ideal, compact cordage for a kit like this. You will always be able to find a use for cordage.

The included 6 feet of nylon coated steel leader wire is just as versatile as the cordage. I suppose that someone well versed in snaring could make a snare from it. However, I like to use it for gear repairs since it can act somewhat like thread with its own built in needle. Like the cordage, you will always find ways to use this.

Vigilant Gear Micro SERE Kit Cordage

Vigilant Gear provided a second handcuff bypass option in the Spring Steel Split-Pawl Handcuff Shim. These work well on cuffs with and without anti shim measures. They will certainly work on the most commonly used cuffs. Assuming I can access the shim from where my hands are cuffed, it is fairly easy to shim a set of chain style cuffs. Hinged cuffs limit your range of motion and make things a lot harder.

Vigilant Gear Micro SERE Kit Handcuff Shim

Quick Sticks are amazing in their effectiveness and simplicity. They are used by inserting them to the back of a padlock’s keyway and then simply applying some leverage to defeat the pawl that locks the bail in place. It bypasses the keyway entirely so there is no picking skill required (though some practice is recommended). I have had great luck with defeating padlocks with a single locking pawl but not so great luck on doubles. I have heard of being done though so, on at least some padlocks, it can be done with practice.

The EZ Decoder is similar in design and principle to the Quick Stick but it is designed to open combination padlocks. You can tell the difference between it and the Quick Stick easily by remembering that the EX Decoder is much thinner. It works by inserting it into the lock through one of the small spaces around one of the combination tumblers (that is why it is so slim) and applying a bit of leverage to lift the locking mechanism. They work like a charm on the right kind of lock and it takes up almost no space in the kit.

Vigilant Gear Micro SERE Kit Padlock Bypass

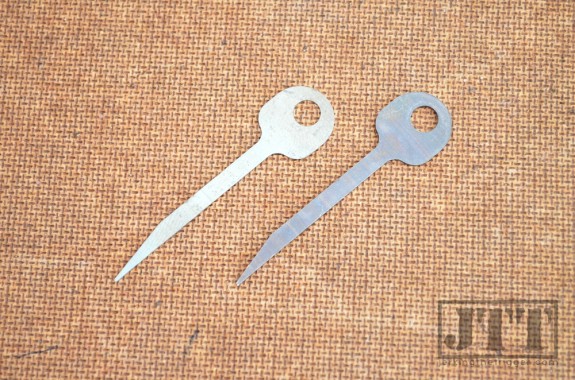
The MSK includes a Micro Escape Tool which is a tiny metal saw that is thin enough to be used as a handcuff shim. The saw edge can be used to cut through flex cuffs, tape, and other non-metallic materials. It has a small lanyard hole at one end and I recommend tying some thin cord to it that can serve as a wrist lanyard (with a bit of extra slack) so you don’t have to worry about dropping such a small item. If you do this in advance, it will be ready to go when you need it.

Finally, the kit includes a small ferrocerium rod fire starter. Ferro rods are a survival/E&E kit mainstay for a reason. They work and they work regardless of weather conditions, altitude, and other factors. The Micro Escape Tool makes a decent striker for the rod and it seems to be of good quality judging by the sparks it throws. A skilled fire starter can have a fire going in minutes by using the ferro rod with the Tinder Quick tab. The ferro rod can also provide hot enough sparks to ignite natural tinder too.

Kit as a Whole

This is a well designed kit. A skilled user could use the included items to cover at least two of their basic survival needs. The cordage could be used to build shelter (though cordage is sometimes not needed for shelter). The ferro rod and Tinder Quick tab can be used to start a fire for warmth. There is room to add a water purification tablet or two which would then cover another basic need. With that said, it is important to remember that this is a SERE kit, not just a survival kit and so it is heavy on items that are used for evasion.

The tested version of this kit used small plastic baggies to hold the cordage. They were a serious pain in the backside if you ever wanted to repack the cordage and place it back into the kit. Thankfully, the current version of the kit includes small rubber bands to retain the cord. The bands are easier to use and can be used as an emergency fire starter.

The rest of the kit items are surprisingly easy to repack. You would think that with a kit this small, repacking would be a pain but it is easy and doesn’t even really have to be done in a certain order.

Wrap Up

This is a tremendous little kit that puts a lot of useful tools into a small package. It will be best suited to knowledgeable users or those who are willing to spend a little time training. No one was born with the innate knowledge of how to use a Quick Stick or EZ Decoder so it would be prudent to practice but you knew that already.

I recommend adding the optional Bogota Entry Toolset to round out your lock bypass options. They are excellent and there is plenty of room in the kit for them.

If your job puts you at risk of being unlawfully restrained, this could be a great tool for you. If you are a prepared citizen, it would be worth a look for you, too.

Review: 20$Bandit Mini Kit MK-7

The Mini Kit MK-7 is, at its simplest, an EDC organizer but to limit its use to simply carting around your flashlight, pocket knife and pens would be to greatly short change it. I have been using it for several weeks now and I am not sure I have found the limits of its usefulness yet.

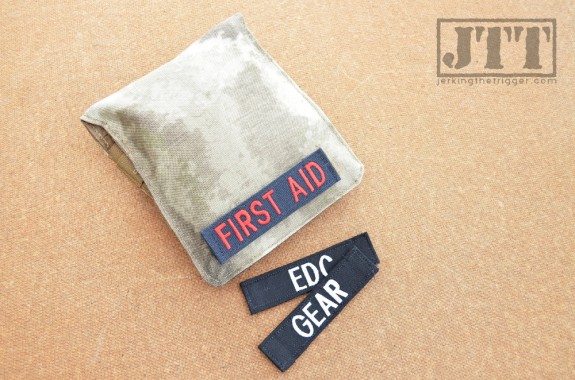
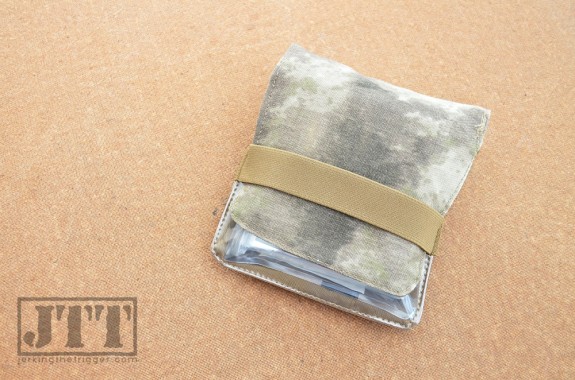
20$Bandit Mini Kit MK-7 ATACS Front with Tapes 20$Bandit Mini Kit MK-7 ATACS Back with Elastic Closure

Overview

The Mini Kit MK-7 is a clamshell opening gear organizer with several internal pouches and loops. It measures roughly 5.5” x 5.5” and weighs about 3 ounces empty. It is sized to be easy to drop into a cargo pocket or a backpack pocket.

The exterior is constructed from 1000D nylon (in most cases) and features a small loop Velcro field for attaching name tapes and other identifiers. The interior is fully lined with pack cloth for additional durability.

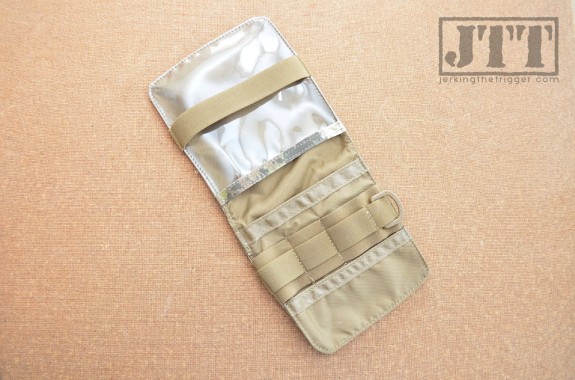
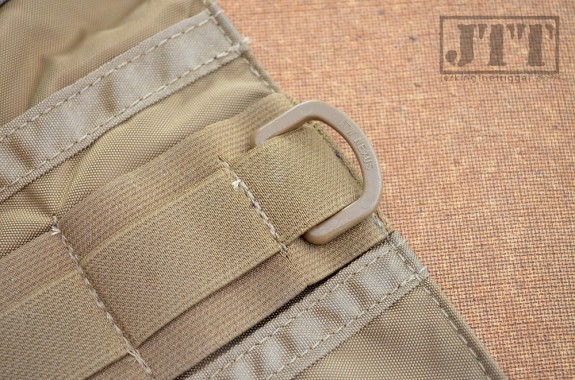
One side of the Mini Kit MK-7’s interior features a clear vinyl pouch for storing items that you want to be able to visibly inspect while stored. The other side features a large slip pocket, several elastic loops of varying sizes, an ITW Nexus polymer d-ring, and a short slip pocket that is one of the keys to why the kit works so well (more on this later).

The entire kit can be folded closed and secured with the attached elastic band. 20$Bandit, the kit’s designer, went with this closure system over more difficult to manipulate zippers.

20$Bandit Mini Kit MK-7 ATACS Interior 20$Bandit Mini Kit MK-7 ATACS D-Ring

Observations from Use

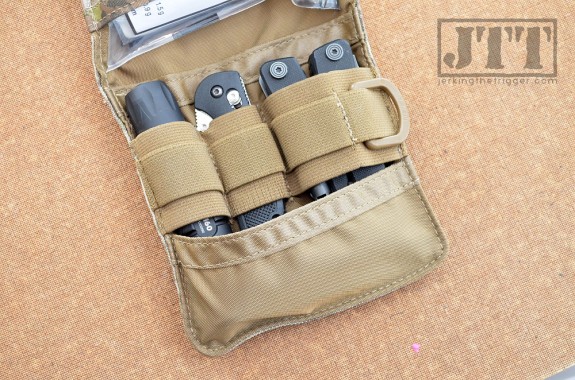
The Mini Kit has the MK-7 designation because this is the 7th iteration of the design. That level of research and development shows in some very key features. The short slip pocket that is located at the base of the elastic organizer side of the Mini Kit is a good example of this. It is very easy to imagine that, without the slip pocket, items held in the loops would work their way out the bottom of the kit. That little slip pocket is the key to making the elastic organizer work.

The elastic loops are well sized for common items. The three largest loops are perfect for things like flashlights, folding knives, and multitools. Even larger tools like those from Multitasker will fit the largest of the loops. The smaller loops are great for pens, smaller flashlights, chemlights, spare batteries, and similarly sized items. You can always find something to store in an elastic loop.

20$Bandit Mini Kit MK-7 ATACS Elastic Organization and Short Pouch

The d-ring is located slightly inboard instead on the very edge of the kit. This gives the exterior of the Mini Kit a lower profile. If you wanted to carry your keys in the kit, this would be a logical place to clip them. I also found it useful as a dummy cord attachment point for attaching items to the kit or attaching the kit to another item like a pack to prevent loss.

I found it best to limit my use of the tall slip pocket behind the elastic loops to mostly flat items since bulkier items tended to interfere with items stored in the elastic loops, making the Mini Kit swell in size and become lumpy. This pouch worked well for spare paper money, a note pad, or other very slim items.

The clear vinyl pouch is one of my favorite features. I use it to store a small notebook that I keep open so I can read my notes without having to remove the notebook from the pouch. It could also be used for any other items that you want to be able to see easily like medical supplies or a map (it would have to be small or folded but it works).

The vinyl pouch also allows you to operate a touch screen through it. However, you would want to be very careful about what you stored opposite the device to avoid breaking the screen when the pouch was folded and stowed.

The elastic closure band stretching across the front of the vinyl pouch does obscure it a bit but it is easy to stretch it out of the way. It can also be flipped around to the exterior of the pouch to get it out of the way but it is attached in such a way that this isn’t as easy as it could be. I would like to see that changed if there is ever an MK-8 version. I should also note that this band does a great job of keeping the pouch closed without the need for Velcro or zippers.

20$Bandit sells Velcro backed tapes that can be secured to the exterior of the pouch and used to identify the contents. This is an effective, simple and, very scalable system. There are far more uses for this pouch than the available tapes would indicate. If you come up with something unique, you can simply have a tape made to match your intended use.

The quality of the Mini Kit MK-7 is good in that it is made from durable materials and sewn well enough that it will not fall apart. My particular example does show some wandering stitches and is a bit crooked in places. None of this affects the function.

Possible Uses

I think I am probably just scratching the surface here but here are the uses for the Mini-Kit MK-7 that I have tested already and that seem to work well.

EDC Organizer – This is obvious and what the kit was intended to do.

20$Bandit Mini Kit MK-7 ATACS as Range Kit

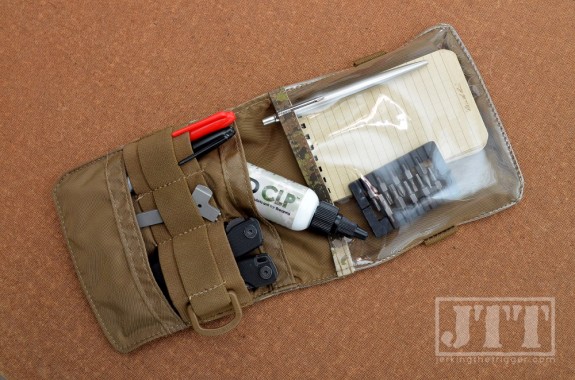
Range Tool Organizer – It will easily carry a Multitasker, Combat Optic Tool, an oil bottle, pen, marker, a note pad, dope card, and more typical range tools.

20$Bandit Mini Kit MK-7 ATACS as Cable Kit

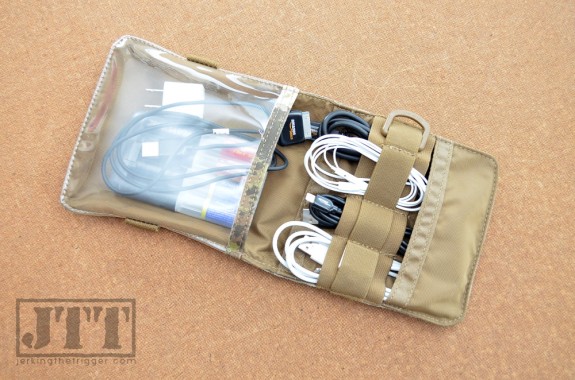
Peripheral Organizer – The loops work great for holding USB cables, charging cables, and head phones. The other pouches can be used to carry charger components and adapters.

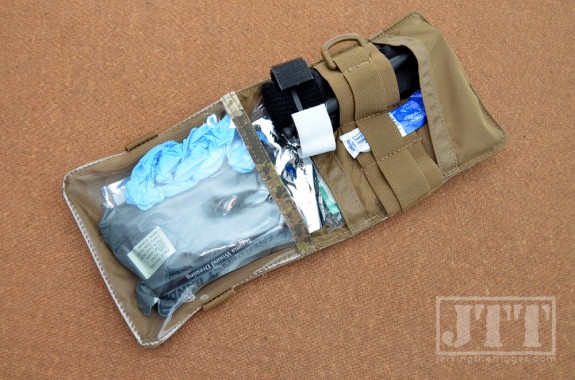
First Aid Kit – It works so well for that 20$Bandit sells a well-appointed Mini Medic insert that is designed to work with the Mini Kit MK-7. It is a great way to keep bandages, meds, and similar items on hand and organized.

20$Bandit Mini Kit MK-7 ATACS as IFAK

Blow Out Kit – I am mentioning this separately from the first aid kit because I prefer not to mix the two. The large elastic loop will fit most tourniquets and the other smaller ones are good for airways, chemlights, and more. You can even fit larger items like chest dressings if you are willing to fold them. It really works well in this role.

Navigation Pouch – The Mini Kit MK-7 works very well when coupled with a larger map case for organizing your navigation tools like a compass, pens, markers, notepad, grids, and other map tools. I like to dummy cord my compass to the d-ring.

Survival/E&E Kit – Just about any pouch designed to be used with EDC items will work well when used with survival items. There is plenty of storage for items to cover your basic needs like ferro rods and lighters (fire), space blankets and cordage (shelter), water treatment tablets and plastic bags (water), and then some.

Wrap Up

Basically, if you take part in an activity that requires you to keep multiple small items organized and available, the Mini Kit MK-7 will probably work for you. It has versatile, well-designed organization features that really show the benefits of having been through 7 revisions before hitting the market. The fit and finish could be better but the quality is good.

I suspect that I will still be finding uses for the Mini Kit MK-7 long after this review is published.

Check out the Mini Kit MK-7 at 20$Bandit. The A-TACS version shown here is available exclusively at PredatorBDU.

Powered by WordPress. Designed by Woo Themes