Archive | Preparedness

Learn Together: Meshtastic (Part 2) – N+1 Theory of Meshtastic

When it comes to doing just about anything, there is the right way and there is the janky way that still works. My Meshtastic N+1 Theory could be either one depending on the context.

What I mean is, this simple idea would work for setting up permanent coverage around your home but it wouldn’t necessarily be the right way if done the jankiest way possible. However, if you are setting up an ad-hoc mesh on the side of a mountain, this might be pretty close to the right way.

Alright, I know I have some explaining to do and I’ll start by saying that if you don’t know what Meshtastic is, check out Part 1 of this series. Now, onto the N+1 Theory…

What is the N+1 Theory?

The N+1 Theory is a simple, practical framework for smoothing out some hiccups with Meshtastic. Here’s how it works:

  • N represents the number of people in your group who need to communicate.
  • You add 1 extra device—the “+1” node—to improve mesh performance and reliability.

For instance:

  • If it is just you, N would be 1 and you would need N (1) + 1 = 2 devices.
  • For a team of 7, you’d need N (7) + 1 = 8 devices.

The “+1” node isn’t just a spare; it’s a strategic addition. By placing this device in a location that optimizes coverage—such as on a hill, at a central point, or in an area with poor connectivity—it strengthens the entire mesh. This ensures that everyone in the group remains connected, even in challenging environments.

This node is just attached to the end of an extendable paint roller pole and lashed to a fence post. Don’t judge me. It works.

Why Refer to This as Janky?

The beauty of this idea is that it can be done in a pretty quick and dirty way. It could be as simple as pulling a node up into a tree on a rope, running a node up an extendable painter’s pole, or even using a magnet to slap it on the side of a metal building… all of which I do on the regular. They all work.

Of course, for a more permanent situation, you may want to install a powered unit outdoors like which I have also done. That unit then serves as your +1 node – your first “hop” into the mesh.

This works because Meshtastic is a mesh network where every node functions as a repeater. The messages are intelligently routed across the mesh and therefore as long as any one node can hit another, there is a great chance that the messages will end up where you want them. So, by ensuring that at least one node is strategically placed, you help the entire mesh.

Meshtastic even expressly supports this kind of scenario with their “Client” and “Client_Mute” roles. I highly recommend you read up on roles when you are setting up your nodes.

The magnet and lanyard I added to this Lilygo T-Echo make it especially useful as a +1 node.

Wrap Up

I know this isn’t especially ground-breaking or even that smart. It’s just something I had to learn by trial and error. So… I gave it a name and now I’ll be rich and famous for it… probably.

I will note that I am working with a new type of node, credit card sized radios from Seeed Studio called the SenseCap T1000-E that makes this concept especially convenient and easy to do the janky way. Stay tuned for more info on those devices.

Whether you are doing it the janky way or the right way, I highly recommend having that +1 node in a strategic location to improve your Meshtastic experience.

It’s way up there but…
It’s easy to get down with one of these.

Learn Together: Meshtastic (Part 1)

I was drawn into Meshtastic by the promise of license-free, relatively easy-to-use, off-grid, off-network text communication on affordable hardware. There is very little barrier to entry and the potential upside is immense so I thought it was worth a try. I am going to drag you along with me, an absolute radio simpleton, as I learn so you can decide if it is worth a try for yourself.

Be advised: If you actually know something about radios or Meshtastic, you are going to be very frustrated with my layman’s misunderstanding and oversimplification. You have been warned!

Before we go too much further, we should establish what Meshtatic even is. Well, you can read about it here from its creators on Meshtastic.com. Basically, it is a radio mesh network made up of mostly inexpensive radios that allow the user to send small amounts of data across the mesh either corporately or privately. The mesh network does not require the use of any network or data connection other than the radios themselves. Meshtastic utilizes the license-free 915mhz band in the USA. Additionally, many of the radios used have very low power requirements making them easy to keep running even when electrical power is scarce.

My Goals for Meshtastic

This is just an introduction to my time with Meshtastic given that I am still firmly in the don’t-know-what-I-don’t-know phase of my journey. However, I have set three basic goals for what I would like to try to accomplish:

  1. Communicate reliably within a few miles of my home.
  2. Set up a private, local mesh within a few miles of my home.
  3. Communicate as far as 40-60 miles away in my region.

The Gear I Have Used So Far

If you want to follow along, I can already suggest a specific radio which I will probably do a more thorough review of later. The Lilygo T-Echo is one of the more affordable ready-to-use options that has a more energy-efficient chipset than many others in this price range. I bought mine on Amazon along with an improved antenna (the stock antenna is compact but doesn’t do the radio any favors):

Where I Am and What to Look Forward To

I have already accomplished goal 1 using just the gear listed above. I will have a post about that eventually as it is quite easy and there are some simple tips and dirt-bag hacks that will make a local mesh even more reliable.

My initial testing has been promising so far with contacts being made over tens of miles and detecting nodes as far as 70 miles (over multiple hops). It has been encouraging enough that I am already researching an outdoor solar node to install on my property to further improve my chances at meeting my goals.

There will be reviews of radios, tips and tricks, and practical information shared all along the way so stay tuned.

Review: Vosteed Mink

The Mink is Vosteed’s first fixed blade but, based on the attention to detail, you would think they have been making them for years. Let’s dive in.

Specs

Blade Length: 3.33″ | 83.90 mm

Overall Length: 7.13″ | 181.00 mm

Blade Width: 1.10″ | 27.92 mm

Blade Thickness: 0.118″ | 3.00 mm

Blade Material: Nitro-V

Blade Grind: Flat

Blade Style: Clip Point

Hardness: HRC 60±2

Handle Length: 3.82″ | 97.10 mm

Handle Width: 0.85″ | 21.63 mm

Handle Thickness: 0.46″ | 11.60 mm

Handle Material: Micarta

Weight: 5.12 oz | 145.10 g (Sheath included)

Carry Position: Adjustable Belt Clip

Knife Type: Fixed Blade

Sheath: Kydex

Designer: Yue

Observations from Use

I have been using the Mink as an EDC fixed blade and it excels in that role. Vosteed designed and sized this knife to be well suited to a number of roles from EDC to outdoors. The shallow clip point renders a splinter-pickingly sharp point. The thin blade stock and tall flat grind terminates at a very thin, slicey edge. The handle provides plenty of grip. It has everything you want from an all-around tool.

The pancake-style kydex sheath comes with a small Tek-lok-like clip that works well for basic belt carry or for attaching to a backpack strap. However, I swapped that clip almost immediately for a Ulti-clip Slim 3.3 which allowed me to clip the sheath into my pocket. This setup worked very well. I also tried the Mink in an older leather pocket sheath that I already own and found that to be a VERY comfortable way to carry this knife.

There are three very subtle design elements on the Mink that I think take it to another level and really showcase the attention to detail that went into this design. First, the handle features a choil that works as a guard but does nothing to hinder a variety of grips or impede the user from getting their grip right behind the edge. Second, there is a very slight swedge grind that makes the tip of this knife even more useful. Finally, the addition of a second section of jimping out near the tip of the knife helps give the user tremendous control of that useful tip. It’s very cool to see how Vosteed uses the ergonomics of this knife to enhance the cutting performance.

The use of Nitro-V steel is a great option here. It is plenty tough enough to support the aggressive cutting geometry on this knife, corrosion-resistant enough to shrug off any conditions this knife might find itself in, and also affordable enough to ensure that the Mink is a great value.

There is one thing I would change. I was a little annoyed with the width of the sheath. Vosteed designed a slim, EDC-friendly fixed blade but then saddled it with a wide sheath. I want to be clear, this sheath is not the throw-away garbage that many makers provide with their fixed-blades. It will work for most people. The sheath’s quality is great… it’s just wide. I would love to see them switch to a slimmer, fold-over style sheath for future runs of this knife.

Wrap Up

The Mink is a lot of things. It is an impressive performer with great cutting geometry and the ergonomics to help you get the most out of that cutting geometry. It is a flexible design that can fill various roles from EDC to outdoors. It is an incredible value for these materials and this level of attention to detail.

The Mink is so good that I am very excited to see what Vosteed’s next fixed blade release will be… a fixed blade in the Nightshade line, perhaps? We can dream.

Vosteed.com

Vosteed Store on Amazon.com

Keep Training with Leukotape P

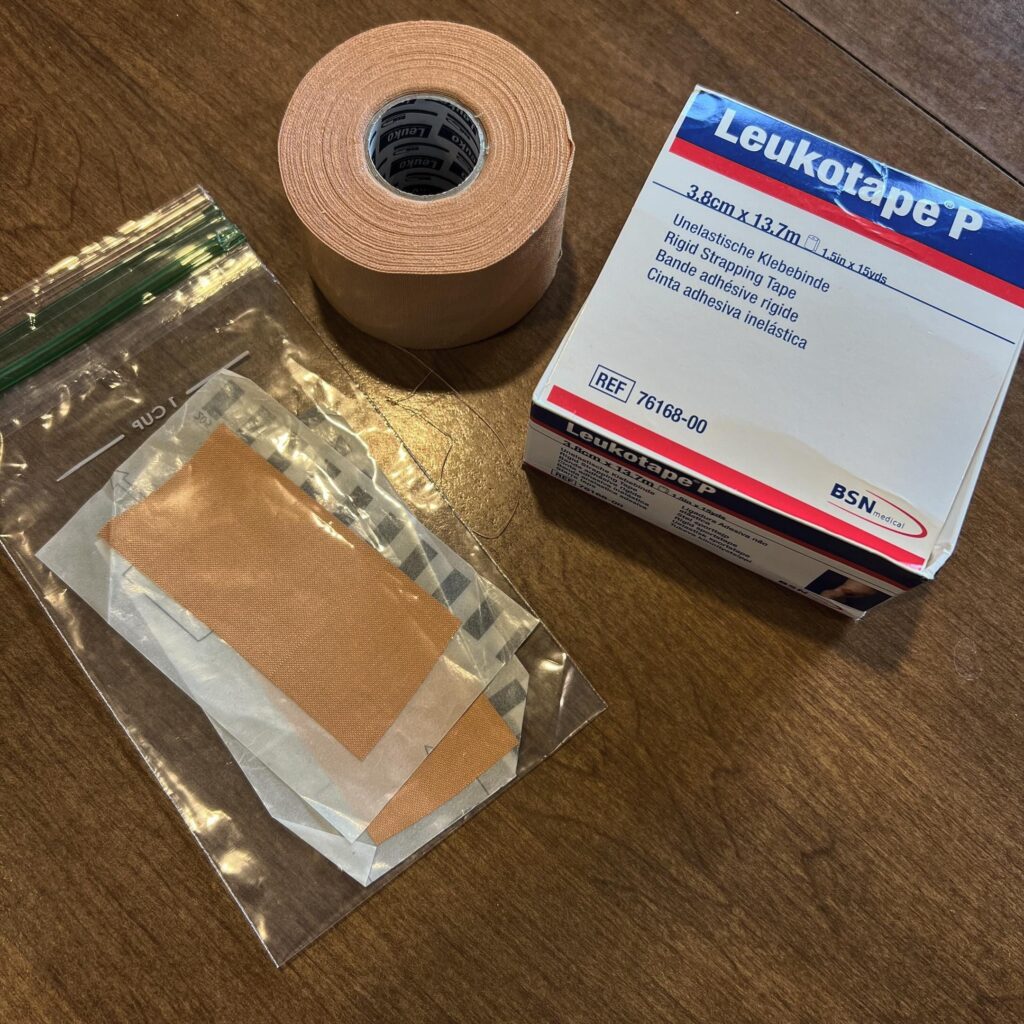
Blisters suck. You are faced with quitting your training or a whole lot of pain the moment you start to feel that hotspot developing… unless you have a way to prevent it from becoming a blister in the first place. That’s how I use Leukotape P, to prevent blisters as soon as I can feel that one might be developing.

Leukotape is a thin fabric tape with low stretch and an incredible adhesive that sticks to skin, even sweaty skin, but also peels away fairly easily. It is best used on friction spots where a blister has not yet developed but where you can feel one coming. I also use it preventatively on known problem areas until that area fully heals and toughens.

The adhesive and the thinness of the tape is the real game-changer here – it lets me keep my runs, hikes, or other training going without the annoyance of moleskin coming loose in my boot. Moleskin is probably still a better treatment for areas that have already developed large blisters thanks to the gentler adhesive and additional padding… but I haven’t gotten a serious blister since I started using Leukotape.

Pro Tip: Don’t carry the whole roll around with you. Save your scraps of release paper (from stickers, receipts, return labels, etc.) and store pre-cut sections of Leukotape on those.

This stuff can be a little hard to find in some areas. I have a local drugstore with a better-than-average medical supply section that sometimes has it. Otherwise, I just buy it on Amazon. If you go that Amazon route, watch the pricing because it fluctuates heavily. I paid $7.99 a roll last week and there is usually some discount for buying in bulk. A single roll lasts a long time but I usually buy at least 3 at a time and end up giving this stuff away like candy.

Leukotape P on Amazon.com

Review: Eberlestock Bando Bag

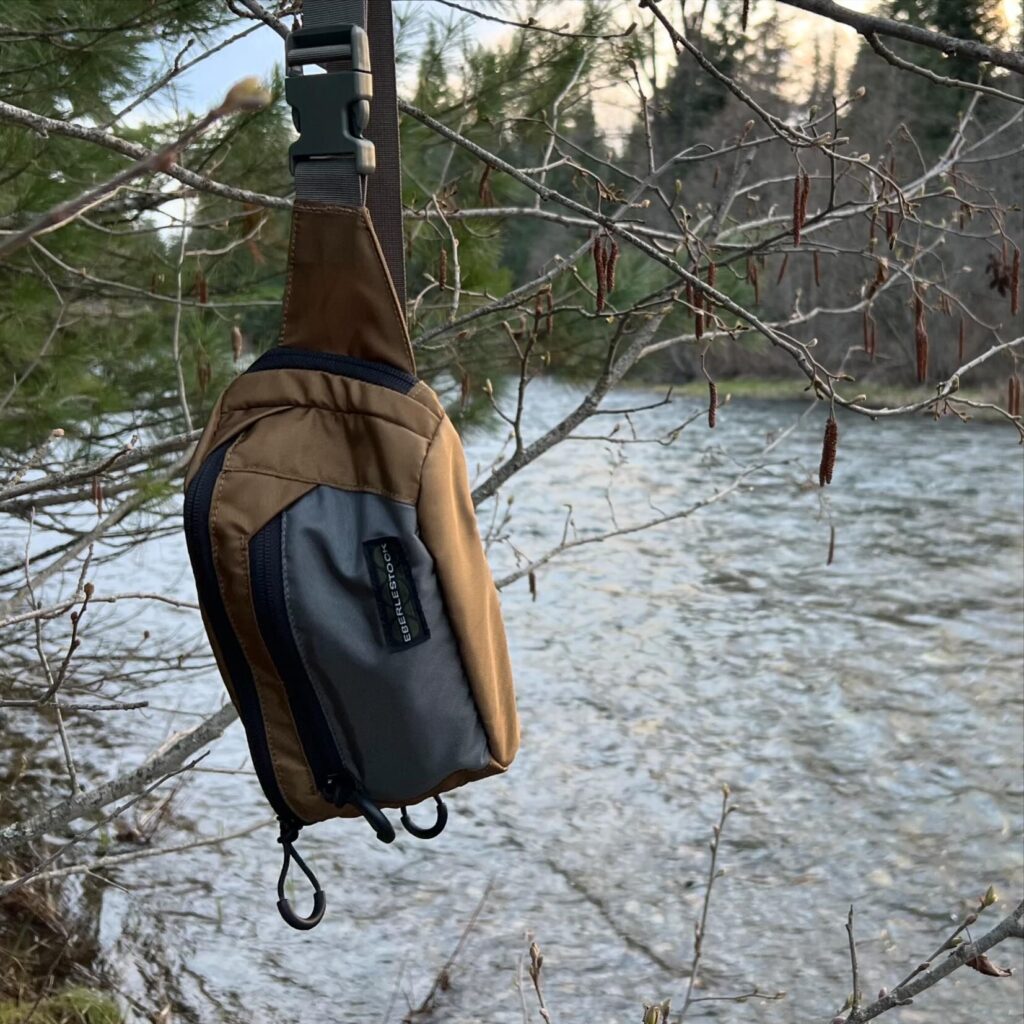
I walk a lot, hike whenever I can, and run occasionally. I tell you this to justify the fact that I wear a fanny pack regularly… almost daily during some parts of the year. I even like doing it. Please don’t judge me. It is a convenient way for me to carry the items I want to have ready access to when I am outdoors and that includes a firearm.

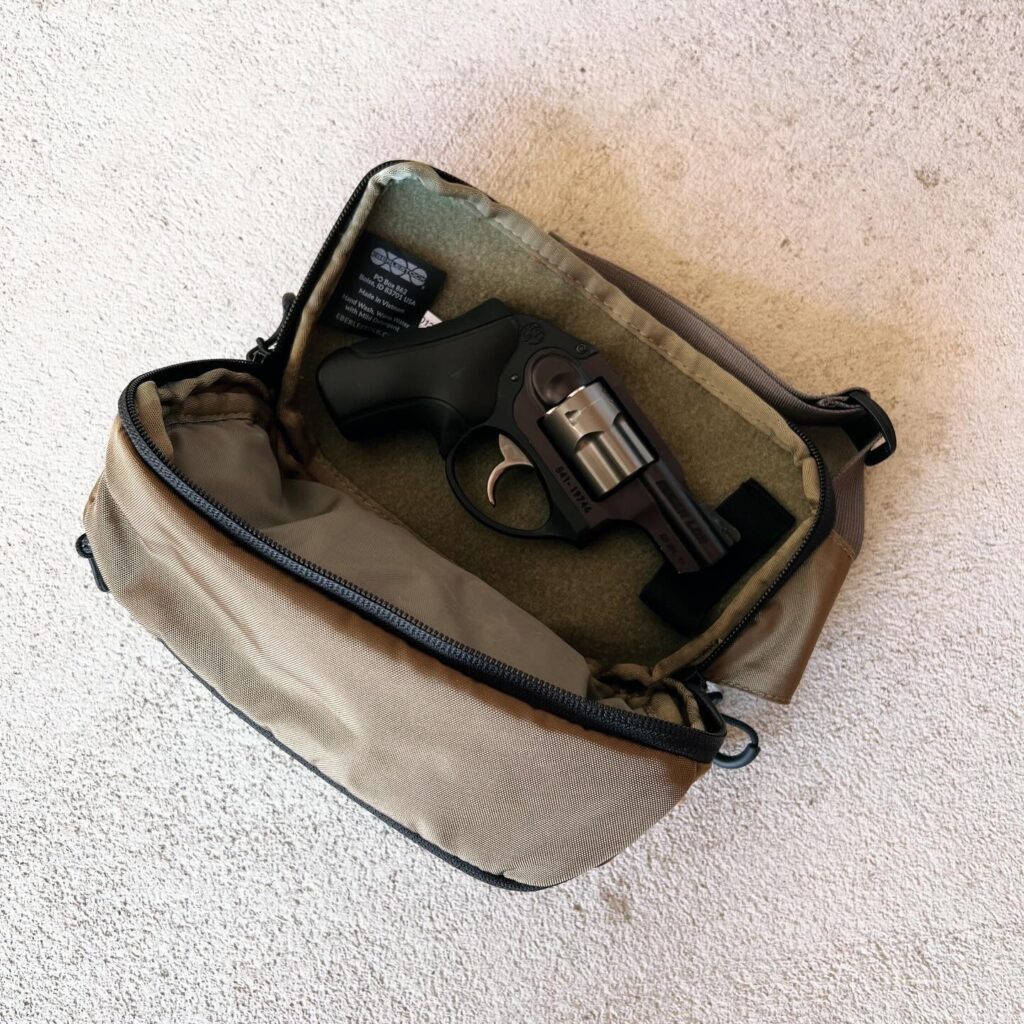
It has been my experience that you can carry a firearm in almost any fanny pack but not all fanny packs are well suited to it. Access is the key. That is where my Eberlestock Bando Bag comes in. This fanny pack has a dedicated pocket that makes accessing a firearm quick and easy. I have been using it since December of last year.

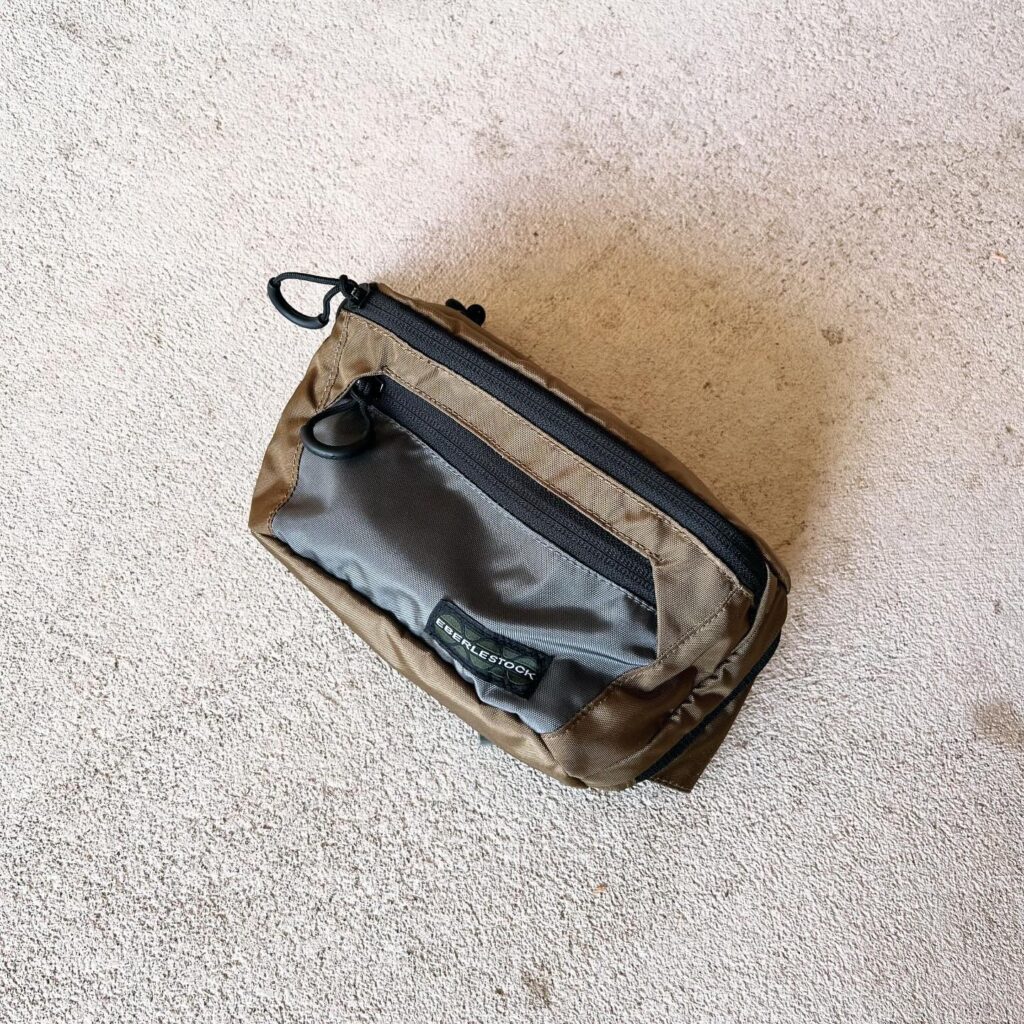
There are other fanny packs that are suited to carrying vital self-defense items but what sets the Bando Bag apart is its appearance. It looks like any other sporty, outdoor-brand fanny pack and this is what I appreciate about it most. I don’t wear it into town but if I did, it would look like every other fanny pack you see in an outdoorsy area.

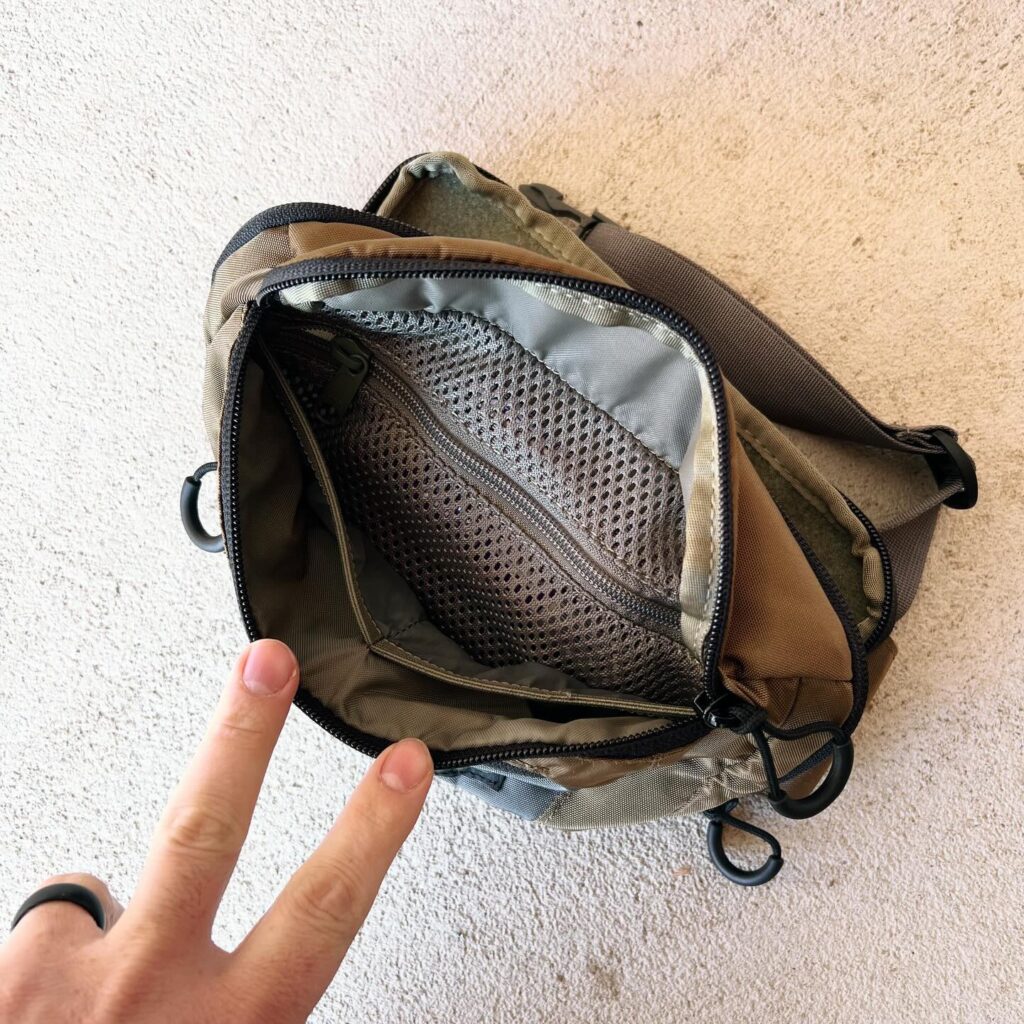
The Bando Bag features three compartments. The firearm compartment (5.5″ x 9.5″) is accessed via a full zipper. It can be “torn” open to allow full access by grabbing one of the zippers or hooking your thumb in the gap between the double zippers (my preferred method). It works well. This compartment will just barely fit a G19 (I usually use a G43 or small-frame wheelgun) but the new XL version fits full-sized handguns.

The second compartment is a very generous cargo compartment with organization. There are two small slip pockets and a large mesh zippered compartment with plenty of other loose space for larger items like phones. The third compartment is a zippered stash pocket on the front which is great for small items like chapstick or a lighter.

I have found the Bando Bag to be comfortable to wear and efficiently laid out to allow me to carry anything I would otherwise have knocking around in my pockets. Drawing from concealment is easy with practice. On top of all that, it is significantly less expensive than most similar bags. I like the first one I bought so much that I just ordered the new XL version to try.

Eberlestock.com

As of the time of this writing, the Bando Bag and Bando Bag XL are on sale for 20% off on Amazon (the regular size Bando Bag is less than $40!): Bando Bag and Bando Bag XL on Amazon.com

Powered by WordPress. Designed by Woo Themes