Archive | Tactics and Training

Setting Priorities

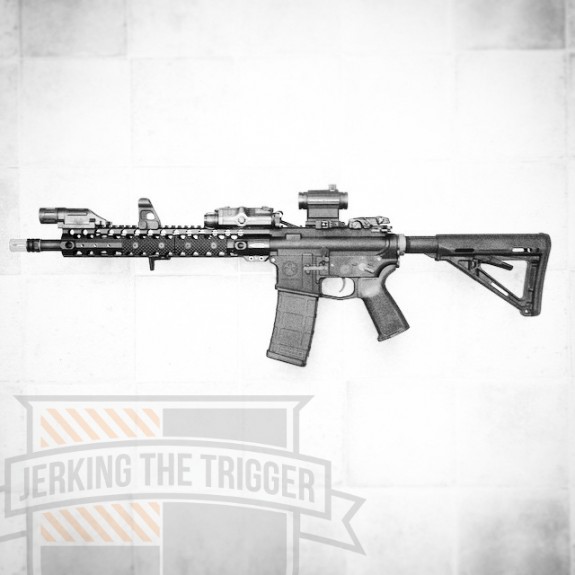
I recently posted a picture of an airsoft training carbine on JTT’s Instagram account. The carbine has an extended rail (as most of my carbines do) with a rail-mounted front sight placed several slots behind my white light which is out near the end of the rail. The picture was shared by one of the manufacturers represented in the carbine and a comment was made by a Facebook user that my sights were “way too far back”. He was concerned about the sight radius of my back up iron sights… which reminded me of a post that I have been intending to write for a while.

The offending picture...

The offending picture…

Priorities are in important in life and they are important in gear and techniques. The above is just one example of dogma getting in the way of what works due to a lack of understanding priorities. Priorities dictate that I am far more likely to use my light than my back up iron sights. Since that is the case, doesn’t it make sense to have as much room behind the light as is needed to operate it without adjusting my grip especially since the sights will still be functional even if they are mounted back a few inches? If you are so wrapped up in achieving maximum sight radius on your back up iron sights that it reduces the effectiveness of your light or your grip, your priorities are out of whack.

That is just one example out of many that are easy to spot if you take a moment to think. Why do so many “survivalist” types train the same way as the police and military when it comes to reloads. It seems to me that someone with a long term survival mindset and no resupply organization behind them should be training to retain magazines (at least some of the time).

Why do people still refuse to use weapon lights? Perhaps they have prioritized the possibility that the light might draw fire over shooting dark, unidentified shapes in the night. I suspect many have learned the same safety rules as I have and yet, they conveniently throw out Rule 4 when it comes to weapon lights.

Why do so many shooters emphasize shooting courses and turn up their noses at combatives and first aid training? I suspect most people are more likely to need to know how to use a pressure bandage or throw a punch than to need to draw their handgun in anger over the course of their lives.

The answer to the above questions and many, many more like them is a lack of understanding of priorities. Setting priorities is just another way of letting your mission drive your gear and training decisions. You can’t make those kind of decisions without information so take some professional training, spend some time on the range, challenge what you know, and start setting some priorities.

So Long I-SHOT

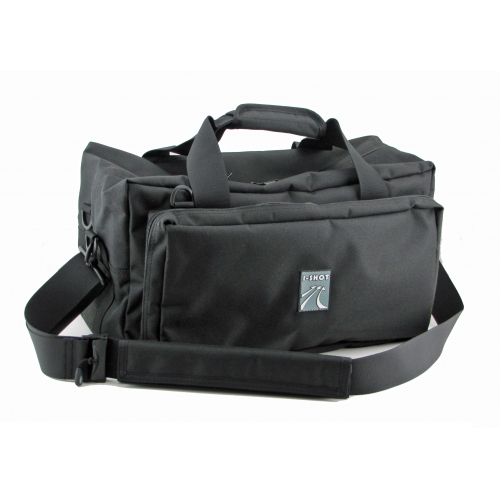
I-SHOT had a long run of innovation in range bags and discreet carbine cases but they are closing up shop so that the owners can concentrate on their other brands. They are closing out their remaining inventory at some very attractive prices. This would be a great time to pick up some gifts for the shooters you know.

These are some of the finest range bags ever made at prices that are too good to pass. Check out the I-SHOT Store Closing Sale.

ISHOT-Ashburn-01-500x500 Pro-Shooter-01-500x500

Big Name Instructors are Great, but Try a Local Guy

If I told you about a firearm instructor that…

  • Served as a police officer
  • Had taken hundreds of hours of training with highly regarded training providers
  • Had years of professional experience in instructional design
  • Holds multiple patents
  • Is a college professor at a private university
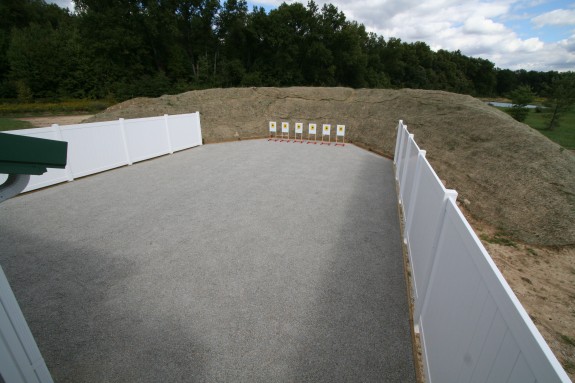
  • Operates out of a private training range that is clean, safe, well-equipped, and comfortable
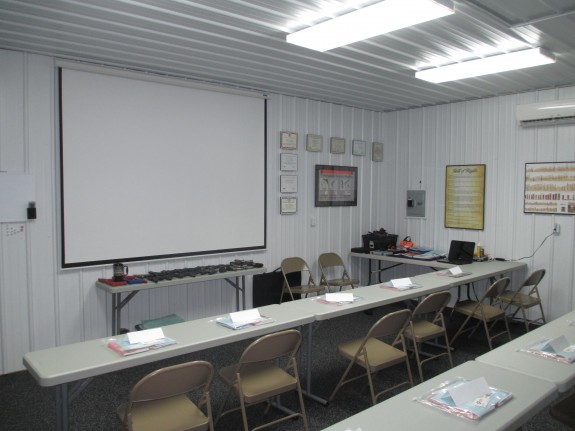
  • Recently constructed a purpose built, multi-media equipped training building that can comfortably house 15-20 students adjacent to the range
  • Has multiple common firearms on hand to try
  • Is NRA certified to train both individuals and other NRA trainers
  • Has taught thousands of students, young and old, over the years how to shoot safely and proficiently

IMG_1165

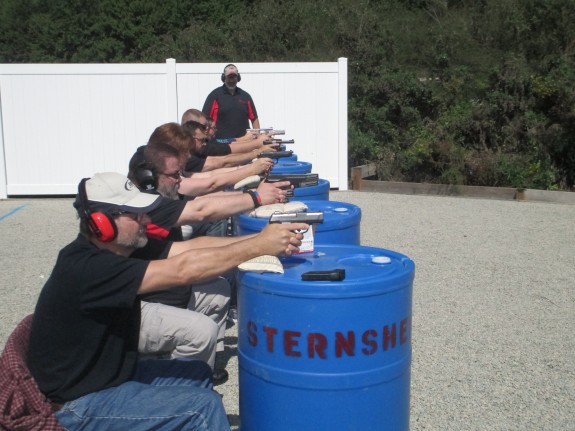
You might think I am talking about a big name instructor but I’m not. I am talking specifically about Dann Sternsher at G4 Personal Safety but there are many instructors like him around the country that are ready to help you become a better shooter. Dann just happens to be one of trainers with which I am most familiar. You see, while you are waiting for the next big name instructor to come through your area, there may be a quality, local instructor right under your nose and you need to find him.

Reasons to Seek out a Local Trainer

It all comes down to time and money. Big name instructors are great. They are often well known for a reason and, hopefully, that reason is that they offer quality instruction. However, you may not always have time to wait for those big name instructors or the cash on hand to pay their course fees. Local instructors often offer training at a frequency and cost that make it possible to train under a critical eye more often for less money. Many local trainers will have affordable courses scheduled monthly or even multiple times monthly.

You want to get your wife up to speed on her new handgun but taking her to the range turns you into a drill instructor and her into an ice princess? Call the local guy.

You need a certification so you can apply for a concealed carry license? Call the local guy.

You need some one on one time to sort out your grip? Call the local guy.

You purchased a new reloading set up and you aren’t sure where to start? Call the local guy.

You just need a tune up to knock the rust off? Call the local guy.

IMG_1150

How to Find a Local Trainer

If you want to find a quality instructor that trains near you, the best place to start is the NRA Instructor Search. Most reputable instructors will be NRA certified – even the high speed guys. Once you have a name or two, start searching online to see what others are saying about the courses. Ask your shooting buddies or the switched on guy at the gun shop (the guy who gives good advice, not the one that says you just have to rack the shotgun to scare off intruders). Ask around on your local gun forums. Check the instructor’s websites for a professional appearance and recent updates. These steps will help you separate the peppercorns from the rabbit turds.

What I Look for in a Trainer

I look for several qualities in a local trainer:

  • They offer courses at a reasonable price compared to others in the area. I am willing to pay for quality but the local trainers should know their niche and price accordingly.
  • They stay in their lane. I stay far, far away from trainers who train beyond their skillset or experience. I admire guys who don’t claim to be anything other than a solid trainer. You don’t have to know cutting edge tactics to critique my draw stroke. If they are going to teach tactics beyond shooting, they better have the background to do so.
  • They are committed to training themselves. A quality instructor never stops training their own skillset. Look for a trainer with recent certifications and a track record of continued learning.
  • They are effective communicators outside the class room. If you call a trainer to inquire about a course and you can barely understand them on the phone or they are unprofessional in their interactions, you can bet that will spill over into the classroom.

If you are serious about training, locating a high quality local instructors can be one of the best investments you make in your skill development. You can certainly continue to train with the well known instructors but it can be wise to fill in with a local guy from time to time.

IMG_7968

Frank Proctor’s 50 Yard Zero at 10 Yards

This recent video (below) from Frank Proctor at Way of the Gun and Trigger Time TV is excellent. In it, Proctor talks about why he uses the 50 yard zero, how to achieve a 50 yard zero at 10 yards, and the benefits of doing so. His 10 yard technique is very simple and it works.

I have tested this a bit since the video was posted a little more than a week ago and found it to be a very handy tool to have in my toolbox. I really like the speed at which I am able to establish the zero since I can see and make my adjustments from my shooting position. I like being able to zero on an extremely compact range and I can see how this technique could benefit those without the skill to shoot a group consistent enough to accurately judge what adjustments should be made at extended distances. However, I have also found some caveats that you will want to keep in mind when using this technique.

If you can confirm your zero at a longer distance, do so. This assumes you have both the space and the skill required. When establishing a 50 yard zero, it is good to check at 50 yards, better to check at 100 yards (point of impact will be high at 100), and best to check at 200 yards. I tested the technique with an iron sighted AR-15, a red dot equipped carbine, and a carbine equipped with a 1-4X magnified optic. All three were well within 2″ of my desired point of aim when I checked them at 50 yards but checking at distance allowed me to further refine the zero. The great news is that using just the 10 yard sight in, I was able to hit a 4″ target at 50 yards in all cases so it is great technique for getting a usable zero on a carbine very, very quickly.

If you need another reason to confirm at distance when and if you are able, consider this. The difference between a 50/200 yard zero and 100 yard zero at 10 yards is only about 1/10th of an inch (1.92″ below point of aim for the 50 yard zero versus 2.06″ below point of aim for the 100 yard zero). The difference between the two zeros opens up to 7/10s of an inch at 50 yards, 1.4″ at 100 yards, and so on. The point is pretty much any zero is going to put you somewhere near 2″ below point of aim at 10 yards and, without confirmation, you may not have the zero you think you have.

Beware of parallax! You will have to be very mindful of consistent head placement when using optics well inside of their intended parallax range. Even optics that claim to be parallax-free will exhibit a shift in point of impact if you shift the position of your eye behind the optic. Basically, you need to position your eye so that the aiming point is in the center of the optic every time. This is good practice whenever you zero regardless of distance but it is vital when you are this close.

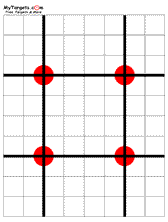
tntarget106gridx4A good target helps. I like Proctor’s field measuring technique of using your finger but also found that a good target helps. I was going to make my own but I came across this target from MyTargets.com and it works well. The target has 4 aiming points laid onto a full page 1″ grid. You can aim at the dots and move your point of impact to the grid point 2″ below the dot. It’s extremely easy and the grid can help you make informed adjustments to your optic/sights.

Be picky about your adjustments. At 10 yards, your mechanical adjustments will be very, very fine. An optic with adjustments that move point of impact 1/4″ per click at 100 yards will require 10 clicks to move 1/4″ at 10 yards. A group that looks “pretty close” at 10 yards can be off by quite a few inches at 50 yards. It is important to follow Frank’s advice in the video about not adjusting off of your group unless the shots in that group are touching. This level of precision will ensure that you have solid data with which to make your adjustments. It also gives you a clearer picture of the minute adjustments necessary at 10 yards to translate to a solid 50/200 yard zero.

Powered by WordPress. Designed by Woo Themes