After I completed my Sub 6 with a Twist build, I received an email from a someone who stated that anyone could make a lightweight rifle if they had “unlimited funds like you”. This gentleman obviously doesn’t have access to my bank statement but I took that email as a personal challenge to prove him wrong.
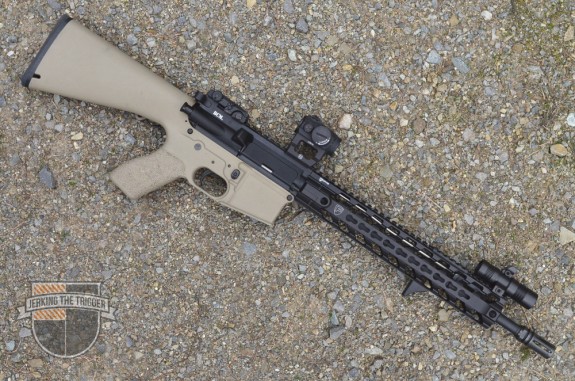
The mildly infamous Sub 6 with a Twist Build
My goal was to build a good quality, reliable carbine that weighed around 6 pounds and cost around $1200. I acknowledge that $1200 is a lot of money but it is still less than some stripped-down, off-the-shelf carbines. The plan for this one was going to be far more ambitious than just iron sights and plastic hand guards. In order to prove this guy wrong, this project would have to have a 12″+ hand guard, a weapon light, and a quality optic. To really prove him wrong, every part would have to be scrutinized for cost in dollars, cost in weight, and quality so that not only was this build affordable, it was also functional.
I am proud to say, I nailed the weight and came in just over $1200 on the price. However, the prices are all listed at retail. A savvy shopper could easily bring the price below $1200.
The Build
I’ll start with the lower as it is an easy one that can be knocked out at one vendor and then move on to the upper parts which requires more thought. Finally, I’ll wrap up with the accessories that make this into an exceedingly useable carbine.
Lower Build
The obvious choice for the lower was a GWACS Armory CAV-15 MKII. Their one piece polymer lowers are extremely durable, very lightweight, and economical considering that they include the pistol grip and buttstock. I have used them extensively and have come to trust them. The lower itself costs $129 and the lower parts kit adds $64.95. If you can find a few extra dollars in your budget, GWACS Armory’s new lightweight pivot pins will save you even more weight.
Upper Build
The upper receiver is where much of what makes an AR-15 reliable happens. This is perhaps the most delicate balancing act between cost in dollars, cost in weight, and quality. Fortunately, we live in a bit of a golden age for the AR-15 and there are no shortage of choices.
The barrel was an easy choice. Faxon Firearms makes great AR-15 barrels that are VERY affordable. I have one of their 16″ midlength, lightweight 4150 barrels that has been a real performer for me. For this build, I used a 16″ midlength, lightweight profile 416R stainless barrel with QPQ finish which has been an impressive performer and will be the subject of a full review later. It is accurate, lightweight, very reliable, and at just $189 – a perfect choice for this build. If you want to save even more, use the 4150 version of this barrel at just $175 (less if you shop around).
This Faxon Firearms barrel was critical to this build. Much of the weight (barrel profile) and reliability (gas port, chamber, etc.) of your build will come down to barrel choice. It would be more difficult to hit the weight and budget numbers, while still building a reliable carbine, without their barrels.
While I was perusing Faxon Firearms, I also picked up their gas block and gas tube. Buying these with the barrel saves $5 ($29.99 for the gas block and $15.99 for the gas tube). Faxon Firearms’ gas block also happens to be skeletonized which saves weight.
I picked up a blemished stripped upper from Aero Precision. I use Aero Precision’s upper receivers in many of my builds and have come to trust them. Their blem uppers also happen to be a great deal. Watch for sales and shop around for an even better price than the $49.99 reflected in the final price for this article. If you are anything like me, you have a forward assist and dust cover laying around.
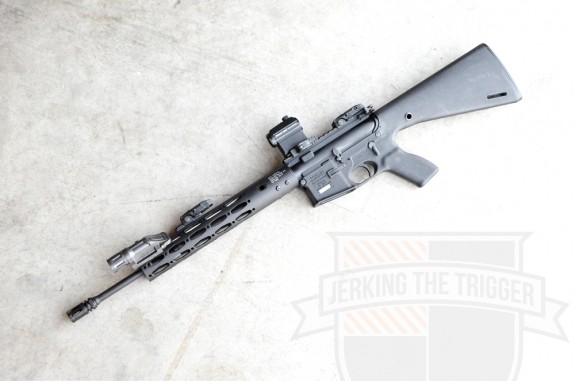
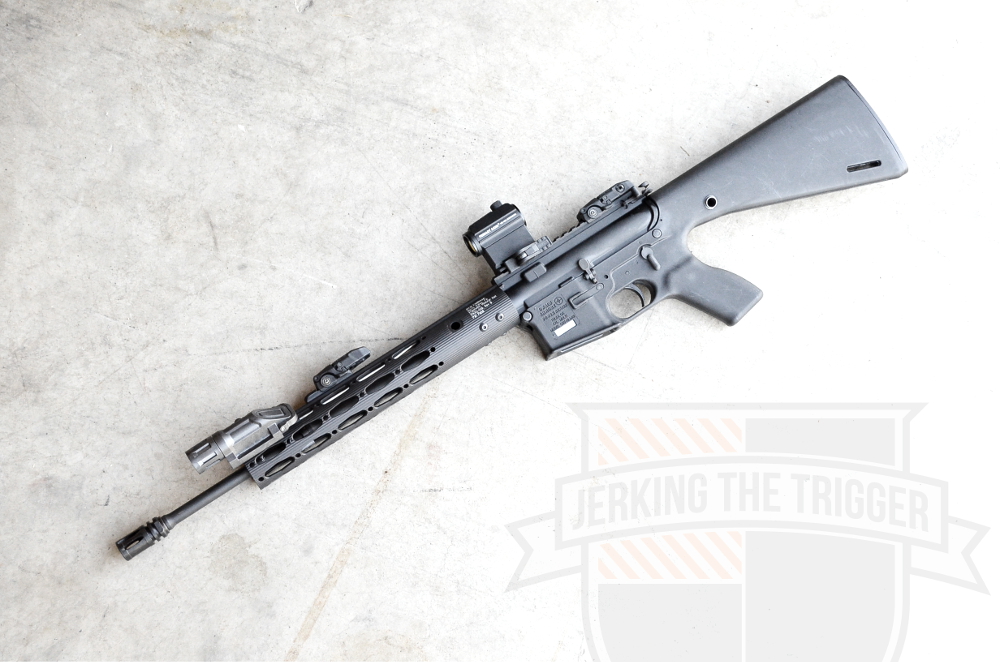
Here it is. You can cram a lot of carbine into $1200 and 6 pounds.
It isn’t hard to find bolt carrier groups for around $140. Pick up the one you are most comfortable with and run with it. In that price range, I really like the Sionics Weapons Systems NP3 coated BCG. Add the charging handle of your choice. You should be able to find a plain one for around $15 if you shop around.
When you think of lightweight and affordable rails, you think of the ALG Defense EMR. It isn’t just a decent cheap rail. It is one of my favorite rails regardless of price. I chose the 12″ EMR V0 since it comes with all the rail sections I would need later in the build, costs only $135, and weighs in at a scant 7.84 ounces including the barrel nut!
The ALG Defense EMRs also have integral sling swivel sockets which saves weight and cost. This is often overlooked but should be considered when planning a lightweight/budget build. The EMR V0 comes with a barrel nut, rail sections, and integral sling mounts. It is a good deal on its face but it is mind blowing deal when you consider the cost of those items.
Accessories
The accessories are what round out this build and make it really impressive for the cost. You can spend more than $1200 for a basic AR-15. If you follow this recipe, that same $1200 builds you an AR-15 with 12″+ hand guard, a weapon light, and a quality optic.
I chose an INFORCE WML for the weapon light. It weighs 3 ounces and has in integral mount which makes its $125 price tag seem even more reasonable. You could go cheaper on the light but it will difficult to find a set up this light in weight.
Magpul’s MBUS back up iron sights are an easy choice for this build. They are affordable and lightweight. A set can be purchased for around $80 (less if you shop around, especially on the secondary market).
The optic that I chose weighs around 6 ounces with its ADM QD mount, has 50,000 hour battery life, rugged construction, has a variety of mounts available, and uses a common CR2032 battery. Sounds expensive, right? It is also backed by some of the best customer service in the business yet it costs only $238.99 (with an ADM mount so it could cost even less with a less expensive mount). The Primary Arms MD-ADS has impressive specs and has proven itself to me as a solid value.
I just used an A2 flash suppressor that I had laying around. If you don’t have one, ask a buddy.
The Tally
The total weight of the carbine build listed above worked out to 6 pounds even. I was hoping to go under 6 pounds but I am glad I didn’t go over.
The total cost was $1219 going by mostly normal retail prices. Like I said before, a savvy shopper could easily build this for less than $1200.
Wrap Up
This build made me realize how blessed we are as shooters/consumers. A build like this wouldn’t have even been possible just a few years ago. Rails were much heavier, barrels were more costly, weapon lights were massive, lightweight optics were more costly, and there certainly weren’t as many choices.
Expensive AR-15s are often expensive for a reason but, in this golden age of AR-15s, you should never feel like you have to settle. There are enough options out there that anyone should be able to build something close to what they want at a price they can afford if they are willing to do some leg work.