Sharpen Your Red Dot

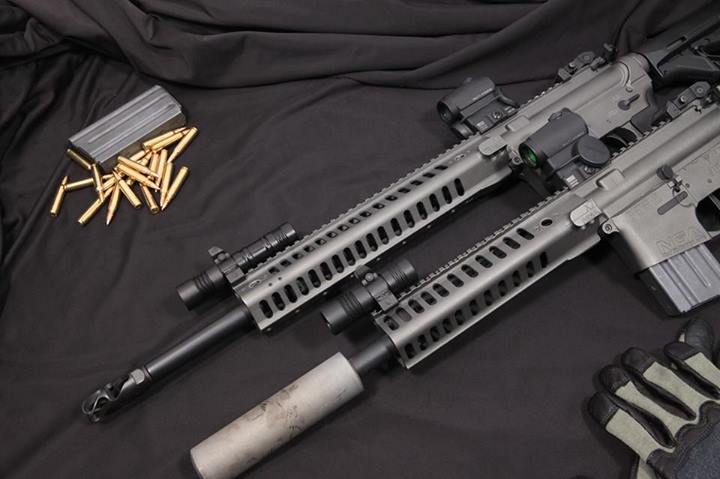
I have written before about how the aiming dots on some Aimpoints don’t always look very crisp to my eyes. Yet, I continue to use them because they are clearly the best red dot site on the market. The Aimpoint Micros (T-1 and H-1) in particular appear more like a starburst than a dot to me. This makes accurate shot placement challenging especially as the distance from the target increases. I continue to use them in spite of all that because of their amazing combination of compact size, light weight, long battery life, and extreme durability. Well, that and I have a work-around.

Aimpoint Micro

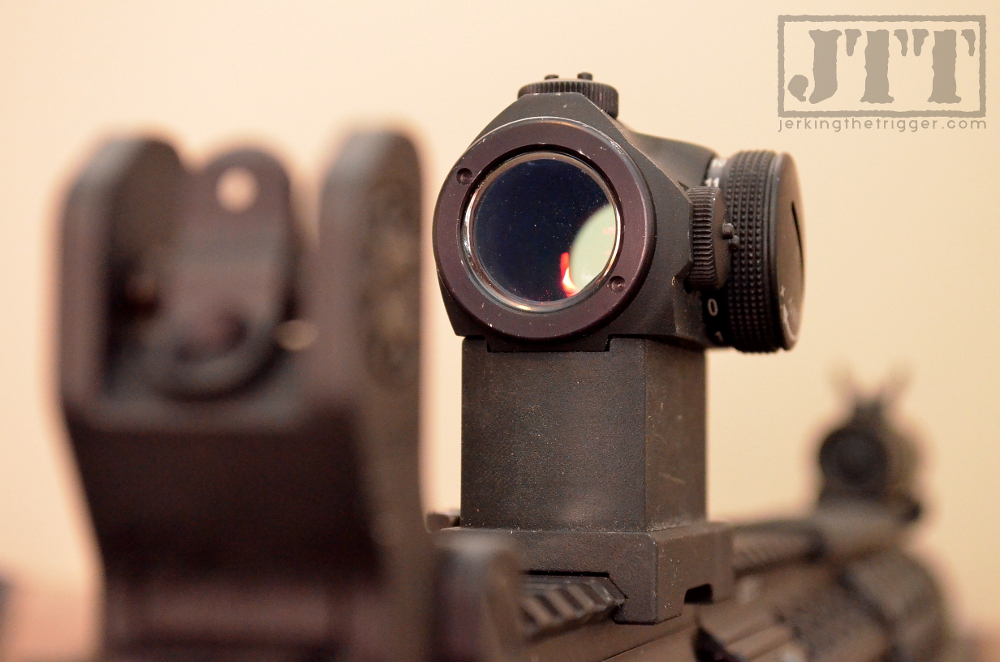
I am certain that it is not unique or original to me but I have found a simple work-around for the issue that works very well for me. I simply look at the aiming dot through the small aperture of the rear sight when precision is needed. Looking through the small aperture makes the dot in an Aimpoint appear perfectly round and crisp and it also seems to bring the target into the same plane allowing both the dot and the target to be relatively crisp. There is obviously some principle of light or vision at play here that is beyond my ability to explain. Go try it now and you will see what I mean. I’ll wait…

This isn’t a perfect fix and it isn’t for every situation. It might require some adjustments to your carbine and may not be for everyone.

When to Look Through the Rear Aperture

This is obviously not a technique that is applicable to all situations. I find that there is really no need to do it until distances extend beyond 100 yards. You certainly would not want to spend time finding your sight picture through the small aperture if you are engaging a bank of targets that are just 25 yards away. There is really no need to because even if the dot is slightly misshapen to your eye, it still probably offers an acceptable level of refinement for this task.

To be clear, I am not advocating that you always look through the rear sight when using an Aimpoint. The approach that works for me is simple: I look through the rear sight only when time allows and/or the accuracy requirement of the shot requires it.

Aimpoint Multiple Models

How to Configure Your Carbine

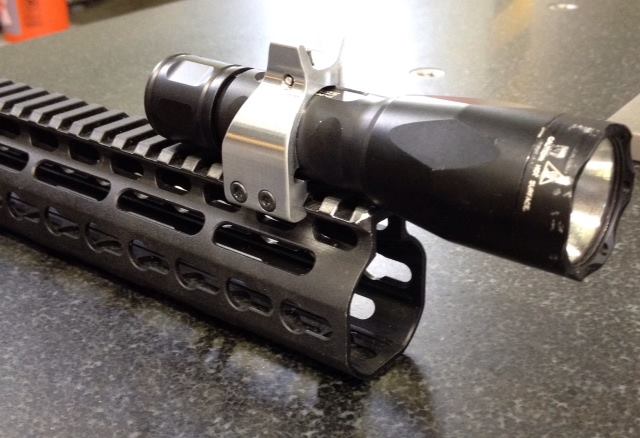
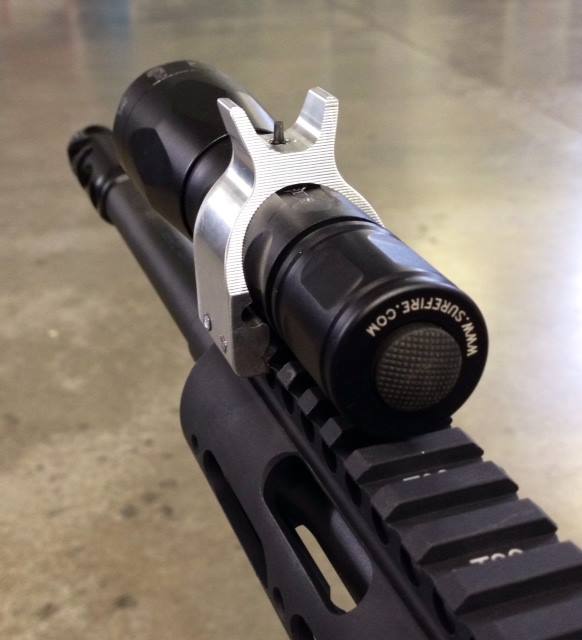
I am not sure there is a hard and fast way that your carbine must be configured for this to work though I have found that there are probably some best practices. For instance, I don’t think it is a good idea to have to deploy a folding rear sight in order to look through the small aperture. This is doubly true for sights that do not deploy with the small aperture in place. I keep my rear sight in the up position to avoid this.

I find that I prefer a lower 1/3 co-witness setup in general but it also happens to be well suited to this technique. It allows me to easily look over my deployed rear sight while maintaining a normal cheek weld when the need for speed is more pressing than the need for a sharp, crisp aiming point. When I need that crisp aiming point, I simply press my eye down to the iron sight.

I should probably also note that I still keep both eyes open when using this technique. I find that my brain can switch to the clearer view through the rear aperture fairly intuitively. This principle should be easy for those who are already used to using magnified optics with both eyes open.

Wrap Up

I want to reiterate again that I am not advocating always looking through the rear sight when using an Aimpoint and I am not saying that it is necessary to look through the sights to use an Aimpoint (this misinformation seems to come up time to time). This is simply a technique that works for me when the specific set of circumstances that allow it arise. Try it sometime.

ROSCH Works SLM1

Yesterday I mentioned that ROSCH Works is developing a new 1″ flashlight mount with integrated front sight. Today I have a name and pictures. It’s called the SLM1 and it looks like this (or at least the prototypes look like this)…

ROSCH Works SLM1 2 ROSCH Works SLM1 1

I am not sure I could be more excited about this. This has been an idea that has been ripe for the picking for some time and, given ROSCH Works success with the SL1, they are the perfect ones to come along and pick it.

Check out ROSCH Works.

Hawkepaks 15 Round Shotshell Strip

You may not be familiar with Hawkepaks but you should be. They offer some great bags and tactical gear at very reasonable prices. I was recently looking for a way to carry shotgun shells on my current gear without having to buy shotgun specific gear and I came across the 15 Round Shotshell Strip from Hawkepaks.

207

These shotgun shell carriers are designed to hold 15 shells in a double stack that allows them to fit in a standard double M4 magazine pouch. They retain the shells via elastic loops and each carrier has a grommet that can be used to lash it to the magazine pouch for retention.

The 15 Round Shotshell Strip cost just $9.99 and are made in the USA. Check them out at Hawkepaks.

Fury Carry Solutions AR/M4 Universal Rifle Mag Carrier

Kydex AR-15 mag carriers are great but they are often molded to a specific type of magazine which can limit their usefulness to those who use multiple types of magazines. The new AR/M4 Universal Rifle Mag Carrier from Fury Carry Solutions is molded in such a way that it will accept and retain just about any AR-15 magazine. It is also somewhat unique in that it has adjustable retention which is not often seen on these pancake style carriers.

These will be available soon. Check out Fury Carry Solutions.

Fury Carry Solutions Universal AR Mag Pouch

ROSCH Works Development Pipeline

A rolling stone gathers no moss and there is certainly no moss on the ROSCH Works crew. They are currently developing several products that are worth noting. I have more detail that I can share on some than others.

The development on the new, brighter head for the SL1 is still moving forward though it has been superseded by a couple of other interesting projects.

Rosch Works SL1 Expansion Kit

The first of those projects is the TM2 which is a light mount that is designed to be as simple as possible while giving flexible light mounting options that require no modifications to the host gun. It can be uses to mount a 1″ light in number of positions to a shotgun barrel or AR-15 barrel with the use of a shim. The design is so simple and robust that it needs only 1 screw. The typical ROSCH Works attention to detail and material science is present in how they are making the TM2 from a stainless alloy that reduces the amount of heat transferred to the light from the barrel. The expected price on the TM2 is $30-$35 depending on the options.

ROSCH Works TM2 ROSCH Works TM2 Fury ROSCH Works TM2 custom light

As you can see from the image above, you can expect to see stand-alone ROSCH Works flashlights in the future.

ROSCH Works is also developing a light mount that will be similar in principle to the TM2 except that it will offer QD functionality. This will allow the user to easily attach or detach their light as the need arises. Like the TM2, it will require no modifications to the host gun.

Perhaps most interestingly, they are developing a light mount with integrated front sight that will allow you to mount any 1″ light on the top rail or your hand guard. This could be one of the most exciting lighting products since the SL1. Stay tuned for additional images and information on this mount.

Rosch Works SL1 FDE

Finally, the SL1 is now available in FDE. ROSCH Works wanted to do more than just coat them and call them good so they spent some time getting these right. They are now available at ROSCHWorks.com.

Powered by WordPress. Designed by Woo Themes