Mounting a modern 2-point tactical sling on an AR-15 is easy. Many stocks and handguards can accept a side-mounted sling by default or at least with the addition of readily available accessories. If you want to do the same thing on a rifle or shotgun with a traditional buttstock, it becomes a little more complicated… unless you know about a sling that has been around forever: the Safari-Tac Multipurpose Sling from Boonie Packer/Redi-Mag.
Overview
The Safari-Tac Multipurpose Sling is a 2-point sling that allows rifles and shotguns with traditional stocks with bottom mounted sling swivels to be carried across the front of the shooter in the same way a modern 2-point tactical sling would. It accomplishes this with a unique attachment method that requires no modification to the host rifle.
You can see the attachment method in this video:
Observations from Use
I’ve been using these slings for more than 12 years. They absolutely solve a common problem in a simple (and affordable way and I am ashamed that I haven’t reviewed this sling until now. This sling does not get enough credit.
The sling attaches via two hard plastic bars that can be tucked into standard sling swivels easy but can not slip back through without intentional manipulations. At the front, the sling just attaches to a button mounted swivel in a fairly standard way with the sling just running out from the bottom. The rear swivel is where the magic happens. The rear swivel is used as a stop that prevents a webbing loop that is wrapped around the buttstock from sliding forward and back. The sling is attached to the loop on the side of the buttstock rather than the swivel itself. This is what allows the rifle to be carried flat against the wearer’s chest.
This Safari-Tac has a plastic slider to adjust the length of the sling. This slider can be operated while the rifle is slung but I still wouldn’t quite call it is a “quick-adjust” sling. The slider is there to aid in length adjustment and for the sling’s use as a shooting aid more than it is for left/ride side transitions or cinching the rifle close to the wearer. It can be used for those purposes. Just don’t expect it to slide like a quick-adjust mechanism.
In addition to the 2-point sling functionality, the Safari-Tac can be used as a shooting aid. The slider creates a loop in the sling that can be looped onto the support arm to help the shooter build a more stable shooting position. This can be something of a lost art these days but it is very handy for those who know how to fully leverage the functionality.
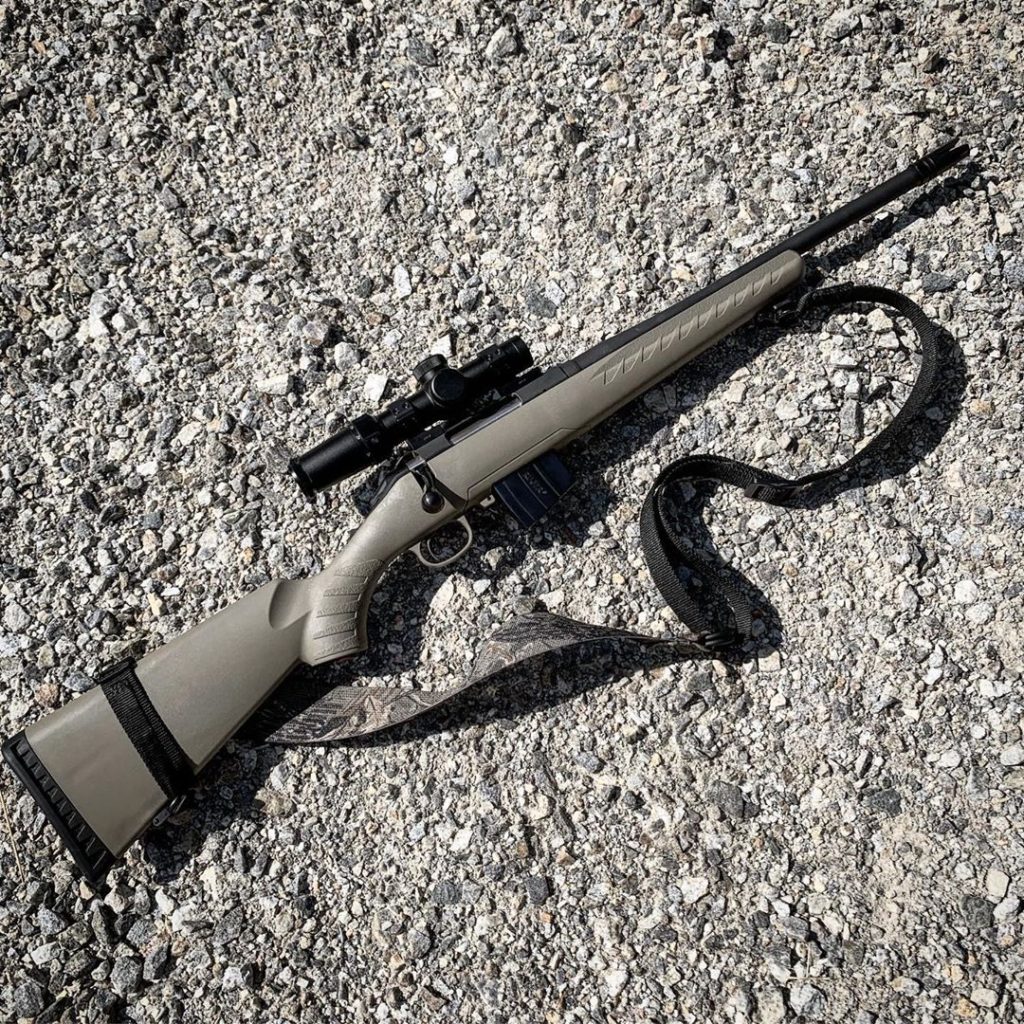
This sling is excellent for bolt action rifles, shotguns, .22 rifles, and any other traditionally stocked weapon that you want to carry in a manner that keeps it comfortably away from a backpack and readily available. Shotgunners may find it especially useful as mounted a modern 2-point sling to a pump-action shotgun can be frustrating. I particularly like it for a longarm that I might carry while hiking like a shotgun or lever-action because it works so well with backpacks thanks to its flat, wide webbing and positioning.
Wrap Up
The Safari-Tac Multipurpose Sling likely pre-dates most of the modern 2-point slings that JTT readers are familiar with but that doesn’t diminish its relevance today. This sling is incredibly useful and solves a common problem in an elegant way. I should also mention that it also happens to be very affordable.
Check it out at the Boonie Packer/Redi-Mag website: Redi-Mag.com
NOTE: Be careful if you plan to purchase one. Boonie Packer/Redi-Mag make other slings with the term “Safari” in the name. I am sure those are fine sling too but this review and the functionality described pertains to the “Safari-Tac” sling.
I have been wearing a Hawkrigger 38 Grapple Gun Belt every day since March. In that time I have used in on mountain bike and gravel bike rides, on day hikes, on an overnighter, during kettlebell workouts, on the range, and for general everyday use. Let’s see what I’ve learned.
Overview
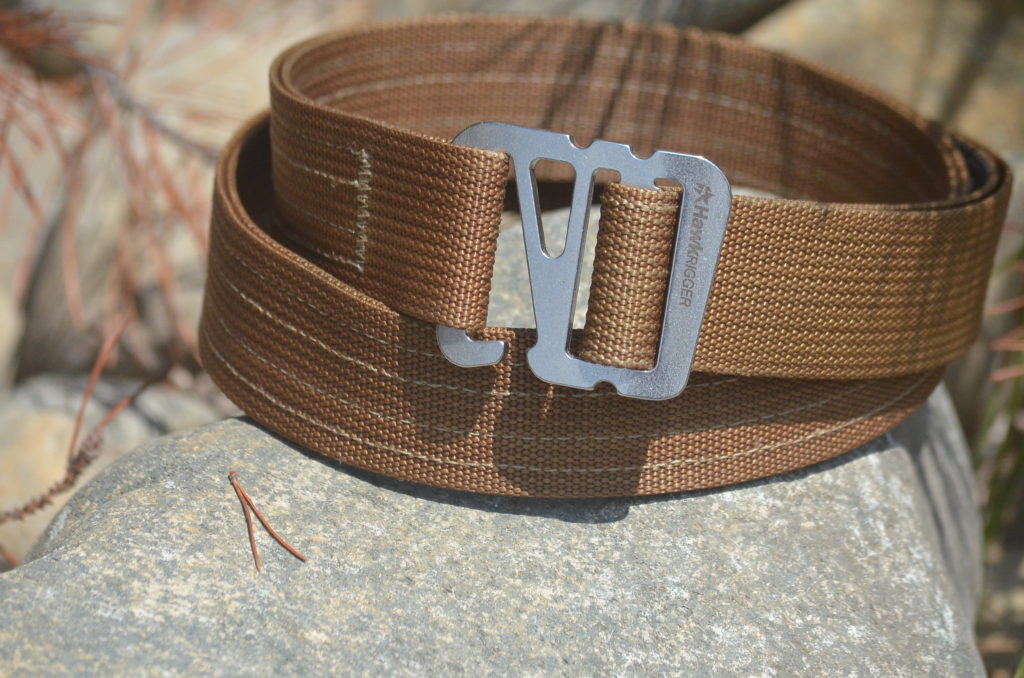
The 38 Grapple Gun Belt is sewn from 38mm (1.5″) wide, US-made scuba webbing. The webbing is double layered and has 4 circumferential stitches for stiffness.
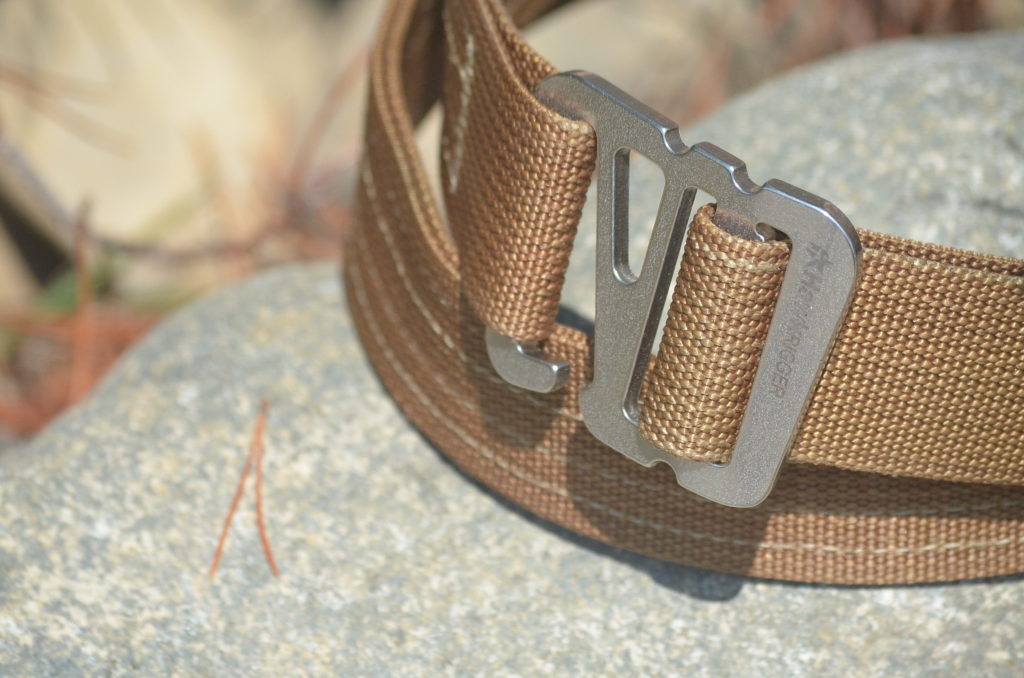
The name “Grapple” comes from the G-hook style buckle. It is made from stainless steel and aggressively deburred to remove any sharp edges. The buckle has a slightly curved shape to conform to the wearer.
Observations from Use
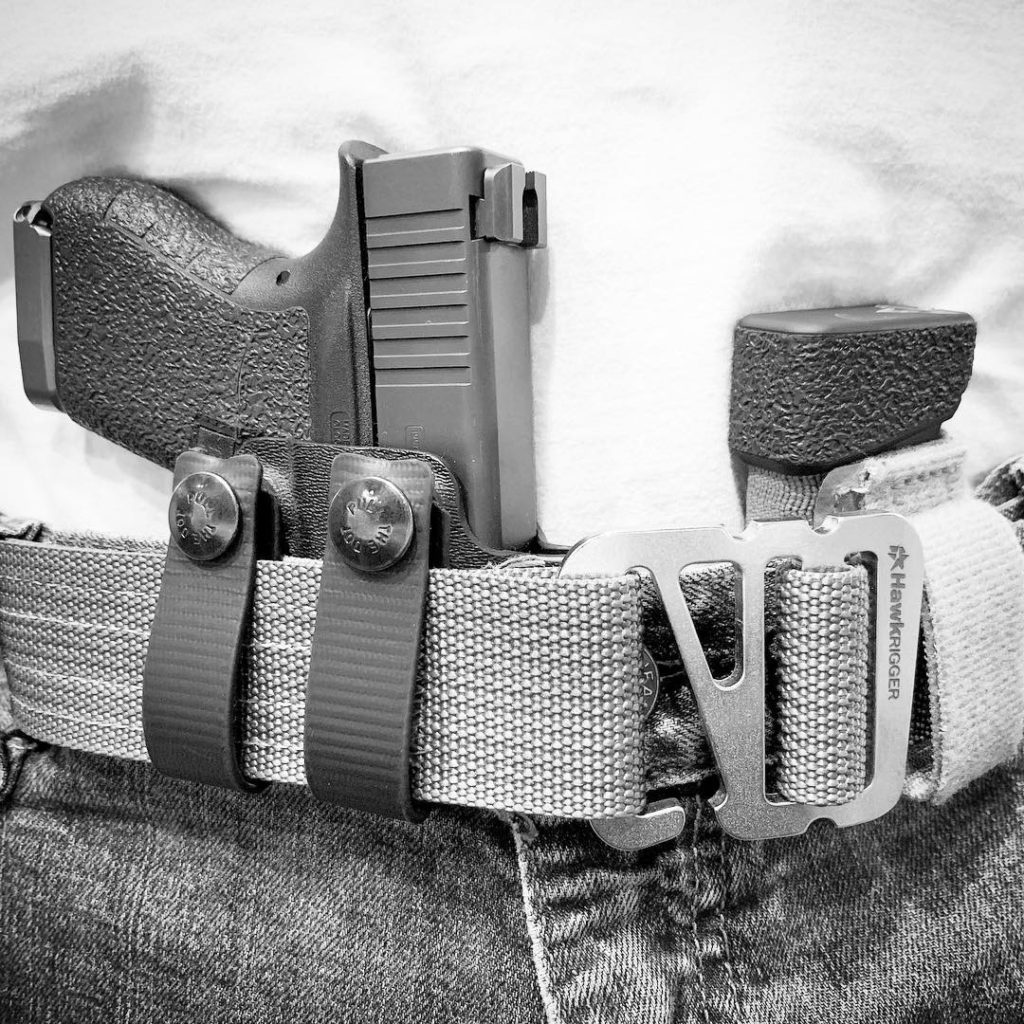
I mentioned some of the activities that I have tried while wearing this belt like biking and kettlebell workouts. I did these activities specifically while wearing appendix carry holsters in order to test various aspects of the belt.
I cycled many more than 200 miles on pavement, forest roads, and trails while wearing this belt. I stopped tracking miles after the first few weeks and I’ve worn this belt on all my rides since so the actual mile count is much higher. I figured that this would be a good test of comfort given the forward bent position that cycling requires. The Grapple is stiff in the direction that it needs to be (up and down) but relatively compliant circumferentially which makes it very comfortable while still able to effectively bear weight. I find it to be very comfortable for AIWB carry as well as 3-4 o’clock hip carry.
I wore the Grapple during kettlebell workouts to see if the adjustment would slip. I never had to tighten the belt during a workout and if you know about the mechanics of a kettlebell swing, that should be impressive. It seems like the more tension you put on the buckle, the more it bites and holds. The only instances I have ever had to tighten it have required very little tightening and it usually happens when there is very little tension on the belt.
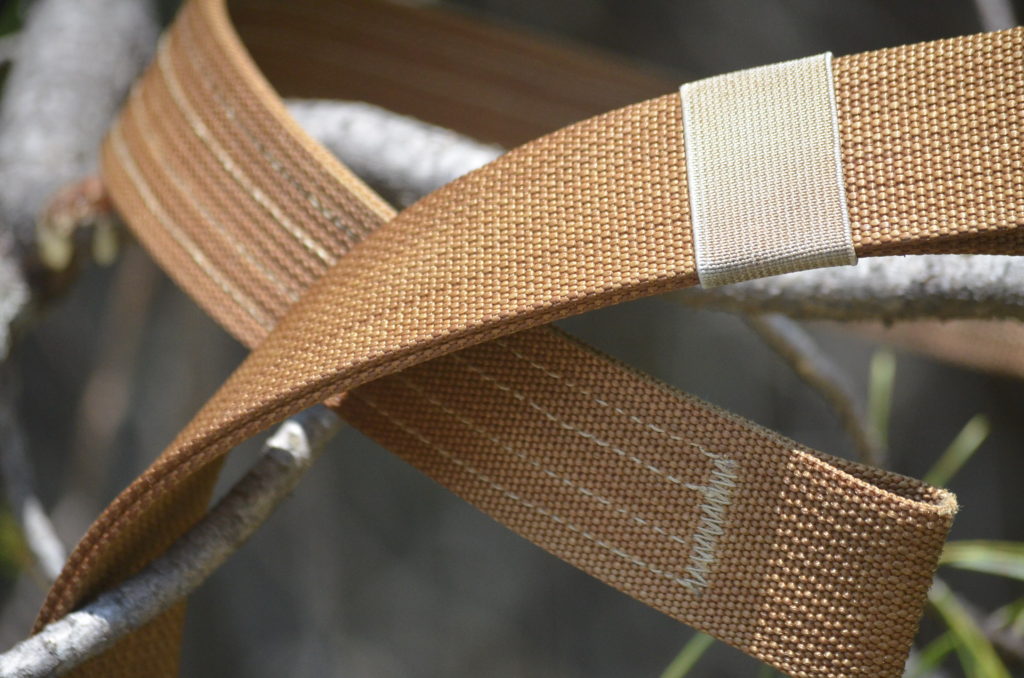
This belt is easy to wear. It is easy to open, easy to close, easy to thread into belt loops, and easy to adjust. The hooked buckle mates easily with a sewn-in loop in the webbing. The webbing is stiff enough that this loop is always held open when the belt isn’t under tension. You can latch and unlatch with your eyes closed. The open end threads easily in any pants and some pants will even allow the very low profile buckle design to pass through the loops.
The adjustment on this belt is very straight forward. Coarse adjustments are best made when the belt is not threaded in pants. Fine adjustments can be made easily by levering the adjustable side of the buckle forward and then either ratcheting it tighter or allow some webbing to slip in order to loosen. I am not sure to what extent Hawkrigger knew that the adjustment would work out this way, but I like it. It is almost like a ratcheting mechanism without moving parts.
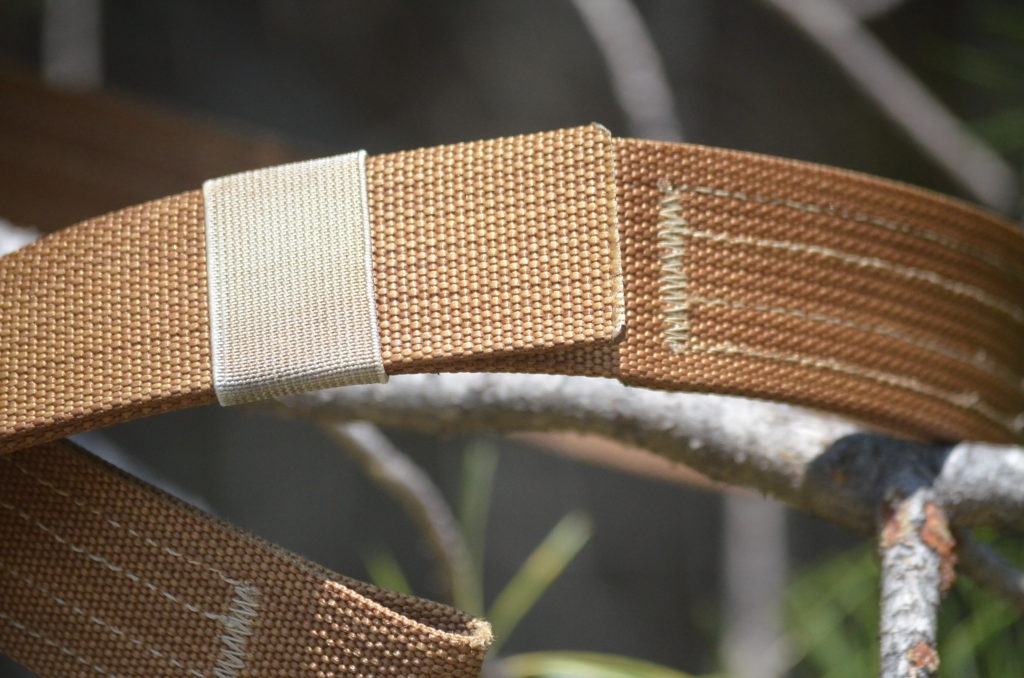
The belt comes with an elastic loop that keeps the excess length under control. The belts are available in multiple standard sizes. When you buy one, you provide your measurement and Hawkrigger provides the correct size based on your measurement. I like that the guesswork is taken out of the process as I often fall between sizes and never feel sure about which size to pick. The belt has a generous amount of adjustment built-in.
The quality of this belt is excellent. It has massive bar tacks where appropriate, 4 full-length circumferential stitches bonding the layers of webbing, cleanly cut and sealed edges, and quality components. Mine still basically looks new. I was concerned about how the buckle hook would wear against the webbing loop over time but that concern has been unfounded due to the lack of anything resembling a sharp edge.
I should also point out that, at just over $50, this belt costs about half of what my previous gun belt cost and I have found that it meets my needs better. I consider this to be an excellent value.
Wrap Up
This is an excellent gun belt. It bears the weight of a gun well and strikes the right balance between rigidity and flexibility. The design is simple, easy to live with, and comfortable to wear. I am wearing it as I type this and I’ll be wearing days later when you read this.
The Nitecore F1 Charger doesn’t look like much but it is nothing short of amazing when it comes to portable power. Its main function is as a battery charger for lithium batteries like 18650s and 16340s (RCR123) but it can also serve as an ultralight battery bank. If all that wasn’t enough, it supports through-charging which makes it a valuable companion to any portable solar panel. It does all that in a very compact, 1-ounce form factor. It’s basically the ultimate charger for the outdoorsman.
Overview
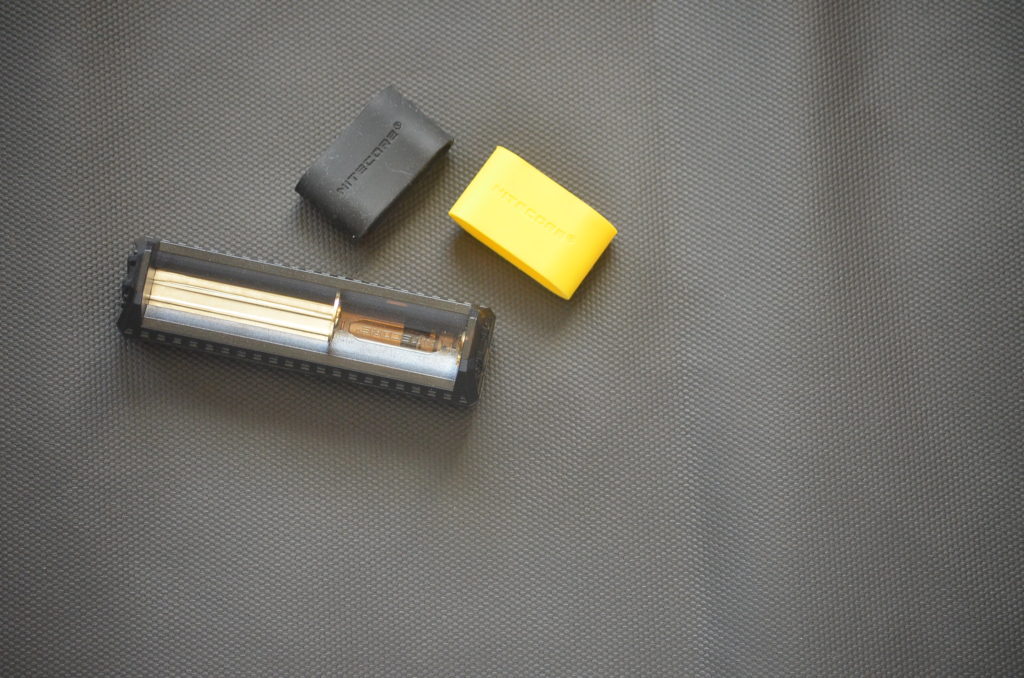
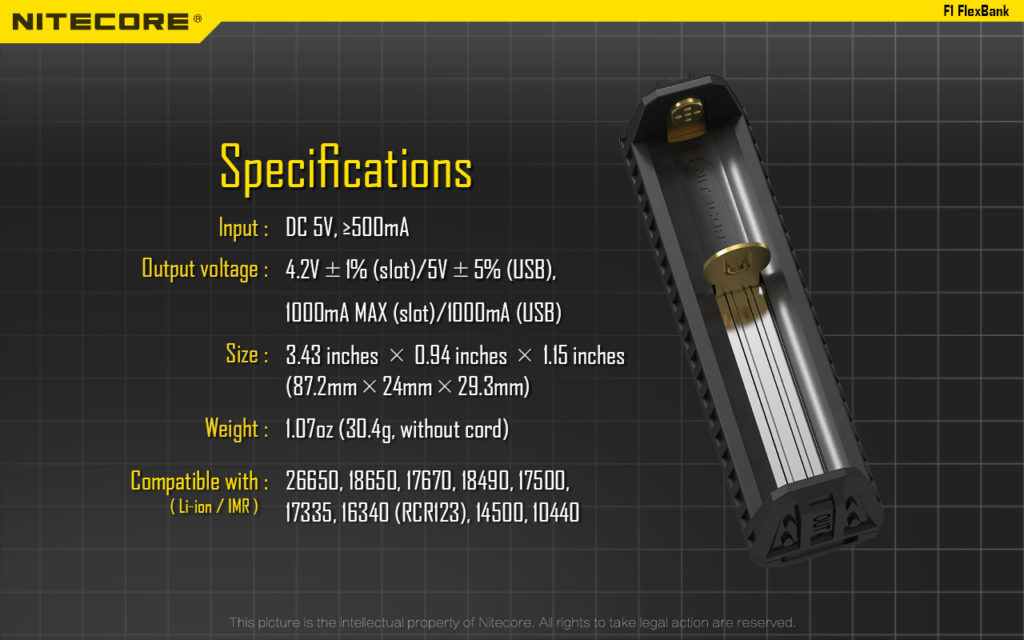
The Nitecore F1 is made from lightweight but strong polycarbonate with a spring-loaded, sliding battery contact that supports a number of common lithium batteries (26650, 18650, 17670, 18490, 17500, 17335, 16340(RCR123), 14500, 10440). It has three tiny LED indicators that are used to read out the voltage of the battery and indicate status for the charger. It also comes with 2 rubber bands (you only need one, the other is a spare) that are used to ensure the battery stays in place.
The F1 features a standard Micro USB in port allowing it to be powered by any USB power supply like wall warts, computers, solar panels, power banks, and more. It also has a standard USB out port for its power bank functionality. It allows the F1 to draw power from a battery and feed it to another device like a cell phone.
The F1 also supports through charging meaning that it can charge the battery and power the USB out port at the same time. This is key to its solar utility (more on this later).
Observations from Use
If you were on a really tight budget and didn’t mind charging just one lithium battery at a time, the F1 would actually serve well as a very basic home battery charger. It can even read out the voltage on a battery and tell you it charge status based on its simple LED display. It works just as well in the field or in a vehicle. It is a simple but capable charger.
The F1’s ability to be used as a power bank really adds to its backwoods versatility. It will provide 5 volts, .5 amps via its standard USB out. That is relatively slow for charging something like an iPhone but it will get the job done. I know some ultralight hikers have even used it successfully in place of heavier traditional power banks… just be sure to carry extra 18650 batteries!
All of the above is great but the F1 really comes into its own when used with solar panels where it addresses two major issues. First, most chargers require somewhat consistent power levels or they produce a charge error and stop charging. This is obviously not ideal for solar where the power that the panel provides fluctuates constantly based on the solar conditions. The F1 is different. I have never been able to produce a charge error with it. It seems to happily keep charging, hanging on at just a trickle, when clouds roll in. Then it recovers seamlessly when the solar conditions improve. If your panel is producing power, the F1 seems to be able to put it to use.
The second solar issue that it solves is with devices that are finicky about constant power levels when charging. For instance, many smartphones like to have a constant power level when charging. If the power provided by the power drops it will likely cause an error and the phone stops charging. If this happens while you aren’t babysitting the solar panel, you can miss out on a lot of valuable charging time. The F1 can be placed inline between your panel and your phone (or other devices). The panel charges the battery and the battery provides a consistent amount of power to the phone. The power never sags (unless you deplete the battery) which ensures there are no charge errors. It acts very much like the batteries in a home-based off-grid solar system. It won’t be the fastest charger you have ever used but it can provide some peace of mind.
Alternatives
There are a couple of other chargers that I have used outdoors including the Olight UC Magnetic Universal Charger (click to see the review) which has the advantage of working with NiMH cells and an amazingly compact form factor but lacks the solar utility or power bank functionality.
Additionally, I have used the larger XTAR VC2S in a similar role. It can charge two batteries at once and also acts as a power bank. This is a very full-featured charger but it is significantly larger than the F1. It is somewhat solar compatible but long interruptions in sunlight can produce charge errors from which the charger will not recover without intervention. Still, when used with something like a Suntactics Solar Panel with their very smart automatic restart functionality (more on this in a later article), this can be an excellent charger/power bank for extended trips.
Note: It can be tempting to try the Nitecore F2 which is similar but accepts two batteries. However, it is not nearly as solar compatible so I found it to be far less useful.
Wrap Up
The Nitecore F1 is a 1-ounce wonder. It’s a good battery charger. It’s a passible and ultralight power bank. It’s indispensable for backcountry solar. It also only costs about $10! If you are using a solar panel in your hiking gear, this can add some great capability and flexibility.
Where to Buy:
I doubt many of you will be able to find the Nitecore F1 Charger in a brick and mortar store. Ebay typically has competitive prices on the F1 as do many flashlight/battery websites. Be mindful of counterfeit Nitecore items. When I purchased mine, Amazon had the best price with shipping included: Nitecore F1 on Amazon
Do you have a gear or concept recommendation that fits the On Foot, Off Grid series? Tell us about it in the comments below or drop us a line on the Contact page.
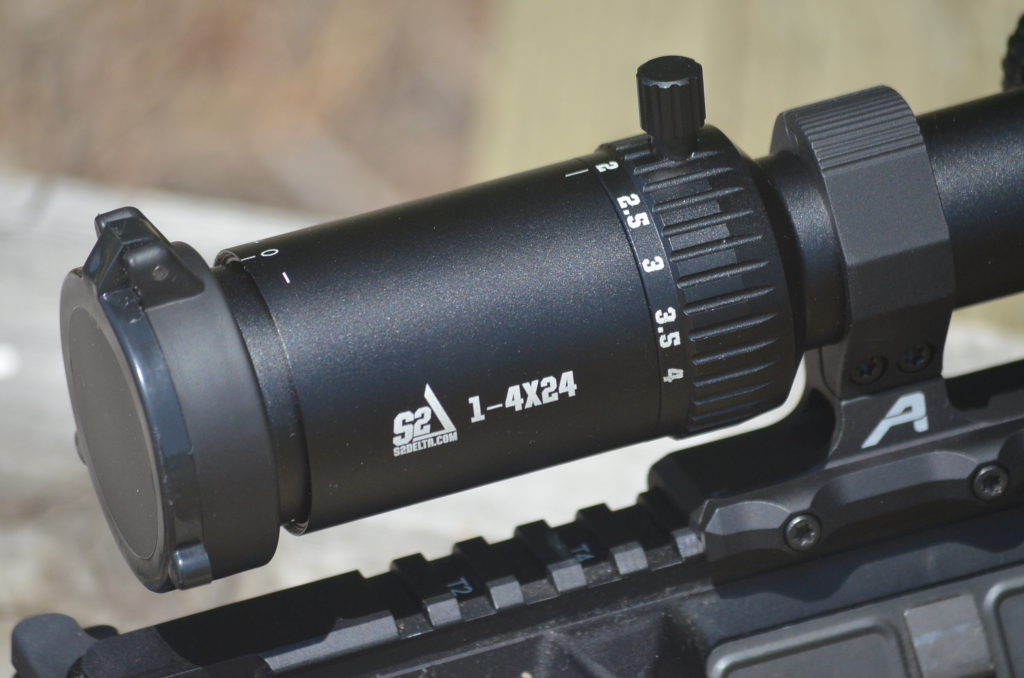
S2Delta sent me one of their new 1-4×24 Carbine Scopes to review. I turn down several budget optic reviews yearly because of obvious quality issues or a lack of anything original. However, this one grabbed my attention because of its unique reticle that includes several elements that I like and its incredible pricepoint. I am so glad I signed on for the review because it turns out there is a lot to say about this optic and it might just be the new budget LPVO king.
Overview
The S2Delta 1-4×24 Carbine Scope is in many ways a typical Asian OEM optic. S2Delta designed the reticle, specified the features, and then turned it over to a factory in China for production. This is quite common among affordable optics and not a bad thing as we have more and better affordable optics than ever because of it.
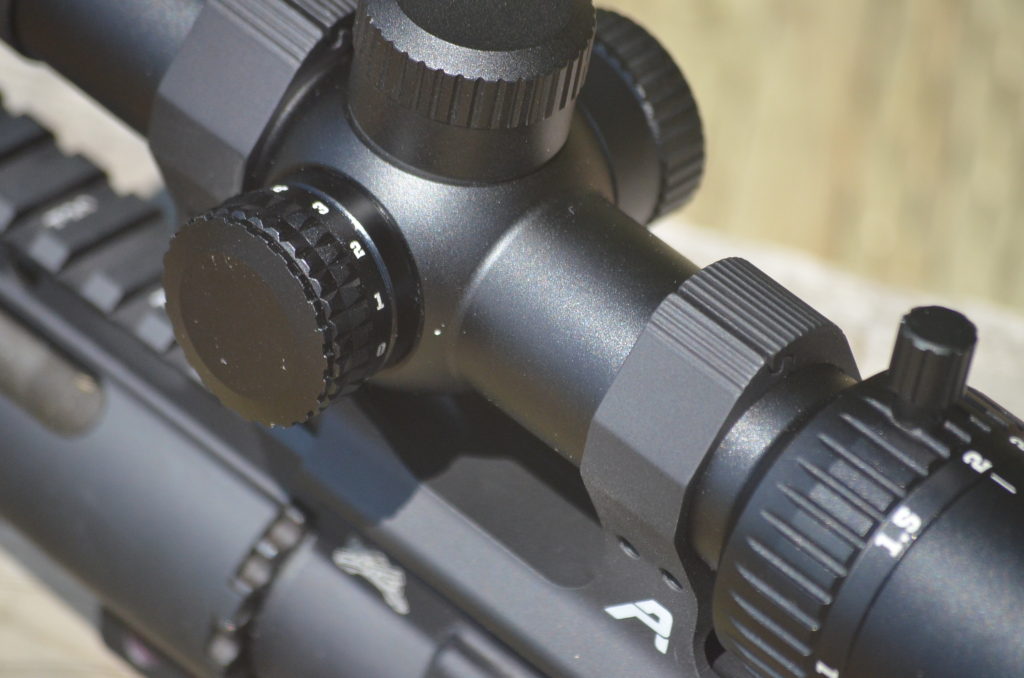
The Carbine Scope has a 30mm, one-piece tube. The entire optic, including the very nice knurled turrets (a very nice touch versus the mostly low profile plastic turrets at this price-point), is made from 6061 aluminum. The turrets are finger adjustable (1/2 MOA) and capped. The optic is nitrogen purged for fog-resistance.
The lenses are fully multi-coated. S2Delta tells me that, “The coatings are aimed at reducing glare/reflection, fog, and scratches.” The proprietary second focal plane reticle offers ranging and BDC out to 600 yards. It is etched and illuminated. The illumination offers 11 settings and it is bright though not “daylight” bright.
The Carbine Scope also includes a built-in throw lever for adjusting the magnification ring which is a very nice touch. It comes packaged with a good quality lens cloth, decent scope caps with a cool trick (more on these later), and Sony 2032 battery.
Observations from Use
Before I get too far into this review, I should set the tone. It may sound like I am gushing but that is only because I am genuinely impressed with this optic to the point that I have ordered another one. This optic made me change my tune from, “How good can a $150 optic be?” to, “How can a $150 optic be this good?” I should also point out that it isn’t just $150… It’s $150 shipped, via Amazon Prime. This optic is extremely accessible.
I should also state that, while I have already mentioned the price several times, I do not want to fixate on it too much. I think it is a good optic at 3-4x the price. In fact, it outperforms some optics that I own, which cost more than 6 times $150, on features and optical quality. This isn’t just a good optic for its price. I think it is just a good optic.
Now onto some more relevant observations from the time I’ve spent with the S2Delta 1-4×24 Carbine Scope…
Build Quality – The build quality appears to be on par with many similar optics but with some noted improvements. Like many Asian produced LPVOs for the “tactical” market, it has a reassuring heavy-for-size feel. It feels durable.
The Carbine Scope features excellent turrets that are an improvement over most optics at this price point. You’ll find large, nicely knurled aluminum, well-marked, finger-adjustable turrets under the caps. These turrets are more like exposed target turrets than the kind of low profile, plastic turrets typically hidden under the turret caps on a budget scope. The audible and tactile clicks that these turrets produce punch way above their weight class. According to S2Delta, these turrets are something that they wanted to get right and I would say they did. They are excellent.
This optic passed an initial box test which also provided a baseline for later durability testing. I mounted the scope in an Aero Precision Lightweight Mount and I realized early on that most of the typical durability testing would be more of a test of that mount than the optic itself. Fortunately, Ivan at Kit Badger gave me the idea to remove the optic from the host, drop it in the bed of my truck, and then start driving the National Forest roads near my home. That is just what I did for just over 12 miles and then immediately retried the box test. The optic passed and other than some finish wear the corners, it seems fine. Even the included scope caps are still functional.
This is a sample size of one so maybe this isn’t typical. However, given the durability seen from other OEM produced optics, I am not really surprised by these results… pleased, but not surprised.
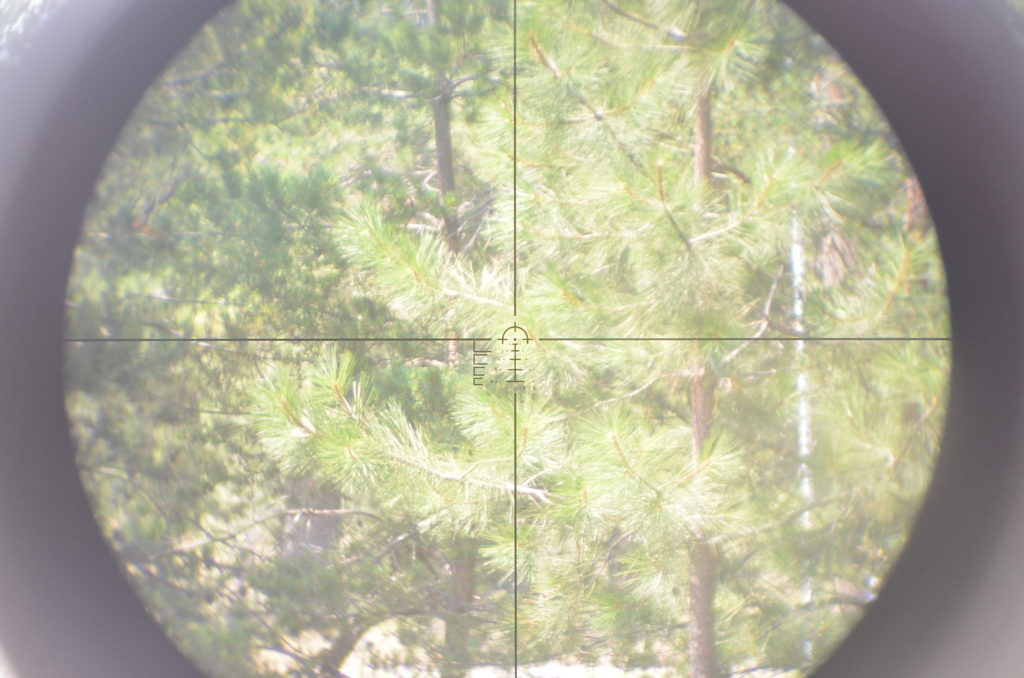
Optical Quality – The folks at S2Delta tell me that optical quality is another element on which they majored in the design phase. I would say the optic quality is very good – better than expected by a large margin. On the plus side, I find it to be bright and quite clear. In my backwoods resolution tests, I was able to resolve individual pine needles on trees out to 75-100 yards in strong lighting (that is some backcountry science for you). It exhibits much less “fisheye” effect at 1X than any other 1-4X optic I own including some costing more than 6 times as much cash. I would say it is easily the truest 1x I have seen on a budget optic.
If you are used to premium glass, you won’t confuse this for truly premium glass. It shows some blurring at the extreme edges of the field of view and, as you would expect, some chromatic aberration. That sounds harsh without context. In context, this glass is far better than any budget optic I have used. It is better than many mid-range optics I have used. The glass on this optic will not hold you back. It is good in a vacuum and incredible at its price.
The tree line shown is 40 yards away. My photography does not do the optical quality of this scope (or any scope) justice. These photos are darker and exhibit much more blurring than the optic does in-person.
Reticle – As I said early in the review, the reticle is part of what grabbed my attention. The current market is laden with thick horseshoe/dot reticles that float in the center of the field of view. These reticles grab the eye but also occlude a lot of the view through the optic with their heavy, eye-catching elements. There are other ways of centering the eye; older ways that many reticle designers seem to have forgotten, like crosshairs.
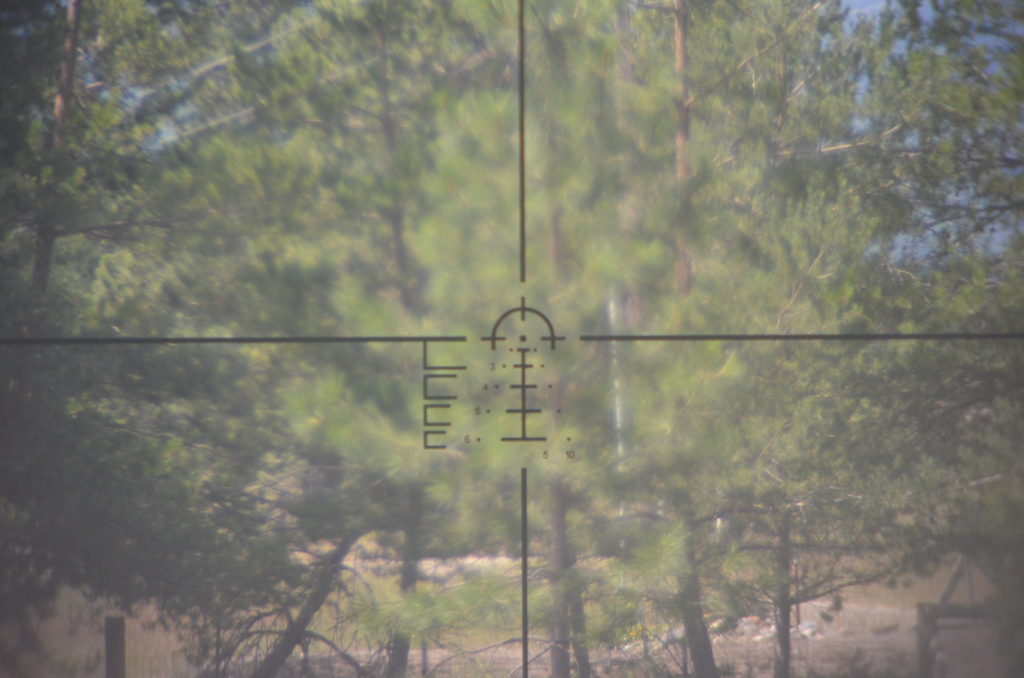
S2Delta’s reticle has a horseshoe/dot design with a BDC extending below it. They have eschewed the heavy ring in favor of full, thin crosshairs that serve to bring the eye into the center of the reticle. I like this because it keeps all of the elements of reticle very thin which is conducive to precision and occludes less of your view. This approach really stands out in the current market and it works, though I do think it might have been even more eye-catching if the outer crosshairs were made slighter heavier like you might see in a German #4 or duplex reticle.
This image is focused on the reticle to show it in detail. This is why the background appears so blurry.
The BDC and ranging elements are also well-executed. The BDC provides aiming points for 200, 300, 400, 500, and 600 yards when you zero the optic at 100 yards. It also provides wind holds for 5 (end of the stadia lines) and 10 mph (dots) crosswind.
Ranging takes place on to the left of the reticle. There are 4 brackets that represent an 18″ width and 11″ height at 300, 400, 500, and 600 yards. The 18″ width can be used to range on an average man’s shoulders and the 11″ height corresponds to the average measurement from the clavicle/shoulder line to the top of the head. Ranging is quick and intuitive though you do have to move back and forth between the ranging brackets and reticle instead of having everything built into the reticle.
Other Observations – This optic exhibits generous eye relief and a relatively forgiving eye box. The eye box is more forgiving than anything else I have tried in this price range. I measure the eye relief at more than 4″ throughout the magnification range.
There are a number of really nice touches that really add to the experience with this optic. The built-in throw lever is a big bonus and great savings over other optics that require an aftermarket or accessory lever.
The included scope caps seem to be of decent quality and actually have a really neat trick. The diopter adjustment ring is fluted and the ocular end cap is molded to mate with these flutes. That means you can set your diopter adjustment and then orient the cap so that it is vertical. In that configuration, the scope cap can’t rotate independently of the diopter and so it serves as a witness mark for your diopter adjustment. I’ve never seen that before but I definitely like it.
Wrap Up
Let me lay out the value proposition for you. The S2Delta 1-4×24 Carbine Scope delivers a lot for the money: above class optical quality that will not hold you back, a well thought out and unique reticle with BDC and ranging elements, durable construction, impressive turrets, and thoughtful touches like a built-in throw lever and clever scope caps. It is definitely not lost on me that this is a sample size of one but I can’t help but be very impressed by this optic… very, very impressed.
This is the best sub $350 LPVO that I have laid hands on and it might be the best there is. This could be the new king of budget low power variable optics.
You can check out the 1-4×24 Carbine Optic at the S2Delta website: S2Delta.com
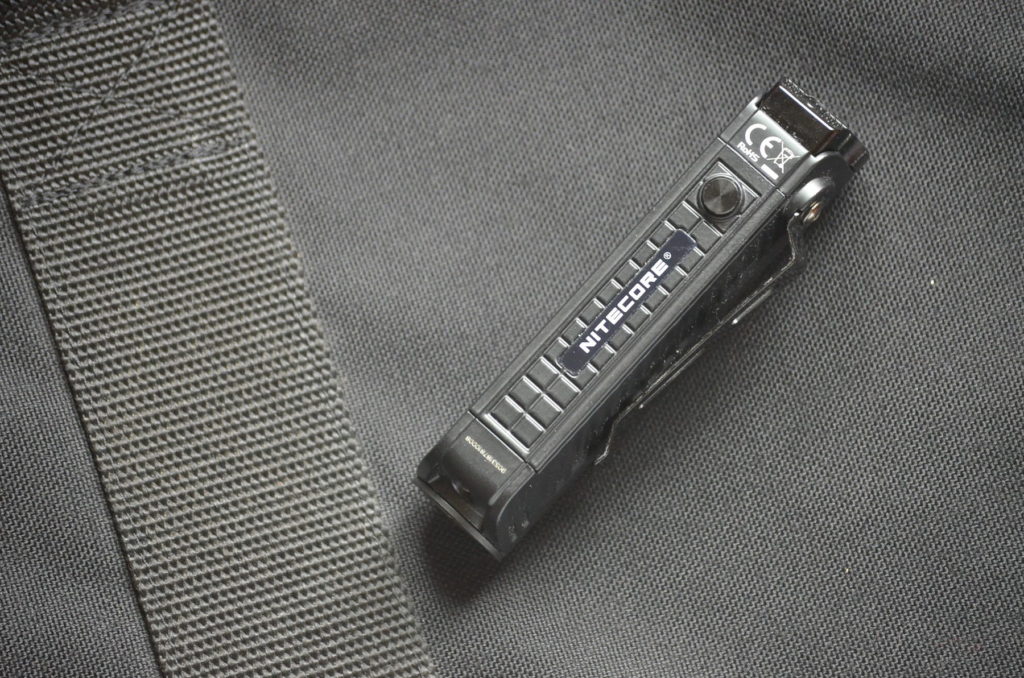
The Nitecore P18 is one of Nitecore’s newest lights in their P Series (Precise Series). It is aimed at the “tactical” market and manages to shoe-horn 1800 lumens into a surprisingly compact package. It also packs a number of interesting ideas that made me jump at the chance to review it.
Overview
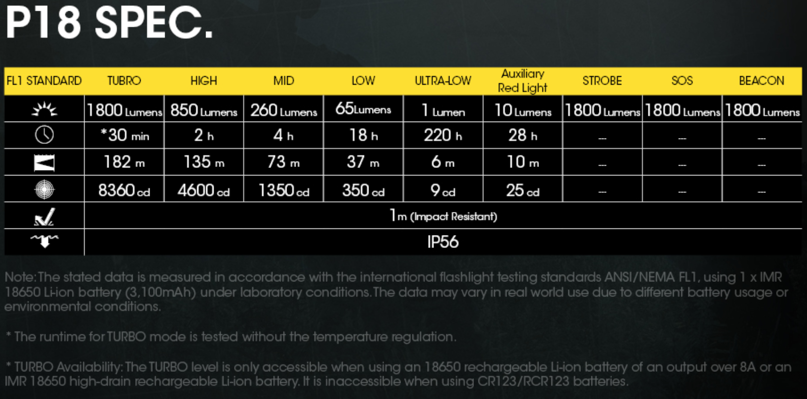
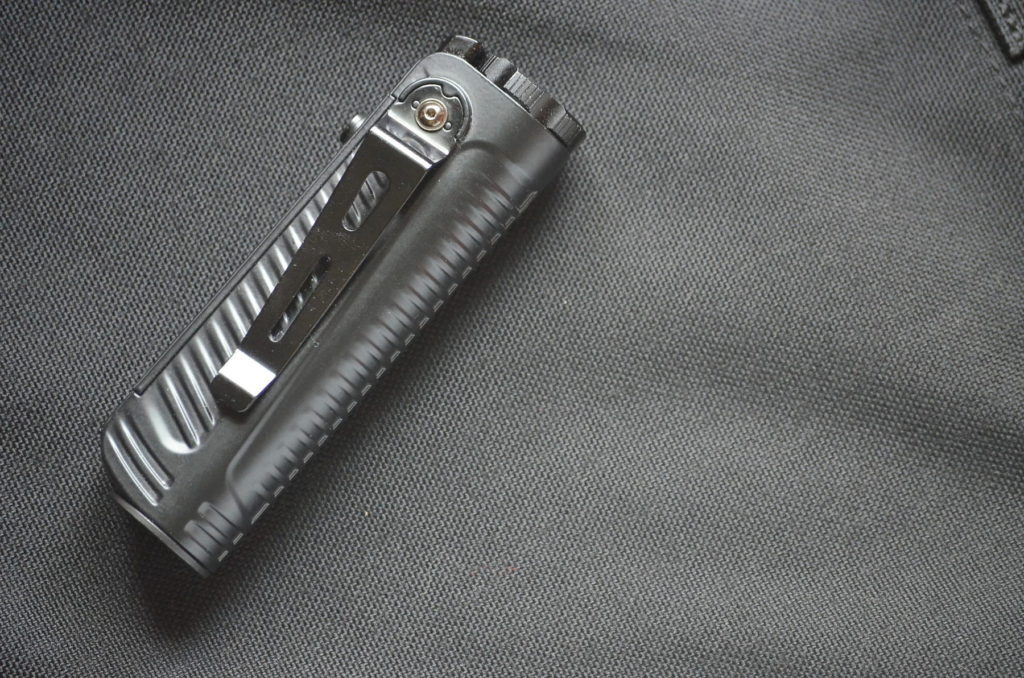
The P18 is just over 4″ long and weighs in at 3.7 ounces. It utilizes a CREE XHP35 HD LED to pump out up to 1800 lumens and is powered by a single 18650 rechargeable battery (included). It comes packaged with a manual, sheath, extra o-ring, and lanyard.
This light boasts a completely silent “tactical switch” and die-cast aluminum construction, both of which really piqued my interest.
Observations from Use
I consider this light to be very ambitious with a number of forward-thinking ideas and concepts. It is VERY different in construction and operation than any light I have ever used so it should come as no surprise that some of the ideas in this light really connect and some could probably be improved.
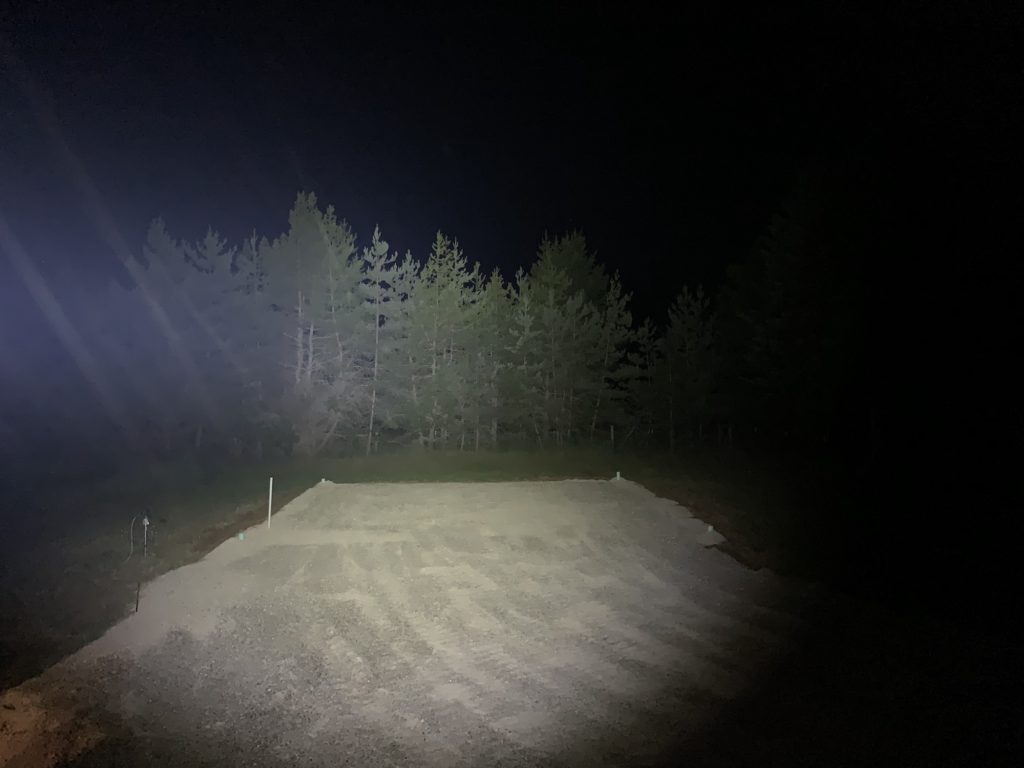
The tree line in this photo is 40 yards away. Turbo mode is activated. This photo does not do the spill beam justice but you can see the intensity and size of the hot spot even at 40 yards.
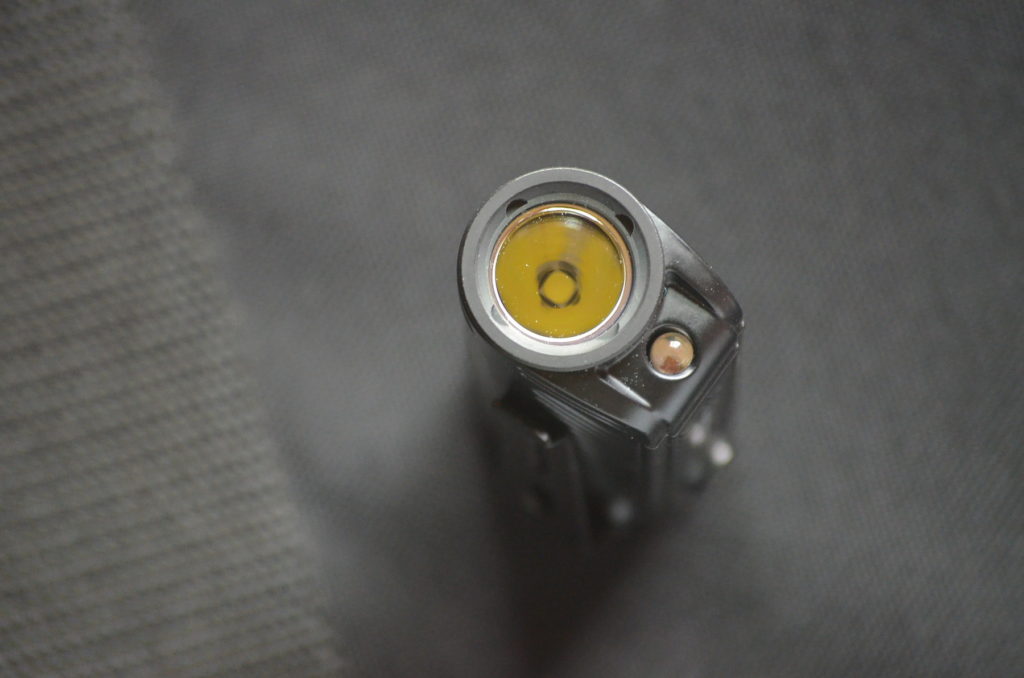
Beam – The P18’s beam is balanced with an emphasis on flood. It has a relatively wide, defined hotspot with an ever-so-slightly donut-like hole in the middle. This “hole” is slightly noticeable on a white wall but it is so slight that you do not see it outdoors. The spill portion of the beam is wide and bright. The engineers at Nitecore appear to have successfully balanced both throw and spill. I find it excellent for all-around use.
Construction – I think the die-cast aluminum body design of this light is very successful. It is a unique shape for sure but it is a shape and construction method with some strong advantages. First, it seems to handle heat very well, staying cooler on turbo mode than other lights I have with even less output. Second, the flat-ish sides allow this light to ride in the pocket VERY comfortably and easy to index which is important given the switch configuration. The overall shape and benefits of the die-cast body are some of my favorite things about this light. I was pleasantly surprised with how much of a difference it made in the overall experience with the P18 and I hope Nitecore continues to play to with this concept with future lights.
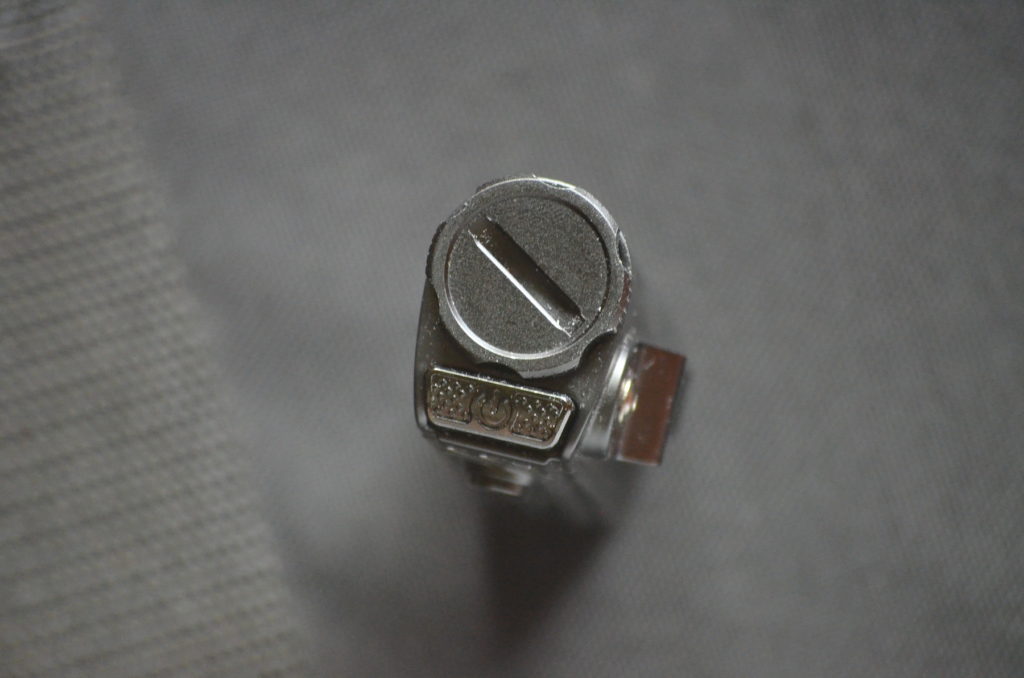
Switches – The P18 has two switches: a small round switch on the side that controls only the red LED and a larger switch that controls all of the white light options on the tail of the light. Both switches are metal so there are no rubber boots to wear out.
The tail switch is shaped roughly like a rectangle and is located directly next to the P18’s battery cap which can make pressing the switch a little awkward unless the light is oriented in your hand correctly (which is easy to do thankfully). It is what Nitecore calls a “silent tactical switch” which means it has no feedback at all – no click and no real change in resistance. This can take some getting used to since half presses are required to move through the UI (user interface) and the line between a half and full press is minimal. I would prefer that the switch offered more feedback as I think that would make the UI a little easier to deal with. As it stands, I think that one of the things holding this light back is the main switch.
User Interface – The user interface of this light is relatively easy to move through, but, as stated above, the switch can feel like it is fighting you at times. I actually like the output spacing between modes but given the complexity, I find this better suited as an outdoor light than a tactical light.
The UI offers 5 levels of white light, 3 flashing white light modes, a red light mode, and a battery charge level indication. All modes are accessed via two switches.
The side button controls the red light and allows direct access to ultralow white light.
Press and hold to activate the red LED.
Press and hold to deactivate the red LED.
Press and hold the side button and tail button to access ultralow mode directly.
Long press (3+ seconds) to view the battery level indicator flash sequence.
The rear button controls numerous white light functions.
From Off:
Press and hold the main button to enter Turbo mode directly (after a short delay). Release to turn light off.
Press and release to enter the last used output mode. The light remains on after release.
Half press to enter last used mode. Release to turn light off.
From On:
Half press to switch between output modes (including Turbo).
Half press and hold to access Turbo mode directly. Release to return to last used output mode.
Full press and hold for 1 second to enter the special modes (strobe/beacon/SOS).
As with most flashlight UIs, they look more complicated on paper than they really are. However, this is more complicated than I would like in a tactical light but the multiple modes and all-around useful beam shape make this handy as a camping/hiking light in my opinion. In fact, I really like it in that role. It is also important to point out that this UI has two important features: direct access to turbo and direct access to ultralow.
Battery – The P18 can be powered by 2x CR123A/RCR123 or 1x 18650 battery. It comes with a flat-top 3100 mAh 18650 cell. The light is limited to cells under 67mm in length. It can operate with longer protected 18650 cells but the tail cap will not fully close rendering the light susceptible to water ingress. The use of CR123A or RCR123 cells will remove access to the turbo mode (high mode replaces turbo for all direct-access functions). The cap will fully close on 2x CR123A cells.
Build Quality – The build appears to be very good on this light. The threads and o-ring came greased from the factory. The tail cap turns smoothly with no grittiness. The LED is well centered in a flawless reflector. There is no dust under the lens. The finish is evenly applied and attractive.
Other Observations – The pocket clip on this light is excellent. It grips the pocket well and, because of the mostly flat sides of the light, it allows the light to carry very comfortably in the pocket. It is not reversible which seems like an unfortunate oversight.
Wrap Up
Nitecore markets this light for the “tactical” market and I think that is a miss. The switch and user interface conspire to make it just a bit too complex for that market. The switch doesn’t offer enough feedback to allow the user to work within the UI effectively. However, I find this to be an excellent light for outdoor use and I applaud a UI design that offers direct access to both the brightest and dimmest white light settings.
I was surprised at what a positive functional difference the shape and unibody, die-cast construction make. I hope that Nitecore continues to innovate this unique shape and construction method.