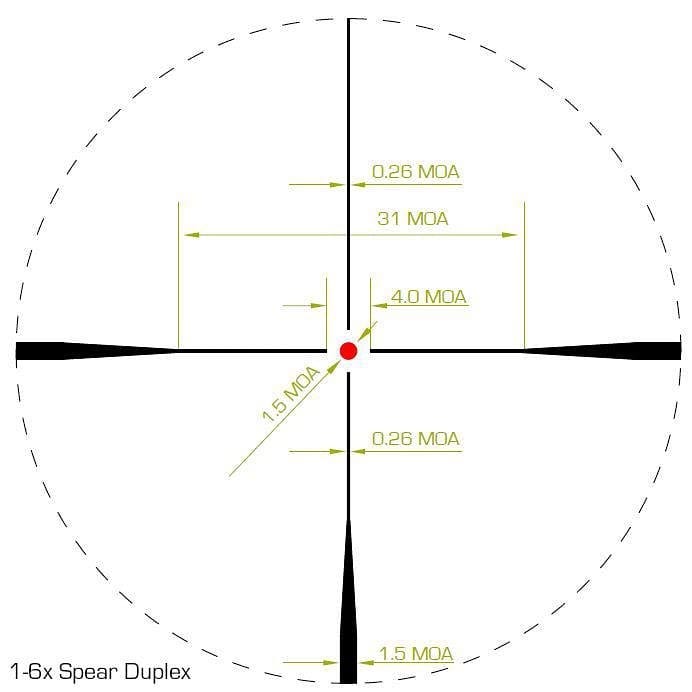
Swampfox Optics has rolled out a brand new reticle option in their Tomahawk LPVO line and it is one that really bucks the trends of heavy, floating, horseshoe reticles.
The new Spear Duplex features a floating central dot aiming point and cross hairs with heavy outer edges for the 3, 6, and 9 o’clock crosshairs (similar to a German #4). The central dot size varies across the Tomahawk line (2 MOA in the 1-4X, 1.5 MOA in the 1-6X, and 1.3 MOA in the 1-8X). The crosshairs are offset from the central aiming point by 2MOA (4MOA from crosshair to crosshair) which makes for a useful bullet drop and ranging reference.
This reticle could be a good option for a number of users who require a simple sight picture and a zero for maximum point-blank range. With SBRs and AR pistols at an all-time high in popularity, this reticle could be a great choice for someone wants to add an LPVO to their shorter barreled firearm that won’t match with many of the BDC style reticles on the market. It could also be a great option for hunting and field rifles that will rarely be shot at more than 300 yards.
The Spear Duplex is available now across the entire Tomahawk LPVO line.
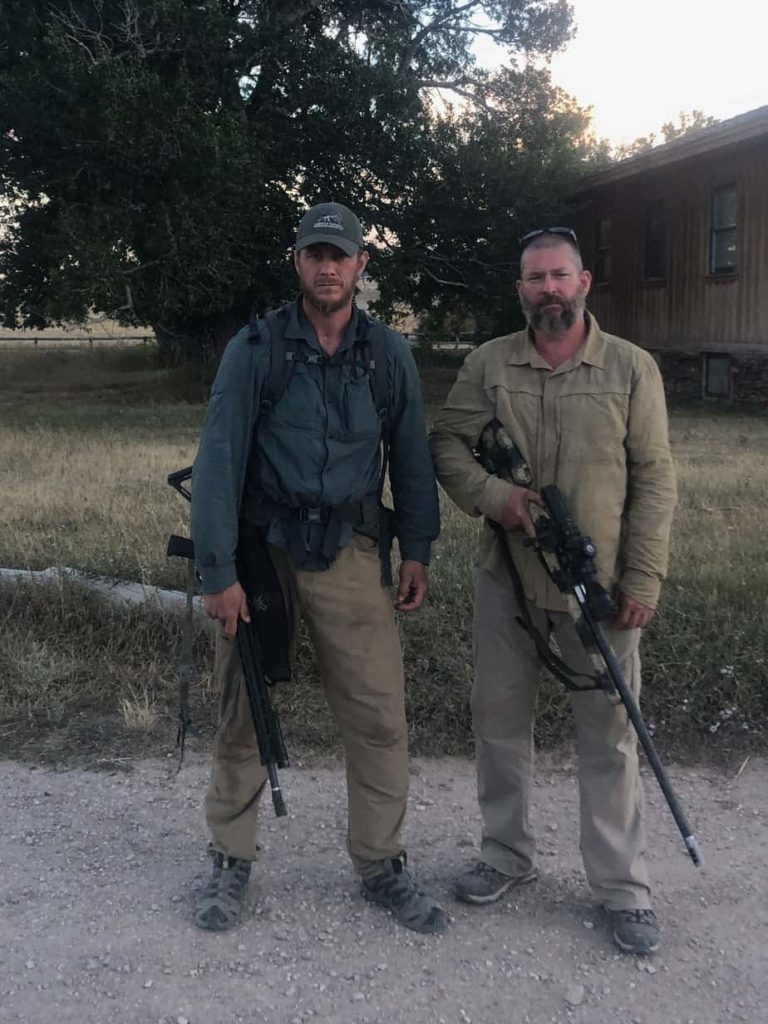
Today’s guest post is penned by Bill Rapier of American Tactical Shooting Instruction LLC (AMTAC Shooting). Bill is “retired after twenty years in the Navy, where his duty assignments included several years at SEAL Team 3 and over 14 years at Naval Special Warfare Development Group. Positions held include assaulter, breacher, sniper, team leader, troop chief and military working dog department senior enlisted adviser. He has always been an avid shooter and is heavily involved in combatives.” Now he is lead instructor at AMTAC Shooting and designer of the AMTAC Blades Northman.
For the last two years I have done the Sniper Adventure Challenge Race. It has been a great way for me to have a goal to train for and to keep pushing the boundaries with training, fitness, shooting and gear. New for this year, one of my local friends (Jake Hoback) and another local buddy were going to team up and do the race. This was great for me as it gave me other dedicated training partners.
Eventually one of the guys had to drop out so I started trying to find my buddy Jake a partner for the race. As I started going down the rolodex of guys to call as potential race partners for him the conversation would usually go something like this: “So, are you up for doing a race next month? You need to be prepared to walk 40-50 miles, carry a 40-50lbs ruck, shoot out to 1500 yards, be proficient with pistol, navigate with map and compass (no GPS) and be prepared to perform a wide variety of other tasks.”
Usually what followed was a long pause, a “maybe”, a “next year” or a “no” with laughing. As I was talking with my friend and race teammate “Chainsaw” about my frustration with the lack of guys that have the willingness, ability, time, and resources to do the race he said, “Yeah, that is modern minute man stuff”. That got me thinking.
The term “minute man” comes from the time just prior to the American revolution. Basically, the minute man was someone skilled at arms with a base of physical/ martial prowess, able to be “ready to go” in a minute. This is what the National Parks Service has to say about the minute man:
Old school minute man
Minute men were different from the militia in the following ways:
While service in the militia was required by law, minute men were volunteers.
The minute men trained far more frequently than the militia. Two or three times per week was common. Because of this serious commitment of time, they were paid. One shilling per drill was average. Militia only trained once every few months (on average) and were paid only if they were called out beyond their town, or formed part of an expedition.
Minute men were expected to keep their arms and equipment with them at all times, and in the event of an alarm, be ready to march at a minute’s warning – hence they were called “minute men.”
What does a “modern minute man” look like? What would the standard be? Should all American men be able to to meet the “modern minute man” standard or are there different levels, standards or roles that we are called to fill?
As I started digging deeper with this concept and discussing it with friends and mentors, it started to make sense that it should be broken up in to different levels with the “modern minute man” just being one of them. Here is a breakdown of the different levels and the standards that should be associated with them:
Responsible Armed Citizen (RAC)
This is the baseline that every American man should be at. The RAC standard is:
A high level of situational awareness
A foundational ability to fight/ use a blade,
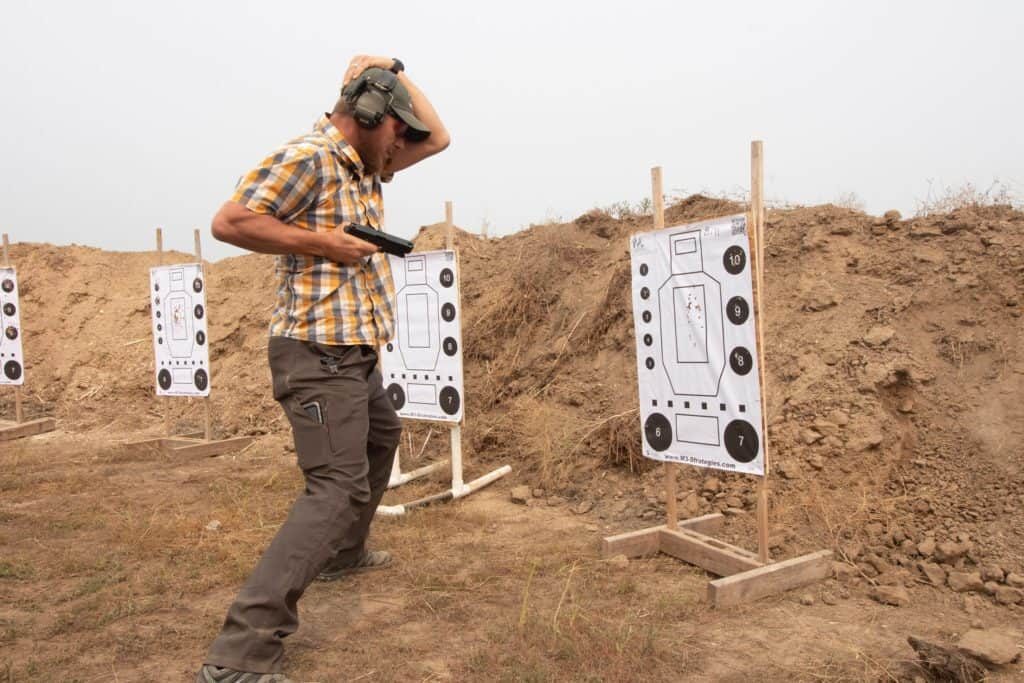
A baseline level of competency with a pistol (perform the Amtac Shooting Pistol RMD or similar task)
A commitment to carry your tools.
Controlling hands and feeding with a bladeFramingSpear elbow, weapons retention shooting position
Follow Me (FM) :
Still working on a better name for this as the infantry has been using this term for a long time.
Be proficient with a carbine (Amtac Shooting Carbine RMD or KD4 Carbine hat qual)
Have the ability to follow someone, walking for 6 miles while carrying your carbine, 6 mags and water (10-15 lbs)
Be physically in shape enough to run your carbine after the walk
Working carbine drills with plate carrier
High kneeling shooting position
Roll over prone shooting position
Modern Minute Man (MMM):
Be able to navigate 20 miles while carrying a 25-30lbs load
Have a base level of bushcrafting skills
Have a base (line of sight) comms ability
Be able to shoot out to 600-700 yards.
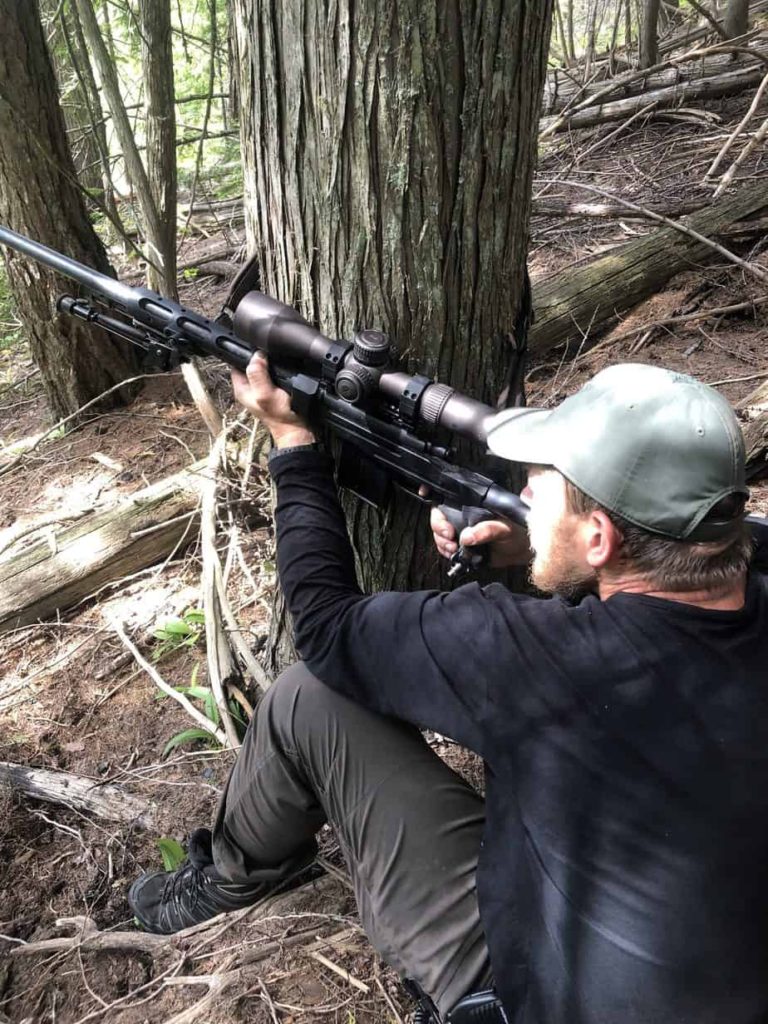
Hill People Gear Umlindi Pack with heavy Recce strapped to back
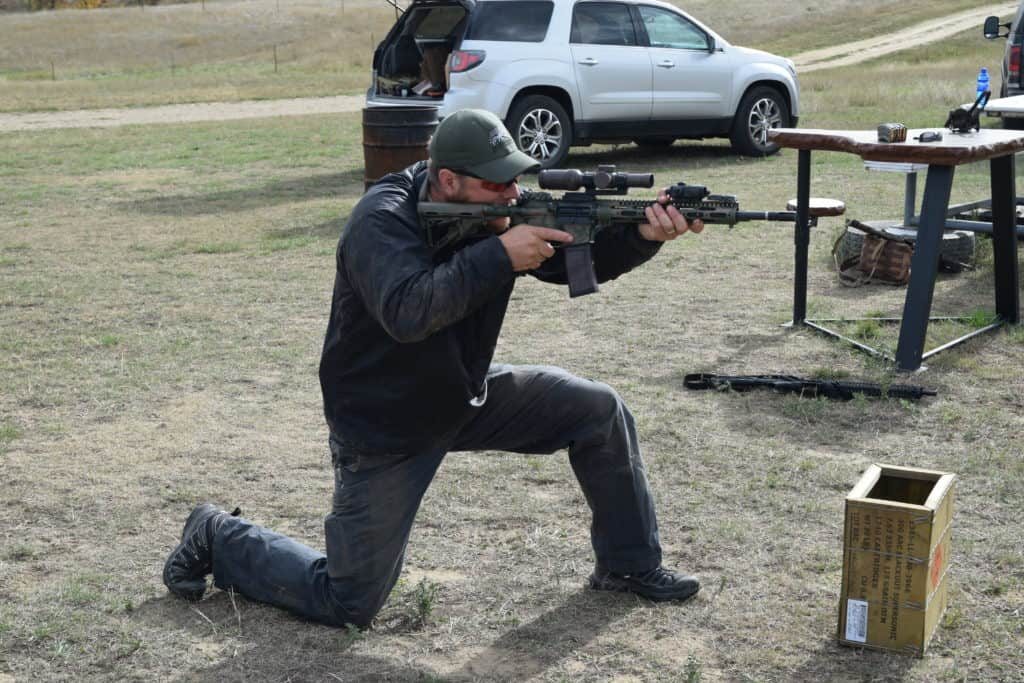
Improvised shooting position, sling wrapped around the tree, engaging target at ~800 yards.
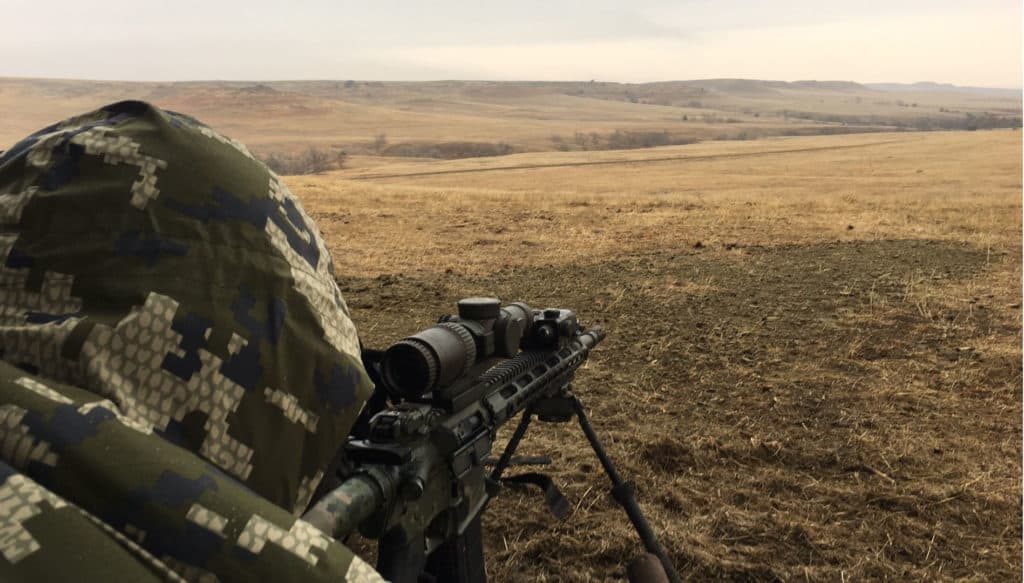
Working yard lines with a hybrid carbine
Jedi Modern Minute Man (JMMM):
Be able to navigate/ walk 40-60 miles
Carry 40-60lbs
Shoot out past a mile
Make your own ammunition
HF comms ability
Ability to work/ travel/ live in the winter in the mountains
Snowmobile supported kneeling, shooting BC steel around 500 yards with a Recce rifle.Medium ruck day (50 lbs) running a BPT Outback chest holster to ensure a fast draw stroke while wearing a ruck waistband.Amtac Shooting Fall Course 2018. Guys working land nav and field shooting positions. Terrain was challenging.
Where do you fall out in these standards? Where do you want to fall out? None of these standards are easy and none of the standards once achieved do not require continued training to maintain. Regardless of if you are just starting this journey and want to achieve the RAC standard or if you have been doing this for years and have your sights set on the JMMM standard the only way you will get there is by deliberate intensive training. More to follow on training and gear as it relates to the MMM concept.
Amtac Shooting Fall Course 2018. Improvised shooting positions, men honing modern minute man skills.
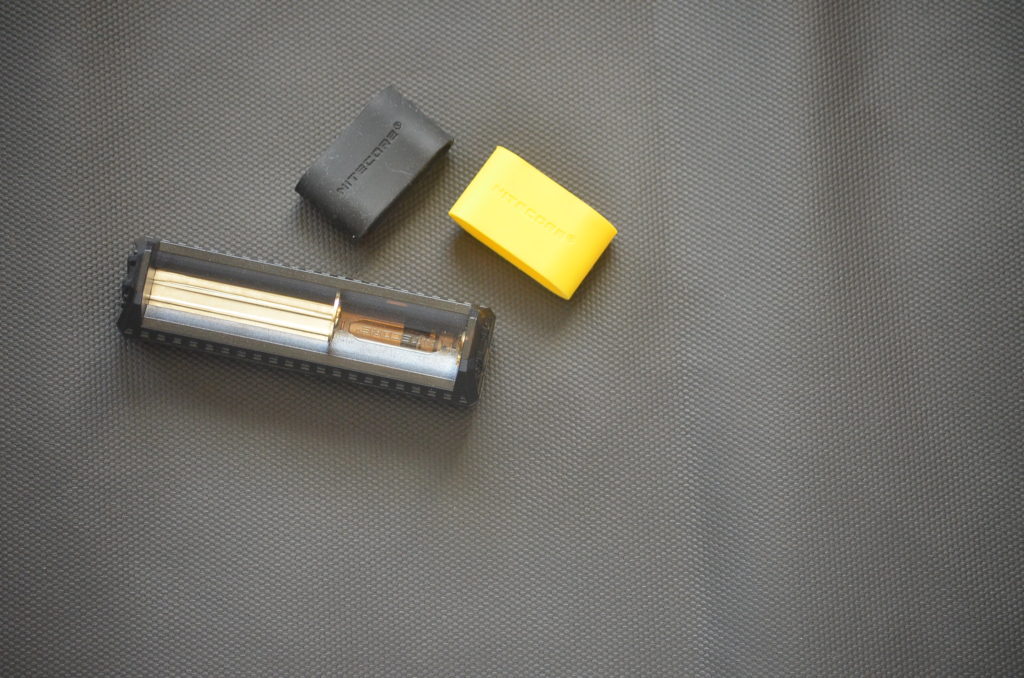
The Nitecore F1 Charger doesn’t look like much but it is nothing short of amazing when it comes to portable power. Its main function is as a battery charger for lithium batteries like 18650s and 16340s (RCR123) but it can also serve as an ultralight battery bank. If all that wasn’t enough, it supports through-charging which makes it a valuable companion to any portable solar panel. It does all that in a very compact, 1-ounce form factor. It’s basically the ultimate charger for the outdoorsman.
Overview
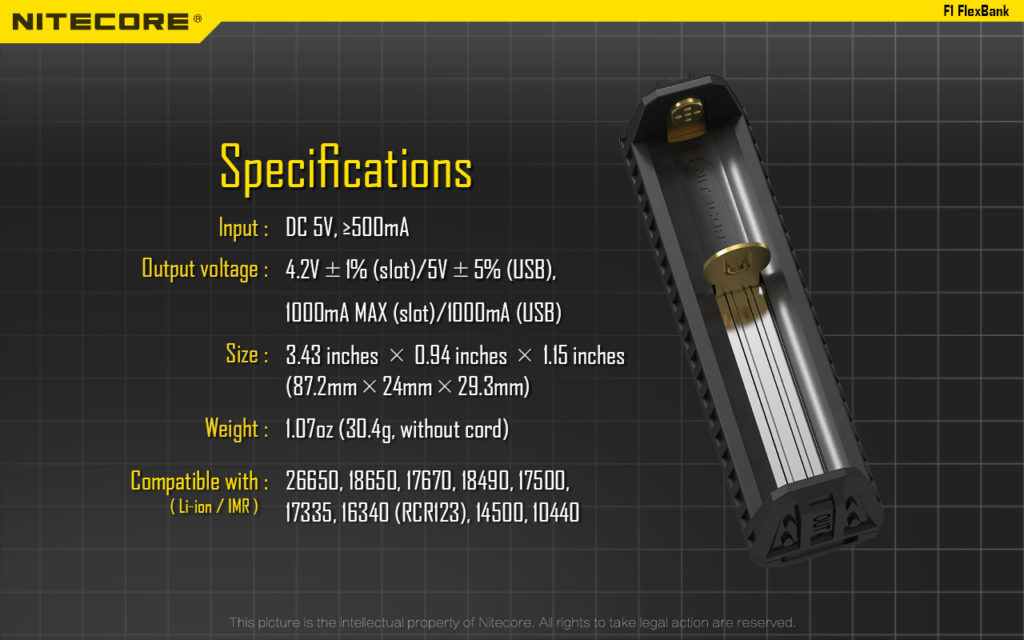
The Nitecore F1 is made from lightweight but strong polycarbonate with a spring-loaded, sliding battery contact that supports a number of common lithium batteries (26650, 18650, 17670, 18490, 17500, 17335, 16340(RCR123), 14500, 10440). It has three tiny LED indicators that are used to read out the voltage of the battery and indicate status for the charger. It also comes with 2 rubber bands (you only need one, the other is a spare) that are used to ensure the battery stays in place.
The F1 features a standard Micro USB in port allowing it to be powered by any USB power supply like wall warts, computers, solar panels, power banks, and more. It also has a standard USB out port for its power bank functionality. It allows the F1 to draw power from a battery and feed it to another device like a cell phone.
The F1 also supports through charging meaning that it can charge the battery and power the USB out port at the same time. This is key to its solar utility (more on this later).
Observations from Use
If you were on a really tight budget and didn’t mind charging just one lithium battery at a time, the F1 would actually serve well as a very basic home battery charger. It can even read out the voltage on a battery and tell you it charge status based on its simple LED display. It works just as well in the field or in a vehicle. It is a simple but capable charger.
The F1’s ability to be used as a power bank really adds to its backwoods versatility. It will provide 5 volts, .5 amps via its standard USB out. That is relatively slow for charging something like an iPhone but it will get the job done. I know some ultralight hikers have even used it successfully in place of heavier traditional power banks… just be sure to carry extra 18650 batteries!
All of the above is great but the F1 really comes into its own when used with solar panels where it addresses two major issues. First, most chargers require somewhat consistent power levels or they produce a charge error and stop charging. This is obviously not ideal for solar where the power that the panel provides fluctuates constantly based on the solar conditions. The F1 is different. I have never been able to produce a charge error with it. It seems to happily keep charging, hanging on at just a trickle, when clouds roll in. Then it recovers seamlessly when the solar conditions improve. If your panel is producing power, the F1 seems to be able to put it to use.
The second solar issue that it solves is with devices that are finicky about constant power levels when charging. For instance, many smartphones like to have a constant power level when charging. If the power provided by the power drops it will likely cause an error and the phone stops charging. If this happens while you aren’t babysitting the solar panel, you can miss out on a lot of valuable charging time. The F1 can be placed inline between your panel and your phone (or other devices). The panel charges the battery and the battery provides a consistent amount of power to the phone. The power never sags (unless you deplete the battery) which ensures there are no charge errors. It acts very much like the batteries in a home-based off-grid solar system. It won’t be the fastest charger you have ever used but it can provide some peace of mind.
Alternatives
There are a couple of other chargers that I have used outdoors including the Olight UC Magnetic Universal Charger (click to see the review) which has the advantage of working with NiMH cells and an amazingly compact form factor but lacks the solar utility or power bank functionality.
Additionally, I have used the larger XTAR VC2S in a similar role. It can charge two batteries at once and also acts as a power bank. This is a very full-featured charger but it is significantly larger than the F1. It is somewhat solar compatible but long interruptions in sunlight can produce charge errors from which the charger will not recover without intervention. Still, when used with something like a Suntactics Solar Panel with their very smart automatic restart functionality (more on this in a later article), this can be an excellent charger/power bank for extended trips.
Note: It can be tempting to try the Nitecore F2 which is similar but accepts two batteries. However, it is not nearly as solar compatible so I found it to be far less useful.
Wrap Up
The Nitecore F1 is a 1-ounce wonder. It’s a good battery charger. It’s a passible and ultralight power bank. It’s indispensable for backcountry solar. It also only costs about $10! If you are using a solar panel in your hiking gear, this can add some great capability and flexibility.
Where to Buy:
I doubt many of you will be able to find the Nitecore F1 Charger in a brick and mortar store. Ebay typically has competitive prices on the F1 as do many flashlight/battery websites. Be mindful of counterfeit Nitecore items. When I purchased mine, Amazon had the best price with shipping included: Nitecore F1 on Amazon
Do you have a gear or concept recommendation that fits the On Foot, Off Grid series? Tell us about it in the comments below or drop us a line on the Contact page.
S2Delta sent me one of their new 1-4×24 Carbine Scopes to review. I turn down several budget optic reviews yearly because of obvious quality issues or a lack of anything original. However, this one grabbed my attention because of its unique reticle that includes several elements that I like and its incredible pricepoint. I am so glad I signed on for the review because it turns out there is a lot to say about this optic and it might just be the new budget LPVO king.
Overview
The S2Delta 1-4×24 Carbine Scope is in many ways a typical Asian OEM optic. S2Delta designed the reticle, specified the features, and then turned it over to a factory in China for production. This is quite common among affordable optics and not a bad thing as we have more and better affordable optics than ever because of it.
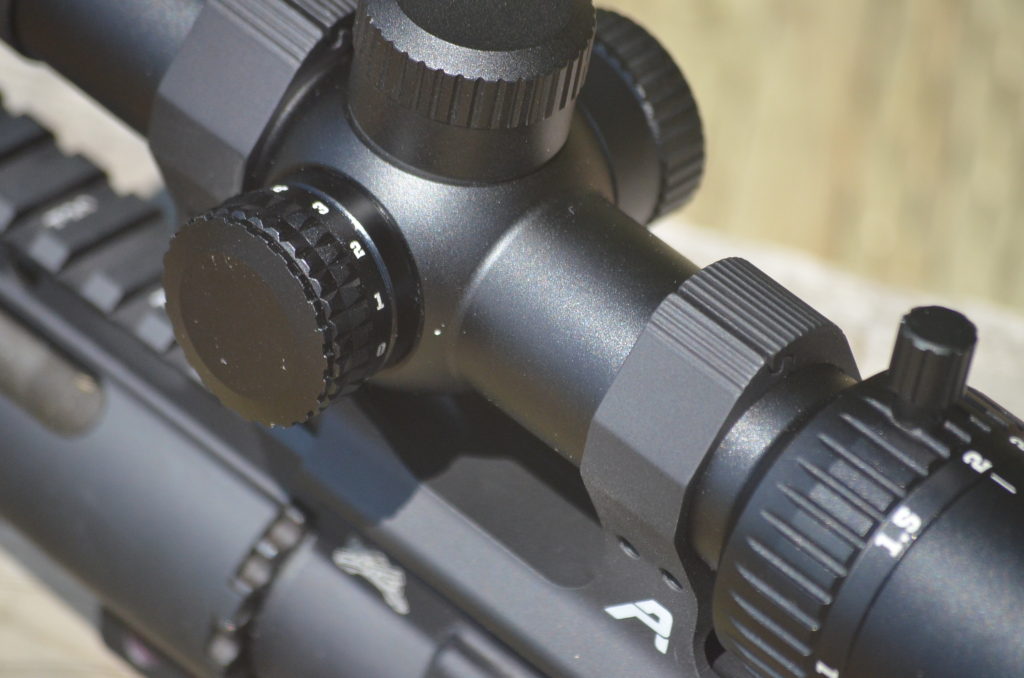
The Carbine Scope has a 30mm, one-piece tube. The entire optic, including the very nice knurled turrets (a very nice touch versus the mostly low profile plastic turrets at this price-point), is made from 6061 aluminum. The turrets are finger adjustable (1/2 MOA) and capped. The optic is nitrogen purged for fog-resistance.
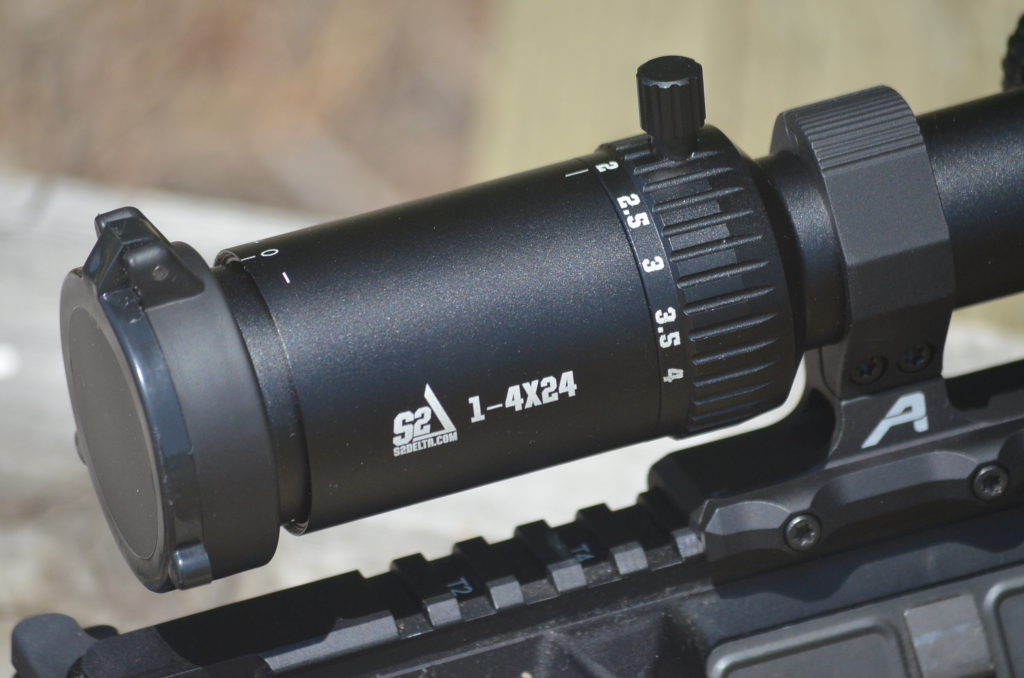
The lenses are fully multi-coated. S2Delta tells me that, “The coatings are aimed at reducing glare/reflection, fog, and scratches.” The proprietary second focal plane reticle offers ranging and BDC out to 600 yards. It is etched and illuminated. The illumination offers 11 settings and it is bright though not “daylight” bright.
The Carbine Scope also includes a built-in throw lever for adjusting the magnification ring which is a very nice touch. It comes packaged with a good quality lens cloth, decent scope caps with a cool trick (more on these later), and Sony 2032 battery.
Observations from Use
Before I get too far into this review, I should set the tone. It may sound like I am gushing but that is only because I am genuinely impressed with this optic to the point that I have ordered another one. This optic made me change my tune from, “How good can a $150 optic be?” to, “How can a $150 optic be this good?” I should also point out that it isn’t just $150… It’s $150 shipped, via Amazon Prime. This optic is extremely accessible.
I should also state that, while I have already mentioned the price several times, I do not want to fixate on it too much. I think it is a good optic at 3-4x the price. In fact, it outperforms some optics that I own, which cost more than 6 times $150, on features and optical quality. This isn’t just a good optic for its price. I think it is just a good optic.
Now onto some more relevant observations from the time I’ve spent with the S2Delta 1-4×24 Carbine Scope…
Build Quality – The build quality appears to be on par with many similar optics but with some noted improvements. Like many Asian produced LPVOs for the “tactical” market, it has a reassuring heavy-for-size feel. It feels durable.
The Carbine Scope features excellent turrets that are an improvement over most optics at this price point. You’ll find large, nicely knurled aluminum, well-marked, finger-adjustable turrets under the caps. These turrets are more like exposed target turrets than the kind of low profile, plastic turrets typically hidden under the turret caps on a budget scope. The audible and tactile clicks that these turrets produce punch way above their weight class. According to S2Delta, these turrets are something that they wanted to get right and I would say they did. They are excellent.
This optic passed an initial box test which also provided a baseline for later durability testing. I mounted the scope in an Aero Precision Lightweight Mount and I realized early on that most of the typical durability testing would be more of a test of that mount than the optic itself. Fortunately, Ivan at Kit Badger gave me the idea to remove the optic from the host, drop it in the bed of my truck, and then start driving the National Forest roads near my home. That is just what I did for just over 12 miles and then immediately retried the box test. The optic passed and other than some finish wear the corners, it seems fine. Even the included scope caps are still functional.
This is a sample size of one so maybe this isn’t typical. However, given the durability seen from other OEM produced optics, I am not really surprised by these results… pleased, but not surprised.
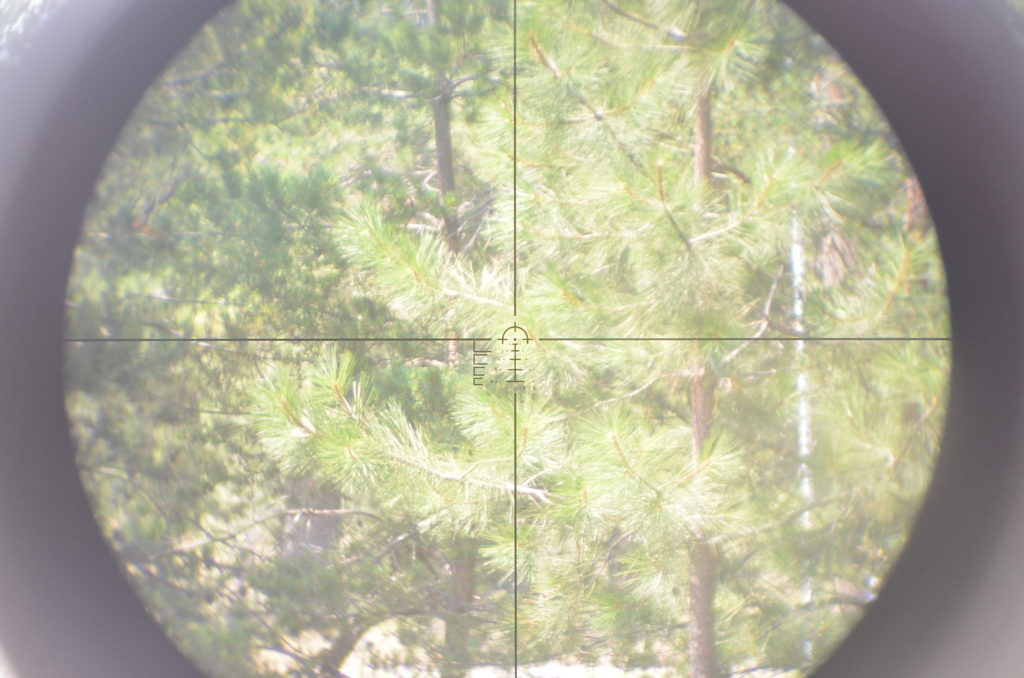
Optical Quality – The folks at S2Delta tell me that optical quality is another element on which they majored in the design phase. I would say the optic quality is very good – better than expected by a large margin. On the plus side, I find it to be bright and quite clear. In my backwoods resolution tests, I was able to resolve individual pine needles on trees out to 75-100 yards in strong lighting (that is some backcountry science for you). It exhibits much less “fisheye” effect at 1X than any other 1-4X optic I own including some costing more than 6 times as much cash. I would say it is easily the truest 1x I have seen on a budget optic.
If you are used to premium glass, you won’t confuse this for truly premium glass. It shows some blurring at the extreme edges of the field of view and, as you would expect, some chromatic aberration. That sounds harsh without context. In context, this glass is far better than any budget optic I have used. It is better than many mid-range optics I have used. The glass on this optic will not hold you back. It is good in a vacuum and incredible at its price.
The tree line shown is 40 yards away. My photography does not do the optical quality of this scope (or any scope) justice. These photos are darker and exhibit much more blurring than the optic does in-person.
Reticle – As I said early in the review, the reticle is part of what grabbed my attention. The current market is laden with thick horseshoe/dot reticles that float in the center of the field of view. These reticles grab the eye but also occlude a lot of the view through the optic with their heavy, eye-catching elements. There are other ways of centering the eye; older ways that many reticle designers seem to have forgotten, like crosshairs.
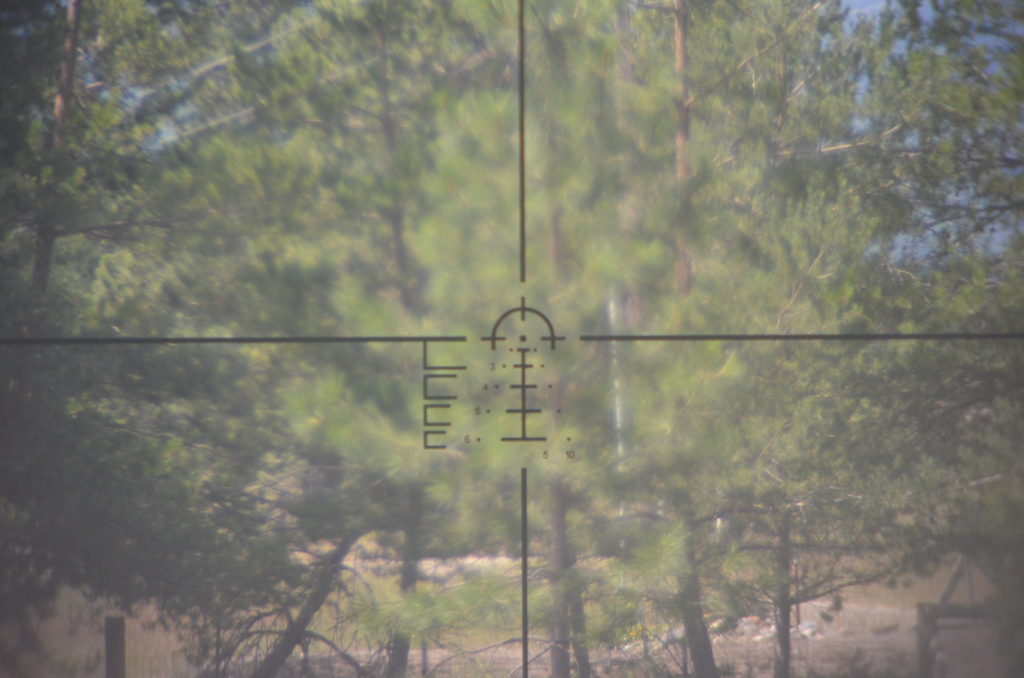
S2Delta’s reticle has a horseshoe/dot design with a BDC extending below it. They have eschewed the heavy ring in favor of full, thin crosshairs that serve to bring the eye into the center of the reticle. I like this because it keeps all of the elements of reticle very thin which is conducive to precision and occludes less of your view. This approach really stands out in the current market and it works, though I do think it might have been even more eye-catching if the outer crosshairs were made slighter heavier like you might see in a German #4 or duplex reticle.
This image is focused on the reticle to show it in detail. This is why the background appears so blurry.
The BDC and ranging elements are also well-executed. The BDC provides aiming points for 200, 300, 400, 500, and 600 yards when you zero the optic at 100 yards. It also provides wind holds for 5 (end of the stadia lines) and 10 mph (dots) crosswind.
Ranging takes place on to the left of the reticle. There are 4 brackets that represent an 18″ width and 11″ height at 300, 400, 500, and 600 yards. The 18″ width can be used to range on an average man’s shoulders and the 11″ height corresponds to the average measurement from the clavicle/shoulder line to the top of the head. Ranging is quick and intuitive though you do have to move back and forth between the ranging brackets and reticle instead of having everything built into the reticle.
Other Observations – This optic exhibits generous eye relief and a relatively forgiving eye box. The eye box is more forgiving than anything else I have tried in this price range. I measure the eye relief at more than 4″ throughout the magnification range.
There are a number of really nice touches that really add to the experience with this optic. The built-in throw lever is a big bonus and great savings over other optics that require an aftermarket or accessory lever.
The included scope caps seem to be of decent quality and actually have a really neat trick. The diopter adjustment ring is fluted and the ocular end cap is molded to mate with these flutes. That means you can set your diopter adjustment and then orient the cap so that it is vertical. In that configuration, the scope cap can’t rotate independently of the diopter and so it serves as a witness mark for your diopter adjustment. I’ve never seen that before but I definitely like it.
Wrap Up
Let me lay out the value proposition for you. The S2Delta 1-4×24 Carbine Scope delivers a lot for the money: above class optical quality that will not hold you back, a well thought out and unique reticle with BDC and ranging elements, durable construction, impressive turrets, and thoughtful touches like a built-in throw lever and clever scope caps. It is definitely not lost on me that this is a sample size of one but I can’t help but be very impressed by this optic… very, very impressed.
This is the best sub $350 LPVO that I have laid hands on and it might be the best there is. This could be the new king of budget low power variable optics.
You can check out the 1-4×24 Carbine Optic at the S2Delta website: S2Delta.com
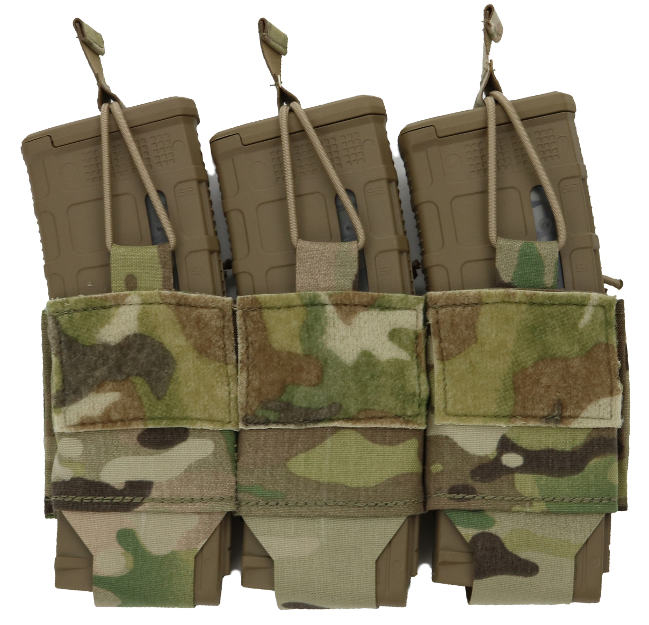
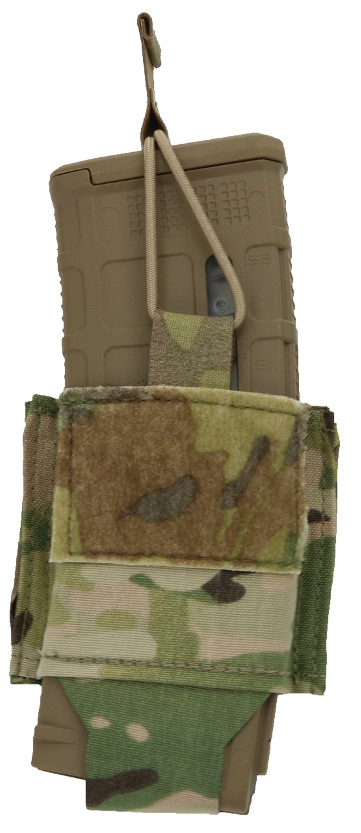
The Beez Combat Systems APTUM PC (plate carrier) system was introduced recently. As part of that release, we are covering many of the available options for this new PC. This installment covers the magazine insert options that the end-user can select based on their mission.
In addition to the obvious use of MOLLE compatible pouches, the APTUM features a “kangaroo pouch” in the front, behind the cummerbund flap area for magazine carriage. This hook and loop pouch can be configured with their APTUM Magazine Inserts to carry up 1, 2, or 3 magazines.
The kangaroo pouch/insert set up offers some advantages. The inserts can be used to augment the capacity of regular MOLLE compatible mag pouches or they can be used as a primary magazine carriage option that will lay mostly flat when not in use.
These inserts, available in 1, 2, and 3 magazine models, may also be available with other plate carriers.