MagPod has come a long way since I put hands on one of the early prototypes. The prototype that I handled impressed me enough to follow the multi-year development of the MagPod closely. Now that I have the production versions in hand, I am not disappointed.
Overview
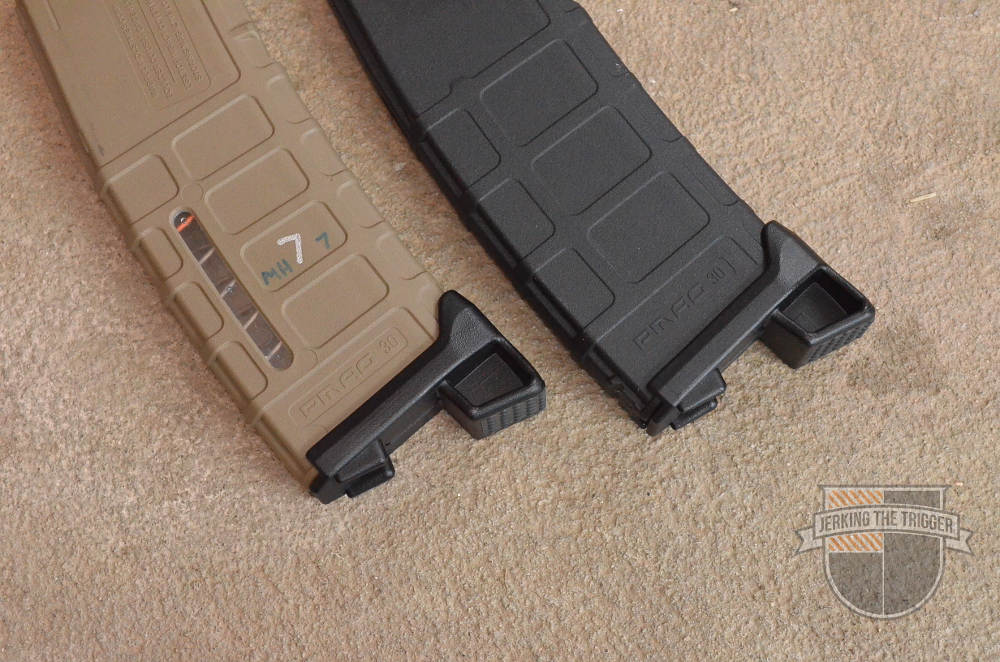
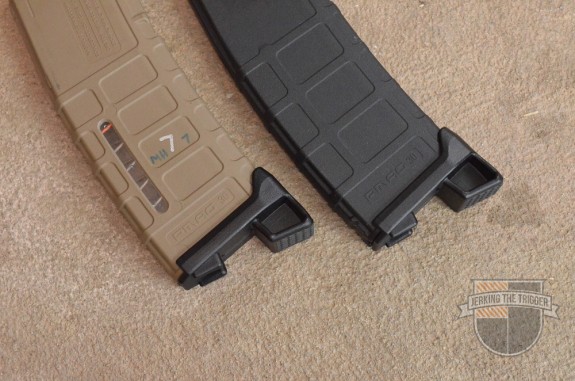
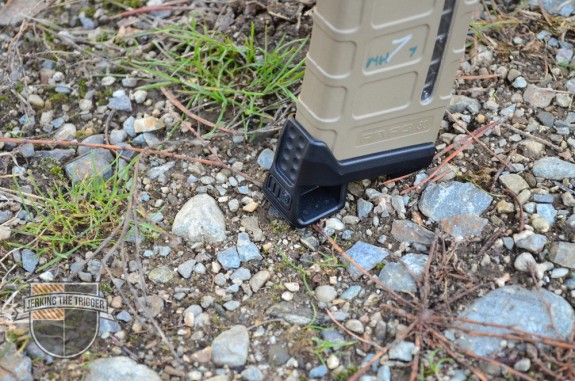
MagPod is a drop-in base plate replacement for the current PMAG 30 Gen M2 MOE Magazines and previous versions of the PMAG 30 (it is not compatible with the GEN M3 PMAG). It is designed to make using the magazine as a monopod more stable and to aid in gripping the magazines.
Background
To appreciate the MagPod, you really need to have some background in using the magazine as a monopod. This is not a new technique and, in spite of what the goober behind the gun counter told you, it won’t make your self destruct.
The 5.56×45 NATO (and .223 Remington) cartridges have tapered sidewalls which necessitates that the magazine have a slight curve to accommodate the stacked cartridges. The end result of the curved shape is that only a small portion of the base plate toward the rear of the magazine contacts the ground when it used as a monopod and the rifle is held level (or near level). You can create a very stable shooting position this way but with only small portion of the magazine on the ground, it is not as stable as it could be.
Technique and Observations from Use
When I go prone without the MagPod installed, I drive the magazine into the deck and provide fairly aggressive rearward and downward pressure on the fore end of the rifle. This locks everything down fairly but there are two issues. The first is that controlling recoil and stability is largely influenced by how much pressure I exert on the hand guard with my support-side hand/arm which means I am muscling the carbine a bit. Additionally, since the magazine is only resting on a small fulcrum point, the gun tends to rock a bit under recoil. The monopod technique more stable than an unsupported prone but not as stable as it could be.
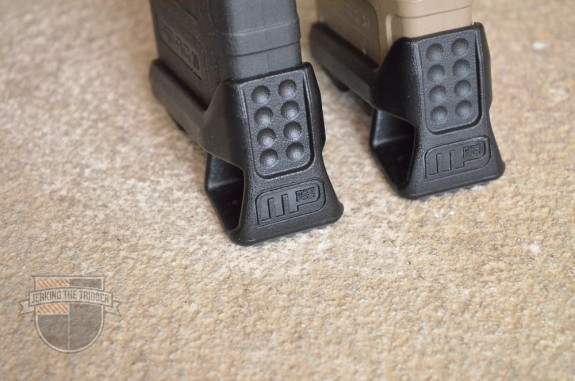
The technique changes in an intuitive way when you install the MagPod. By intuitive, I mean that I didn’t really have to retrain myself or anything like that. The base plate is now supported at both the front and rear which adds stability. Additionally, the shape of the MagPod and its textured rubber pad on the bottom, allow the shooter to load it lightly – not unlike what you would do with a bipod. “Loading” a bipod, or in this case a MagPod, means that you lean into it slightly. In order for it to work, the bipod or MagPod must be able to bite into the shooting surface enough to resist your weight, effectively locking the rifle in place. Loading the MagPod adds to the stability and takes some of the strain out of the equation since you are now stabilizing the rifle with your own weight instead of the muscles in your support arm. The result is a more stable rifle with less muzzle rise and sits only a small fraction of an inch higher than it would without the MagPod. .
One of my initial concerns with the MagPod was that it would only be stable when the rifle was leveled. I am happy to say that on ground that has some give, you can aim up or down several degrees before it feels like the magazine is lifting off the deck. Hard surfaces are less forgiving but even if it does lift, it is no less stable than using a magazine without a MagPod installed.
When you first purchase your MagPods, I highly suggest dragging out all your gear and checking to see how your MagPod equipped magazines will interact with your magazine pouches. If you use open top pouches or hard carriers, you will see no real change. If you use pouches with bungee retention, you will no longer be able to just slip the retainer off the mag to one side or the other since the “legs” on the MagPod will trap the bungee retainer. You will have to lift the bungee slightly to remove it. If your flap covered mag pouches lack sufficient adjustment for flap length, it is likely that the MagPod equipped magazines won’t fit. A little bit of dry fire and range time should get you sorted out in short order.
When it comes time to grab a magazine from its carrier, you will find that your little finger tends to wrap around the front leg on the MagPod, enhancing grip. This works for me whether I am using a “beer can” grip or running my index finger along the front of the magazine. If you have especially deep magazine pouches, the front leg works as a finger loop for digging out the magazine.
I like that the front of the MagPod features a series of series of eight small divots. These are to be used to mark your magazines with an identifying pattern in case you find yourself on a range full of MagPod shooters with magazines littering the ground around you. I rarely shoot by myself and most of the people I shoot with use PMAGs so I have been marking my baseplates with a pattern using a paint pen for years. I can continue that practice with the MagPod.
Wrap Up
MagPods work. They add stability when shooting from the prone position. You will need to check them with your gear but you should have no problem making them work with most magazine carrying methods.