There are products that I come across once in a great while that display an exceptional attention to detail. These are the products that make it obvious that the manufacturer gave thought to even the seemingly mundane details. Every choice, from the materials used, to the design of certain details, to the parties involved in the creation of the product, were scrutinized and can be explained so thoroughly that, while there may be differences in preference, you can’t be anything but impressed. The ROSCH Works SL1 Sight Light is one such product.
Overview
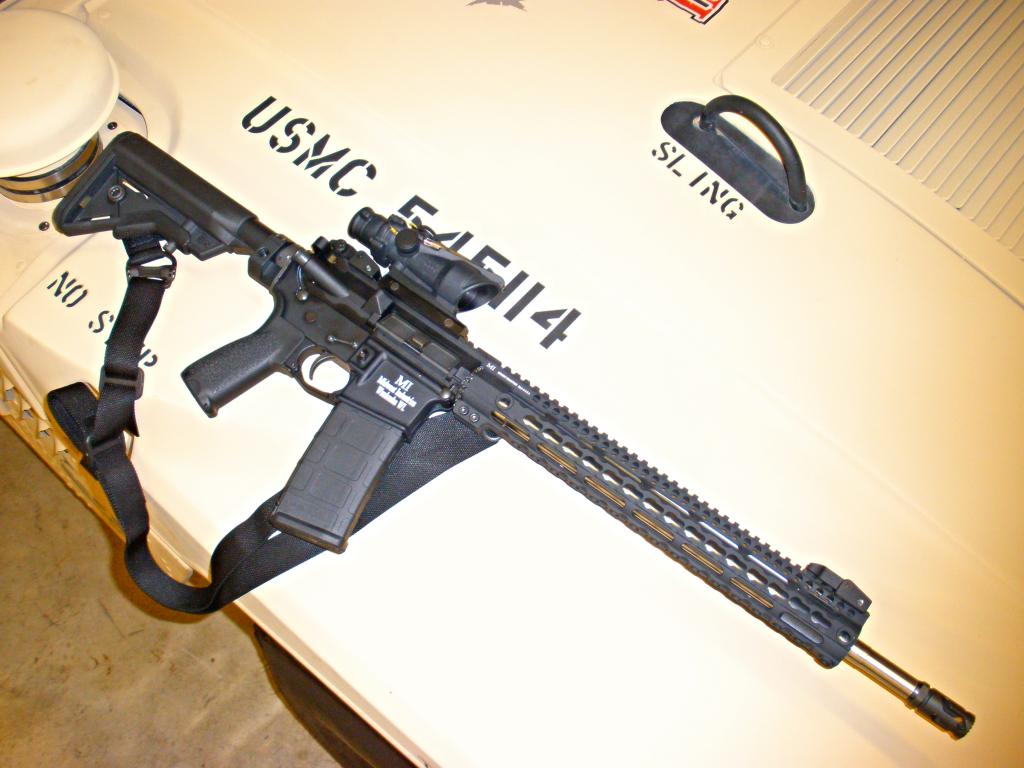
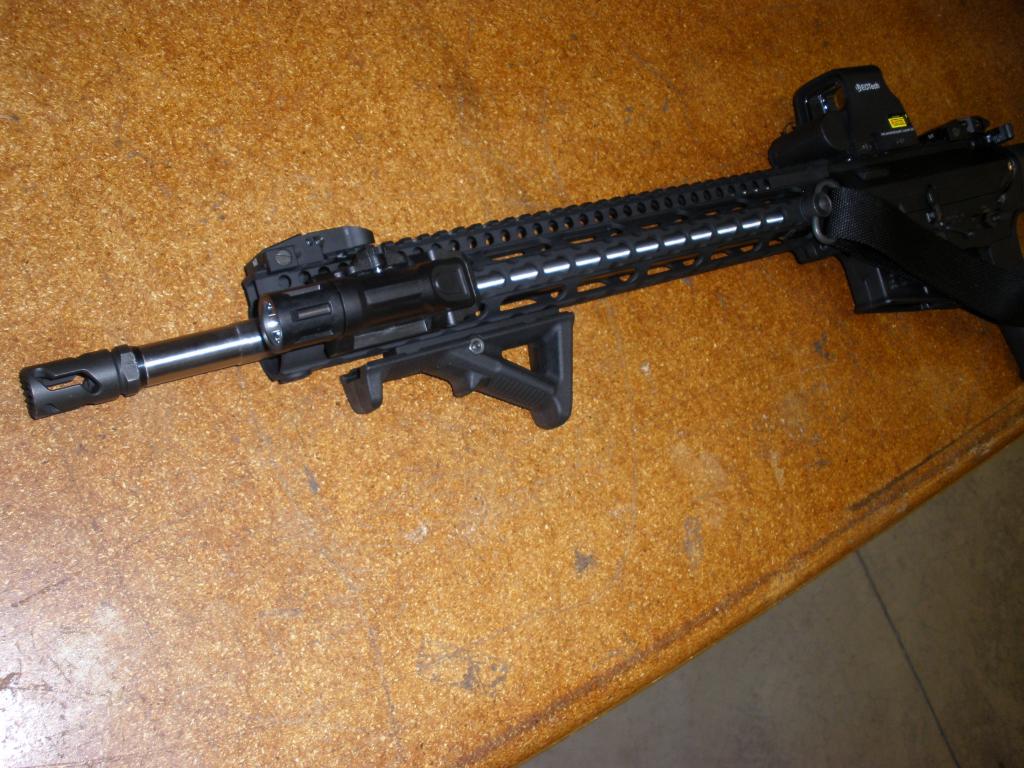
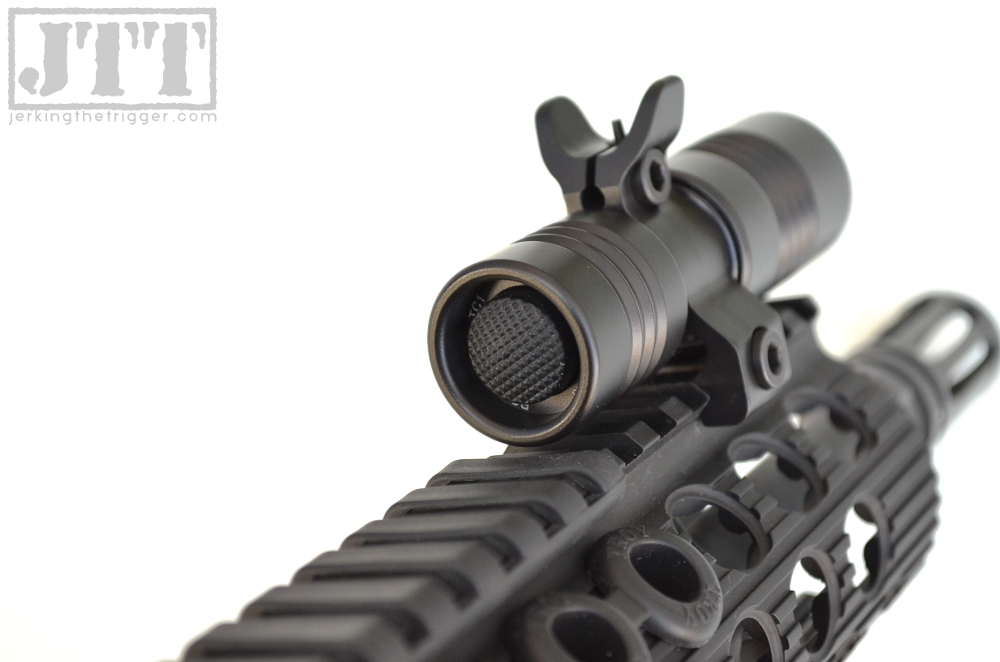
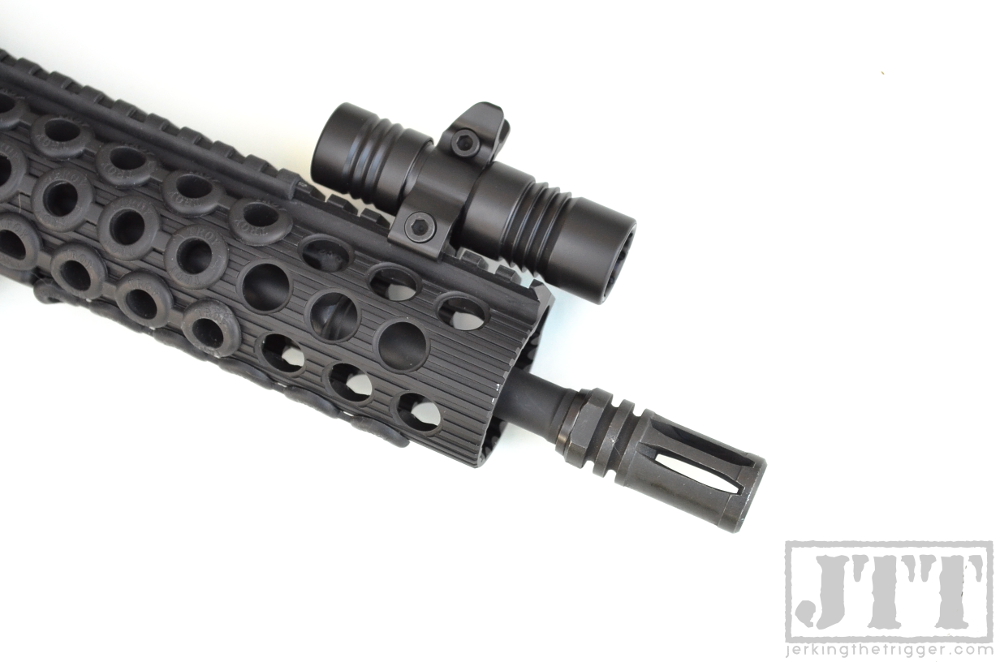
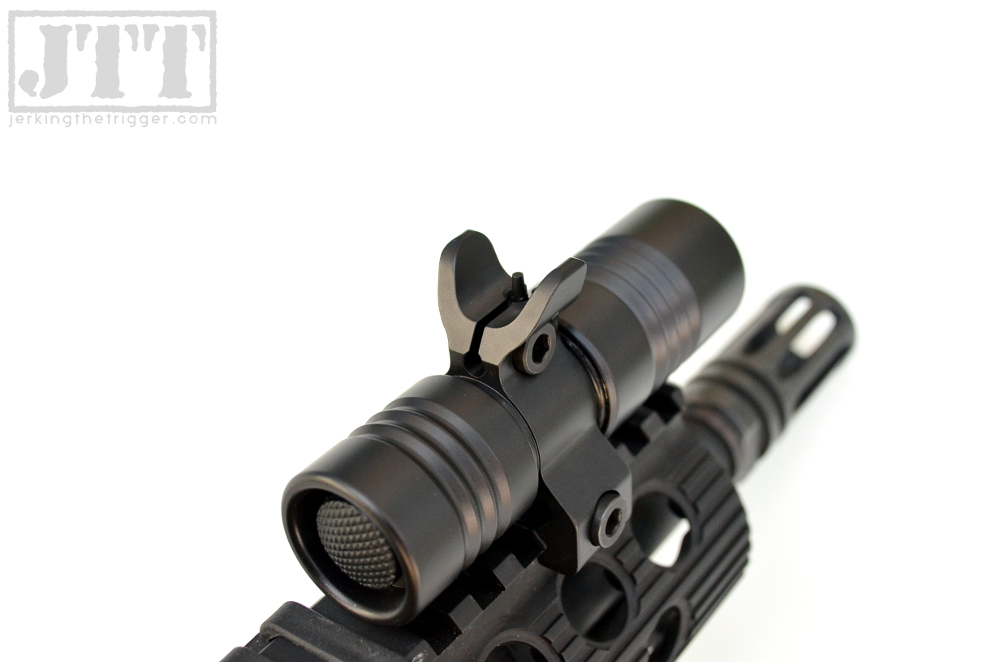
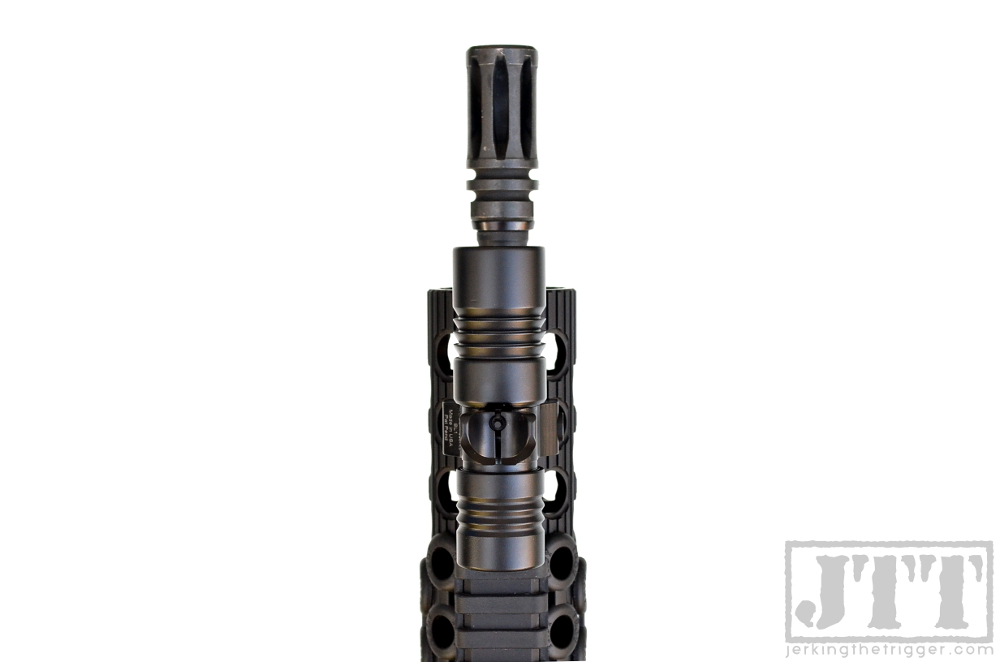
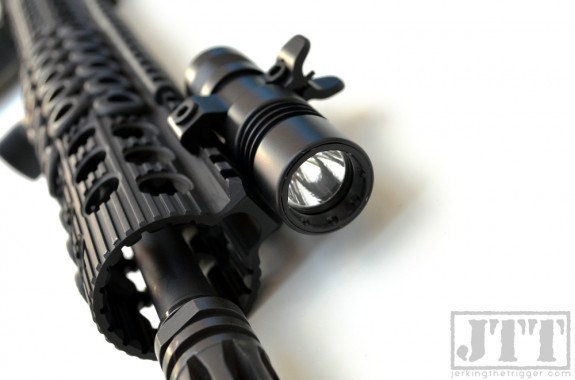
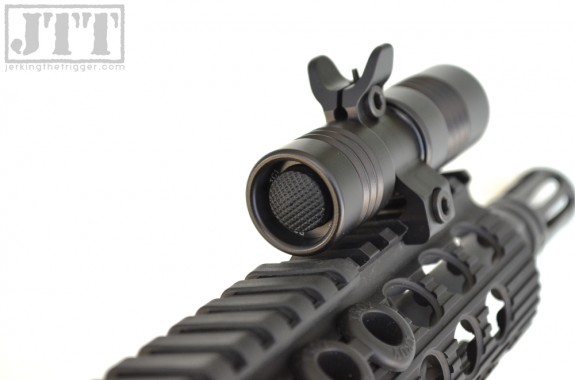
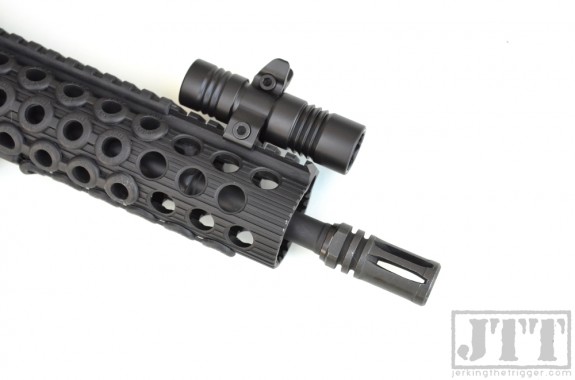
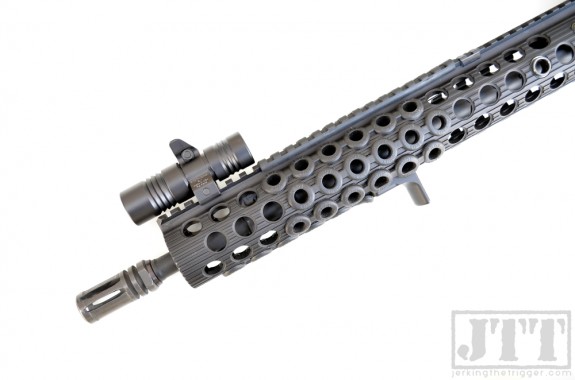
In the simplest terms, the SL1 is weapon mounted light with an integrated front sight. It is designed to be mounted on the 12 o’clock (top) rail of an extended railed hand guard to provide both a sight for aiming and illumination. By combining the front sight and weapon mounted light, the end user saves bulk and weight (only 3.2 ounces).
The SL1 is machined from 7075 T6 aluminum which is overkill for a flashlight and I mean that as a compliment. It is Type III hard anodized and then Cerakoted (except for the head which lacks the Cerakote, more on this later). Steel parts, like the screws and front sight are nitrocarburized (AKA Melonite, etc) to make them all but impervious to rust and to provide a matching black finish.
The rail clamp is designed to fit on standard Picatinny rail and is integral to the body of the light. In looking at pictures, some have assumed that the clamp is separate from the light but it is not. It is actually an integral part of the light’s body. The LED head and tail cap are removable.
The SL1’s LED head was co-developed by Gene Malkoff of Malkoff Devices – a giant in the arena of LED flashlights. His finger prints are all over the design and can be seen clearly in features like the fully potted electronics which means that the entire LED head is assembled and then filled with epoxy to render it one solid, nearly indestructible part. It provides a steady 250+ lumens for 50 minutes (emphasis on the +, more on this later) with several hours following of diminishing but useable light.
The SL1 is powered by a single CR123A battery which is provided. ROSCH Works also provides the hex wrench necessary to mount the SL1 and adjust the front sight, along with a sight elevation tool.
Observations from Use
Before I get too deep into my observations from using the SL1, it would be a good time for me to mention that I have written about the advantages and disadvantages of mounting your weapon light over the bore before. If you are unfamiliar with the concept it might be a good time to catch up.
The fit and finish of the SL1 is excellent. The finishes are all evenly applied and attractive. The tail cap and head threads operate smoothly and they were clean and had lubrication applied right out of the box. The LED is well centered in the reflector and the reflector is clean. The light just exudes a solid, well-made feel with obvious attention to detail.
Preparing the light for use is extremely easy. I chose the mounting location based on my typical grip location on my carbine. The switch should fall easily within reach of the support hand. You simply remove the cross bolt with the supplied hex wrench, slide the light onto the desired rail position, and then reinstall the cross bolt. The installation process should be familiar if you have ever installed any other clamp style rail mounted accessory.
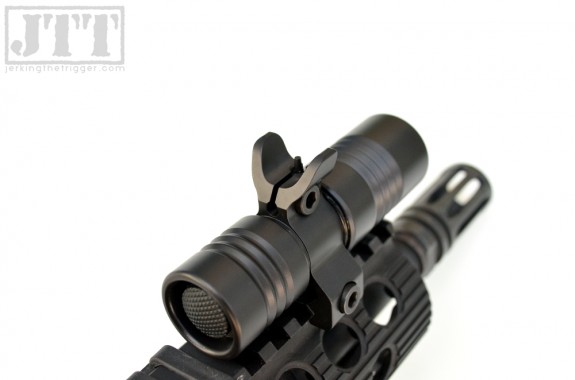
Zeroing the SL1’s front sight was especially easy because I was using it to replace the front sight on an already zeroed carbine. I simply removed the old sight and then co-witnessed the new front sight to the red dot optic that remained on the carbine. It is always prudent to confirm actual zero once you get to the range, but careful co-witnessing should get you very close. The front sight consists of a threaded post that spins in a hole in between two protective “ears.” The ears are clamped together via a screw and nut. You loosen the screw to allow the front sight post to spin and tighten the screw to lock it in place. ROSCH Works provides a tool that makes turning the front sight extremely easy.
Operating the light is easy. The twisty style tail cap is simple and intuitive. I like to turn it tighter until the light comes on and then back it off just far enough that the light can’t be activated by pressing anywhere on the switch other than the button. In this position, the switch travel is short enough to be easy to activate and the risk of unintentional activation is minimized. I have had no issues with the light activating during recoil. The tail cap is very well designed with a short fence around the button to protect it from accidental activation.
The SL1’s beam pattern is just about ideal thanks to its Cree XPG2 LED under a lightly textured reflector. It has a central hotspot with a corona that gradually tapers down in intensity. The corona is quite bright and does a great job of giving you a broad picture of a dark room. The beam is optimized more for closer indoor work rather than long range outdoor work and hence the beam is more flood than throw. In fact, the SL1 has the widest beam of any weapon light that I own. However, in spite of that wide floody beam, it is still able brute force enough light to identify targets at 50 yards and even get enough light to engage a target to as far as 100 yards. The light is very white with a slightly cool color temperature and minimal depth perception robbing harsh blue tones or sickly looking greenish tones.
I compared the SL1 to several other lights with similar manufacturer’s claimed outputs. It compared very favorably and, though I can’t confirm it with any sort of measurement, it definitely seems to be putting out more than 250 lumens compared to other lights. This is pretty typical of Gene Malkoff’s lights. He often undersells the output rather than risk not living up to a claim.
The SL1 is a good enough weapon light that it is easy to lose track of the fact that it is a really excellent front sight as well. The protective ears around the sight are shaped properly to prevent distraction. The front sight is slightly tapered and narrower than a standard front sight which I like very much. It is also round with no set detent positions so it is basically infinitely adjustable. It is also very, very easy to sight in.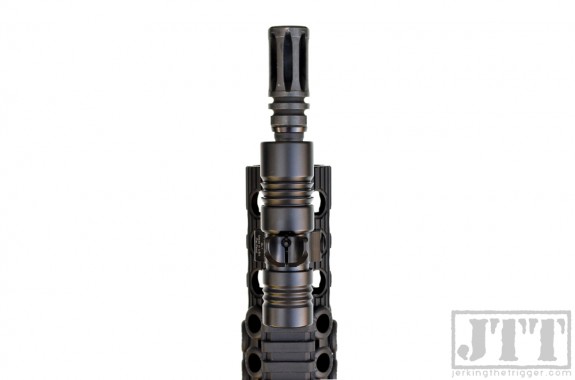
The SL1 is impressive in its compact dimensions. It is just 3.5″ long which is relatively short to begin with. However, when you add the fact that the front sight is integrated, you can start to get a sense of how much space the SL1 saves. The weight savings are equally as impressive. The light and sight set up that I replaced with the SL1 was already one of the lightest available at just 4.5 ounces (3 ounces for the light and 1.5 ounces for the sight). The SL1 weighs just 3.2 ounces and replaces both. More importantly, it is arguably a better light and a better front sight than what it replaced.
To give you an idea of the attention to detail that went into the SL1, you need to understand some of the minute aspects of the light that were considered. Here are some examples:
- The reverse polarity protection is actually physically built into the light. The positive end of the battery can’t make contact if the battery is inserted backwards.
- According to ROSCH Works, the SL1 has been “bashed into walls, dropped on concrete, tested for repeat zero, evaluated on numerous ranges at night, and so forth,” to test it.
- 7075 T6 aluminum was chosen to minimize the chances of a ham fisted users stripping out the cross-bolt threads by over tightening.
- The clamps are actually designed to make thread locker unnecessary by providing constant tension on the cross-bolts (but thread locker is provided with the SL1 for those who, like me, use it impulsively).
- ROSCH Works makes their own screws and bolts! They chose hex key screws because “You can set the torque to an approximation of 28 in-lbs without a torque driver just by tightening “hand tight” using the small handle of the hex L first and then the long handle 60 degrees (2 hours) beyond that.”
- The lens is recessed to protect it from muzzle blast and is made from tough optical acrylic with AR (anti-reflective) coating based on Gene Malkoff’s experience with LE and Military users over the years.
I find this level of detail amazing and impressive.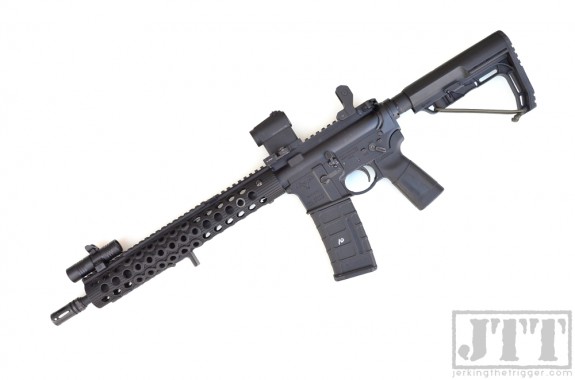
If I could change one thing, I might do something to knock down the glare on the front sight’s protective ears. They are mostly flat and can catch a bit of glare in the right situation. A little bit of glare can make them difficult to see past since they are fairly broad compared to some protective ears.
Additionally, while I generally prefer to use momentary activation for weapon light use, I have become a firm believer in a well executed forward clicky switch so that some form of constant on is easily accessible. Much of this opinion has been shaped by LEO friends in metropolitan areas. Most agree that “flash and move” is best but when you are picking your way through a derelict home with piles of junk and excrement all around that present the potential of real, physical harm… you turn your light on and leave it. To be fair, this is a preference and thankfully, ROSCH Works already has additional switch options in process.
Wrap Up
The ROSCH Works SL1 is a notable development for adherents of the 12 o’clock mounted light. It is extremely rare that a piece of gear combines two other pieces of gear and manages to actually improve both. The SL1 is a great weapon light, a great front sight, and together, it feels like something entirely new. This is a tremendous product.
Check out the SL1 from ROSCH Works.
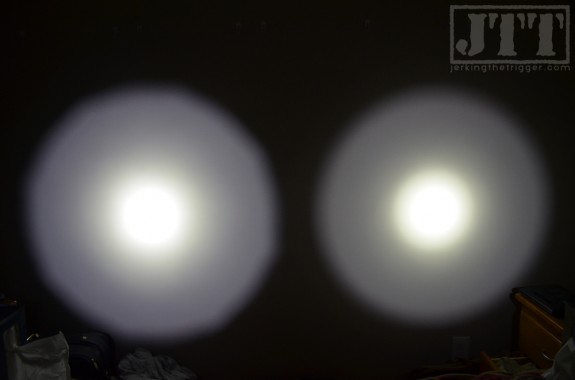
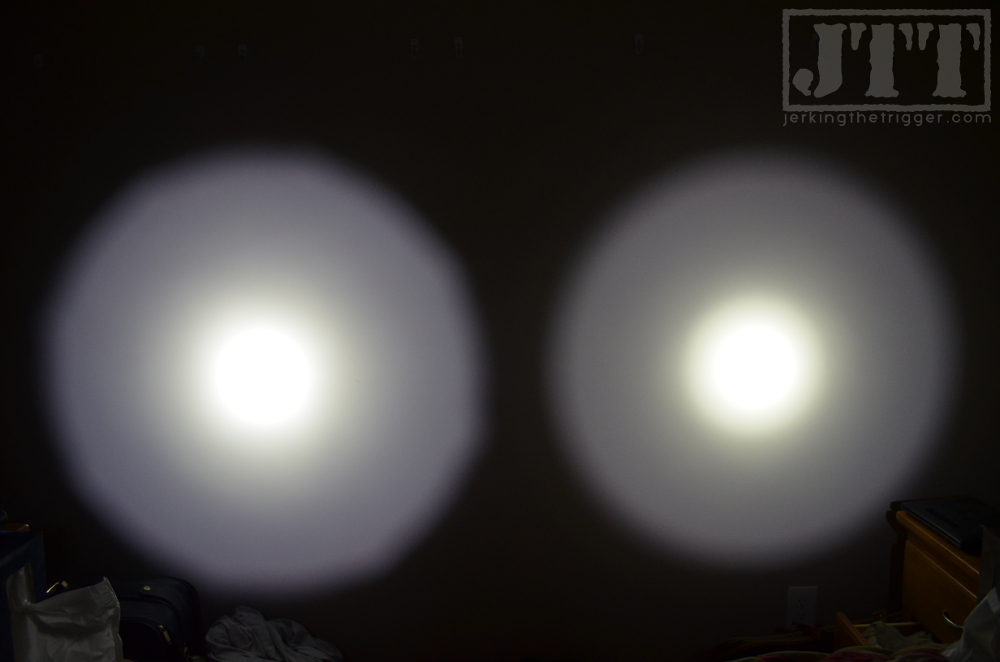
The SL1 and 200 lumen INFORCE WML have similar beam profiles though the SL1 is wider and brighter (SL1 on left, WML on right, 5 feet from off-white wall).
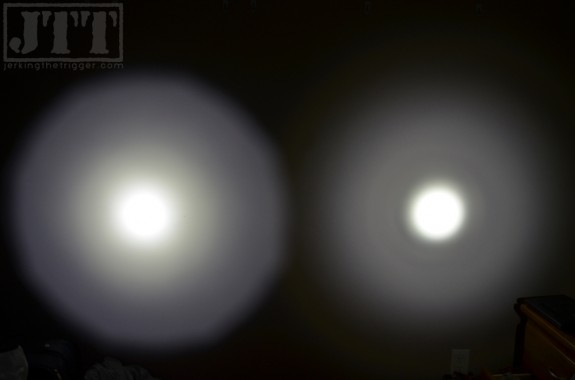
The the SL1 (left) has a wider beam than the Surefire X300 (right) though the X300 does have more throw (5 feet from off-white wall).
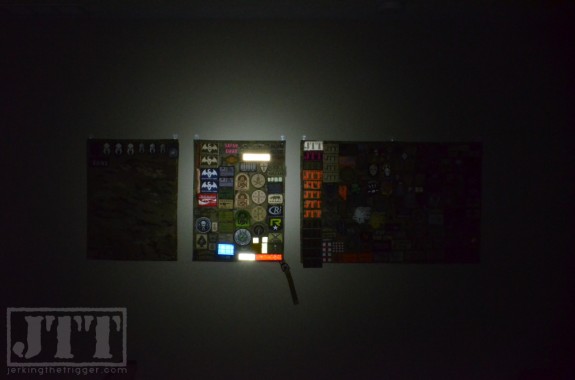
The SL1 beam at 18 feet. Note the wider, useful spill beam. The next 2 comparison pictures were taken using identical camera settings.
WML beam at 18 feet.
X300 beam at 18 feet.