Archive | Reviews

Review: Walker Defense Research NERO 556

I have said before that I turn down far more review items than I take on. Something has to really grab my interest in order for me to consider sinking the time and ammo (money) into testing… especially when it comes to muzzle devices. Walker Defense Research’s NERO 556 definitely grabbed my interest with its computer modeled and very unique shape, modern manufacturing methods, and exotic materials.

Overview

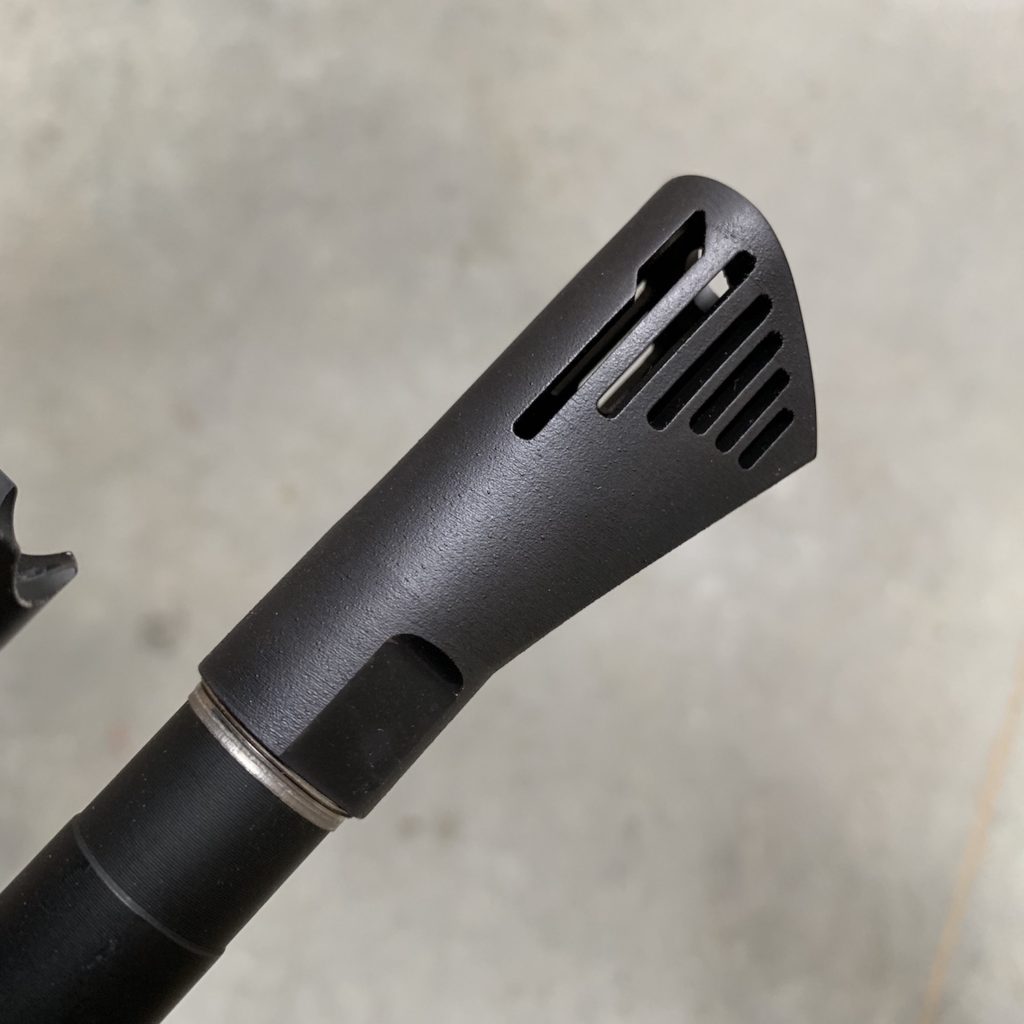
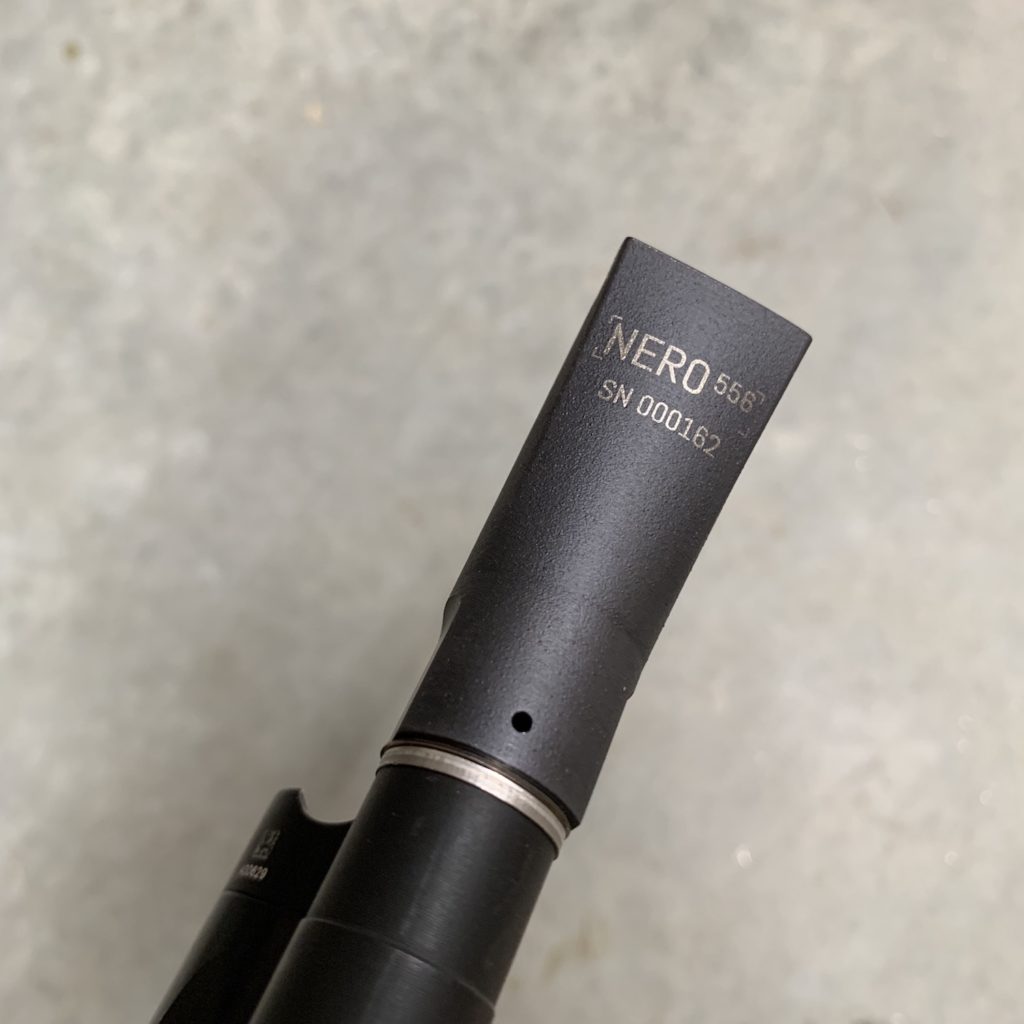
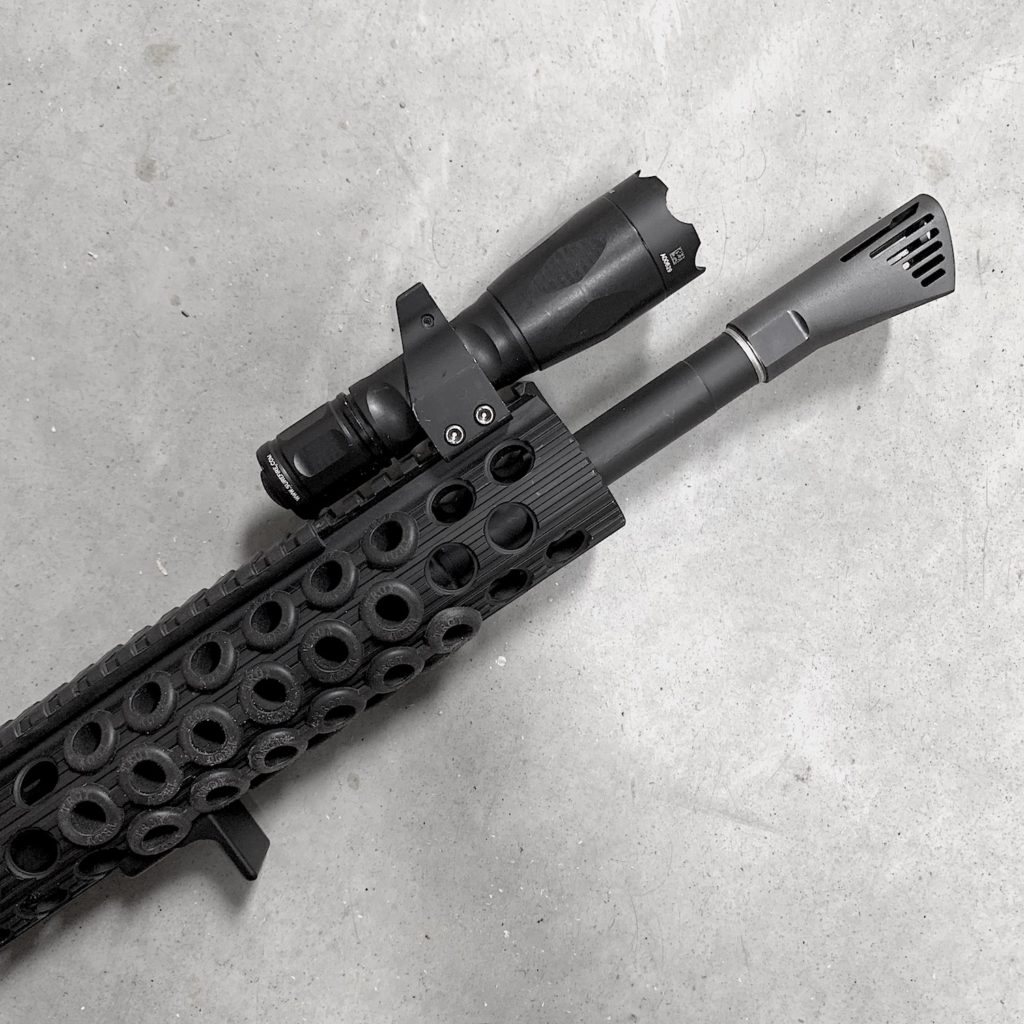
The NERO 556 is what Walker Defense Research refers to as a hybrid muzzle brake/compensator. It has a very unique shape that is the result of “ground up” design based on computer-modeled physics. It is made from Inconel, an alloy that is extremely heat and corrosion resistant.

The complex internal shapes and material selection required a different approach to manufacturing so the NERO 556 is direct metal laser sintered which is essentially 3D printing with metal.

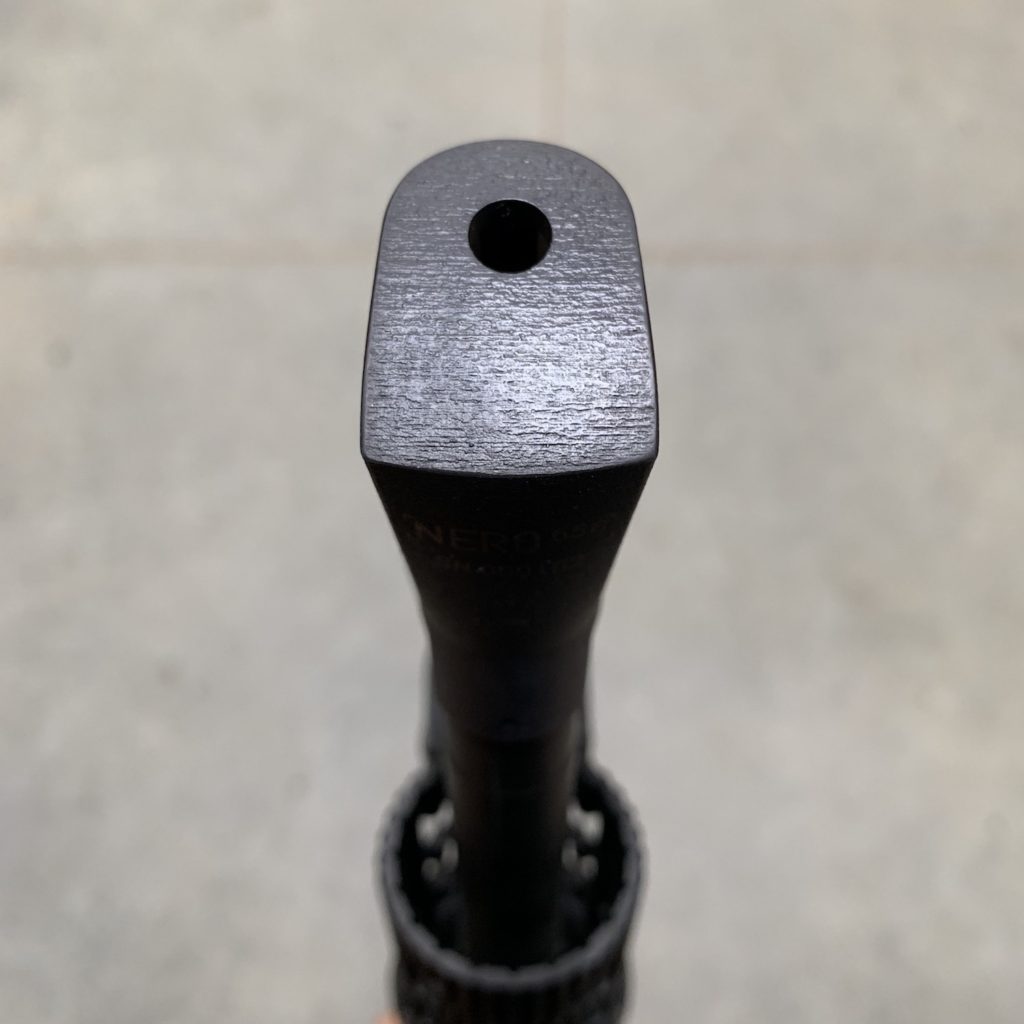
The NERO 556 is finished with a black PVD coating that actually renders a sort of matte grey finish. It is 2.6″ long, pre-drilled for pinning to a 14.5″ barrel, includes a crush washer (I mounted mine with shims) and is threaded 1/2×28.

Observations from Use

In my log book, I have just over 600 rounds recorded on this brake but I know the actual number is higher from a few other people giving it a try (something I find helpful in brake reviews). It was mounted on an upper built with a Sionics 16″ medium contour, mid-length barrel. I learned a fair amount in that time and this, like many brakes, feels like it does need to be learned.

Walker Defense states that their goal was “to create the ideal compensating muzzle brake by starting from a blank canvas. Our goal was to completely transform the recoil impulse of the AR-15 into a simple, soft rearward push with zero muzzle climb.” In my experience with typical cylindrical muzzle brakes, there is only so much that can be done to balance how the escaping gases are vectored in order to control the muzzle so I was hoping that the unique shape of the NERO 556 would give it an edge. I would say that it definitely works but there is still that subjective element found with many brakes.

I found that when I initially shot the NERO 556, the muzzle was driven down below my point of aim. There is probably an argument to made that is better than allow the muzzle to rise above the point of aim but, to my way of thinking, recovering from below point of aim is still taking time to recover. However (and this is a big however), I did find that I was able to mitigate this effect as I spent more time with the brake and a friend who tried it said it was one of the most neutral brakes he has ever tried. This is why I like to get feedback from others for muzzle device reviews. Individual grip, stance, and skill level can play a part in the performance of any muzzle device.

I still find that it drives the muzzle down a bit but with some additional time behind the brake, it does seem that I am adjusting. One thing is for sure, the NERO 556 effectively eliminates muzzle rise. The bottom line is that there is no such thing as a magical muzzle device. You are going to have to put in the time with this brake just as you would any other. If you do not already have a grip and stance that works to provide fast followup shots, this isn’t going to fix that. If you do, the NERO 556 will enhance what you are already doing.

Regarding concussion and noise levels… It’s still a brake/comp. The design does not beat you up as much as something with large side ports but I still perceive it as louder/more concussive than something like a pronged flash suppressor when I am shooting and when I’m near someone shooting it. When you are redirecting combustion gases as effectively as the NERO 556 does, this is to be expected.

I should also say that I have really come to appreciate the idea of the NERO 556 which, even as I type this, sounds strange. The performance is actually quite good but I also just really appreciate the way this device pushes the envelope. It looks different. It is made in a different way from differing materials. However, those differences have a purpose behind them. This is a bold project and I like that about it.

Wrap Up

The NERO 556 is function over form. It is ultra modern in concept, execution, design, and materials. It is ambitious.

It effectively mitigates muzzle climb though some may find that it depresses the muzzle. As with any muzzle device, it is up to you to hone yourself until you are leveraging it fully. It is loud though not as bone-rattling as brakes with large side ports.

WalkerDefense.com

On Foot, Off Grid: Olight UC Magnetic USB Charger

Electronics have become an important part of many people’s backcountry experience and safety. In this series, On Foot, Off Grid, we cover the electronic gear that power your backcountry adventures along with some strategies for their use. The series will cover plenty of gear options and explore ideas for dealing with cold weather, streamlining your power needs, and more.


We covered the use of a power bank as a central, or even THE central component, of a portable backcountry power setup in the first installment of On Foot, Off Grid (read it HERE). Now we are going to take a look at an item that lets us access the electricity stored in the power bank to charge other loose batteries – the Olight UC Magnetic USB Charger.

One of the main reasons I purchased an Olight UC Magnetic USB Charger is the form factor. It looks more like earbuds than a battery charger. It is extremely compact and extremely lightweight yet it is a surprisingly full-featured charger.

There are other chargers with a similar form factor on the market which brings me to the other reason I chose the Olight version. It is the only one I found that was smart enough to charge both lithium-ion batteries like 18650s or 16340s AND NiMH cells like the Eneloop AA and AAA batteries that I prefer.

Using the Olight UC Magnetic USB Charger is extremely easy. You simply plug it into your USB power source and then attach the magnetic leads to each end of the battery you want to recharge. Polarity doesn’t matter because the charger is smart enough to detect it automatically. An indicator light at the base of the wire will let you know what is happening – blinking red means standby or a charging error, solid red means charging, and green means that your cell is done charging.

It is very well designed and well made. The cord is the flat type that will not tangle. All of the components are encased in anodized aluminum. The magnets in the leads are appropriately strong and the leads are shaped well for use with both flat and button top cells.

I strongly suggest you try this at home before you bring it into the field. One, it is nice to get a sense of the speed that it will charge your batteries. It isn’t the fastest but I have found it to be completely acceptable for recharging AA and AAA batteries in the field. Two, you want to be sure it works with your intended power source. I have used it with Anker Powercore power banks and a Nitecore F1 Charger (more on this in later installment).

Here is the bottom line: The Olight UC Magnetic USB Charger is easy to use. It packs as small as a set of earbuds and weighs just .72 oz. It charges both 3.7V lithium ion batteries and 1.2V NiMH batteries. While it only charges one cell at a time, this hasn’t been an issue for me as I have taken steps to streamline my electronics to include items that only require a single cell. This is an incredibly lightweight, compact item that can be an important part of any backcountry power setup.

Where to Buy:

These are available all over the internet. When I purchased mine, I couldn’t beat Amazon’s price with the included shipping: Olight UC Magnetic USB Charger on Amazon (affiliate link)

The Amazon page also features a full list of compatible lithium ion cells.


Do you have a gear or concept recommendation that fits the On Foot, Off Grid series? Tell us about it in the comments below or drop us a line on the Contact page.

The above URLs may be affiliate links.

On Foot, Off Grid: Battery Banks

Electronics have become an important part of many people’s backcountry experience and safety. On Foot, Off Grid is a new series on Jerking the Trigger that will cover concepts and electronic gear that power your backcountry adventures. The series will cover plenty of gear options and explore ideas for dealing with cold weather, streamlining your power needs, and more.


The On Foot, Off Grid series is going to kick off with a gear item that might be considered the heart of any backcountry power setup – portable power banks. These portable powerhouses can help you charge your phone, charge a flashlight or headlamp, charge batteries, charge GPS units or personal locator beacons, and more. These are important parts of anyone’s gear list and all of them benefit from the addition of a power bank.

What is a Power Bank?

A power bank is essentially just a case that contains a series of batteries (usually 18650 lithium-ion batteries) packaged in a case with at least one input for charging the bank and at least one output for charging electronics (usually some flavor of USB). Even more simply put, it is an easy way to store, carry, and then access electricity.

How Do I Use One?

There are a lot of ways to use a power bank in the backcountry, some of which I have already mentioned. There are some specific ways that I use mine that I can share. The primary use for mine is to keep my phone operational. Today’s smartphones offer excellent GPS functionality (better than many dedicated GPS units), long battery life, excellent cameras, and emergency connectivity in far-flung places. They are also quite a bit more rugged with many of them even being submersible. I will never be caught without a map and compass but my cell phone is central to a lot of what I do when outdoors.

Additionally, I use other accessories with my power banks that let me charge batteries or directly charge USB-rechargeable headlamps and flashlights. By carefully selecting my lights and carrying a power bank, I can reduce the number of spare batteries that I have to carry.

Other Considerations

  • Be sure to test a power bank with your devices before you head out. You need to understand how much power you’ll need and how quickly you can charge your devices.
  • Cold weather can be hard on the lithium-ion cells contained in most battery banks. Choose your power bank with this in mind. If you will be out in cold weather, your power bank should be small enough to carry in a pocket under your insulation layers to ensure that it remains functional.
  • Quality power banks aren’t that expensive. Don’t skimp. The quality of the cells inside the power bank is often reflected in the price. You will see better performance from a quality power bank.

Recommendations

I have used Anker power banks for years. The Anker Powercore 10000, in particular, is beloved among many backcountry travelers for its combination of lightweight (6.34 ounces), compact size (about the size of a deck of cards), quality, and affordability. If I could only have one, it would be this one.

Click Here: Anker Powercore 10000 on Amazon (affiliate link)

I also use an Anker Powercore 20000 that I have owned for years. It is about twice and size and slightly more than twice the weight of my Powercore 10,000mah in part because it is a slightly older model. The current model is slightly lighter than mine.

Click Here: Anker Powercore 20000 on Amazon (affiliate link)

The options for these power banks are extensive. Stick to a quality maker and select the options you need. Anker has always worked for me, they are known for good service, they use quality cells, and they are rugged without being bulky.


Do you have a gear or concept recommendation that fits the On Foot, Off Grid series? Tell us about it in the comments below or drop us a line on the Contact page.

The above URLs may be affiliate links.

Bargain or Just Cheap? – Steel Will Modus F25

Welcome to Bargain or Just Cheap? This series will review budget friendly knives for a variety of uses in a short format. All of the knives will cost less than $50 (in most cases, much less) and will be purchased out of my own pocket. I’ll buy them, carry them, and use them in an attempt to determine if the knife is a bargain or just cheap.


There was a time when Chinese made knives were mostly junk – at least those that were imported and sold very inexpensively. That is changing thanks to a wave of manufacturers like Steel Wil and othersl that are offering some really excellent knives that are often priced very competitively. That is certainly the case with the subject of today’s installment of Bargain or Just Cheap? – the Steel Will Modus F25.

Steel Will often offers two versions of the same design, one with more premium materials and one with more working class materials like FRN handle slabs and D2 steel. I often tend toward to working class model because they are very affordable and I actually happen to like D2 steel and FRN (plastic) as a handle material from all my years carrying Spyderco knives. The particular version of the Modus that I purchased is the F25-12 model. It features a 3.25″ D2 steel blade with green FRN handles.

The Modus features a modified sheepsfoot shape. Most sheepsfoot knives have a completely straight edge but the Modus’ edge sweeps gently up toward the tip giving it some belly. The blade is quite tall for a folder and the primary flat grind is nearly full height which does a very good job of thinning the edge. It cuts and slices very well.

The handle feels great in the handle and the texture provided by the patterned FRN scales is great. The full steel liners under the FRN have been skeletonized to reduce weight.

The lock up on these Steel Will liner locks is excellent. They typically exhibit early lock up with full engagement. The lock up on my Modus is among the best I have seen on a liner lock.

The Modus weighs in at under 3.4 ounces and it its FRN handle makes it very easy on pockets. The pocket clip is quite good with tip down left or right side carry, solid tension, and no sharp edges. I find these knives to be a joy to carry.

I think my favorite thing about these knives is how well they deploy. They are opened via a flipper and Steel Will has absolutely mastered the art of the flipper even without the use of ball bearing pivots which is mildly mind blowing. This knife is buttery smooth and has a perfect detent. It fires open easily and locks up with a satisfying snick.

NOTE: I have seen one Steel Will flipper that didn’t deploy well. It turns out the phosphor bronze washers were installed backwards (the smoother, more rounded side should be against the blade). Once they were corrected, the knife fired like a champ. It’s an easy fix.

Bargain or Just Cheap?

The Steel Will Modus is an EDC gem. It isn’t just a good knife, it is one of my favorite knives!

At around $40, it is definitely a bargain. It is light weight, deploys smoother than many flippers costing significantly more, and offers a lot of cutting performance in a sensibly sized package.

I am using Amazon as the price base line for this series. All knives were purchased by me from Amazon: Steel Will Modus F25-12 (there are other colors available)


Our goal is to represent knives for a variety of uses from EDC, to outdoor, to tactical knives. Do you have a favorite affordable knife? Let us know about it in the comments!

The above article contains affiliate links.

The EDC Tool Roll: Crescent 4″ Adjustable Wrench

The EDC Tool Roll is a feature on Jerking the Trigger in which we profile various every day carry worthy tools. The tools shown aren’t multi-tools but rather real tools, that by virtue of their compact size, light weight, usefulness, or unique functionality, can find a place in any range kit, emergency kit, or every day carry bag.

Feel free to comment on the tools that you carry so we can all learn! The discussion on these posts has been very valuable so far.


The way I see it, if you are going to carry something like a compact ratchet set or the incredible Knipex Pliers Wrench in your EDC Tool Roll, you also need to carry something like an adjustable wrench. You can use a set of pliers to hold a bolt in place while you tighten a nut but good hardened pliers will make a mess of the bolt with their sharp jaws. This is why my version of The EDC Tool Roll almost always includes a small adjustable wrench.

The Crescent AT24VS might be the best deal going in compact adjustable wrenches. Mine was sent to me by a friend, Dann S. in Ohio, who finds them regularly for $4-5 at local farm stores. They are often located in a bin near the registers like all good impulse buys should be. These wrenches cost more online.

The AT24VS is a drop forged wrench with machined flats. It has a smoothly turning knurl that makes adjusting the wrench easy, even with gloves. There is a laser etched scale on one side of the jaws but it is difficult to read in some light conditions. The black oxide finish on mine has held up well though, like most tools that aren’t chromed, I do put a bit of oil on it when I clean it up.

The combination of relatively comfortable handle, compact size, and easy adjustment have me reaching for this wrench fairly frequently. It might be the best bargain of the wrenches we have covered so far if you can find it the cheap farm store price.

Where to Buy:

Your best bet is to try to find this locally. Crescent brand wrenches are not hard to find and if you can find it at $4-5, it is a no-brainer. Online prices aren’t nearly as attractive but it is available on Amazon: Crescent AT24VS on Amazon

Previously Reviewed Alternatives:

  1. Channellock 804 4.5″ Adjustable Wrench
  2. Knipex Pliers Wrench (86 03 125)
  3. Lobster UM24SS Shorty Adjustable Wrench

See all the reviews for previous tools: The EDC Tool Roll

Do you have a compact adjustable wrench that you prefer or another tool recommendation that fits The EDC Tool Roll? Tell us about it in the comments below or drop us a line on the Contact page.

The above URLs may be affiliate links.


Powered by WordPress. Designed by Woo Themes