Trijicon ACOGs are excellent optics for fighting rifles, especially when having to deal with extended distances. The ACOG’s combination of size, durability, and speed make it one of the best choices for an AR-15 optic. The ACOG has been battle tested in Iraq and Afghanistan and has come through with flying colors. It has also become very popular in the competition shooting world – especially 3Gun competition. It is a proven system.
The Problem
One of the ACOG’s best features can also be one of the most annoying. The fiber optic illumination system on the ACOG allows the reticle to glow brightly in full sun and automatically adjust to changing lighting conditions. When there is no ambient light present the reticle is illuminated by the tritium insert. It all sounds great until the task at hand calls for any amount of precision. In full sun, the reticle can be so bright that it begins to flare. This flaring obscures the view of the target and makes it difficult to shoot with any level of precision.
I used to just use electrical tape to mask the fiber optic tube of my ACOGs. However, this is an all or nothing solution. It fixes the flaring problem but it doesn’t allow the fiber optic to gather any light in intermediate and low light situations. This solution was too static. I needed something that was more dynamic – something that would allow me to adjust to different lighting quickly and easily.
I tried making a hook and loop flap that could be stuck to the ACOG and peeled back to varying degrees to expose or cover the fiber optic tube. This worked great in my living room. Once the rifle was actually run through some drills a problem became obvious. The flap would catch readily on my gear, sometimes pulling it almost completely off the ACOG. So this solution was dynamic but it wasn’t durable.
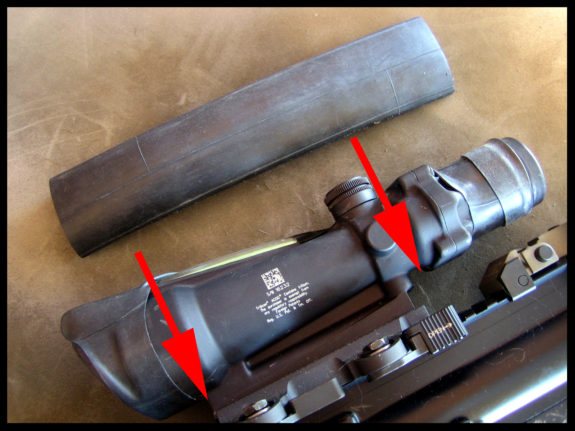
Finally, I took a page out of the 3Gun play book. Shooters in 3Gun have been using bicycle tire inner tubes to cover the fiber optic for years. Typically a piece of inner tube is cut to length and then stretched over the optic. This effectively covers the fiber optic while still allowing for some adjustment by peeling the tube back. Inner tubes are tough and cheap. This idea has a lot going for it. This was my starting point.
The Solution
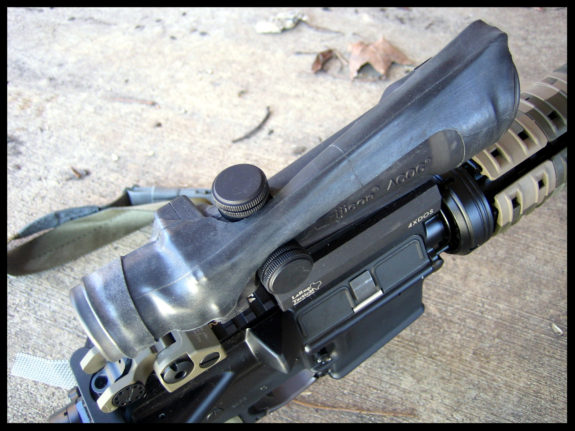
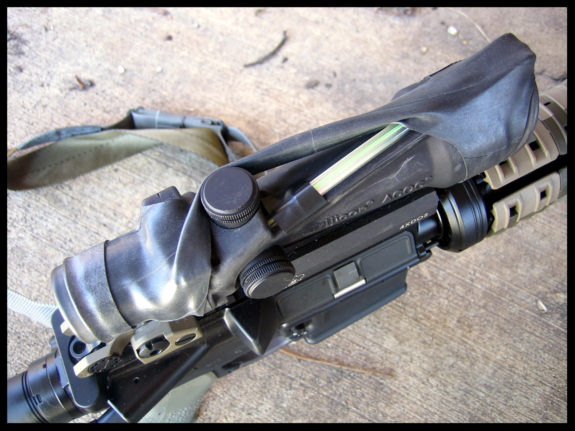
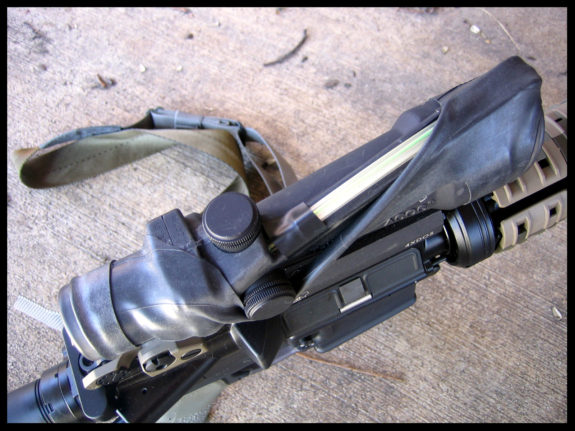
What I ended up with really works. It is securely mounted on the ACOG and will not snag on gear. It blocks almost all light from entering the fiber optic but also adjusts rapidly and easily to any lighting condition. It costs pennies and is easily replaceable.
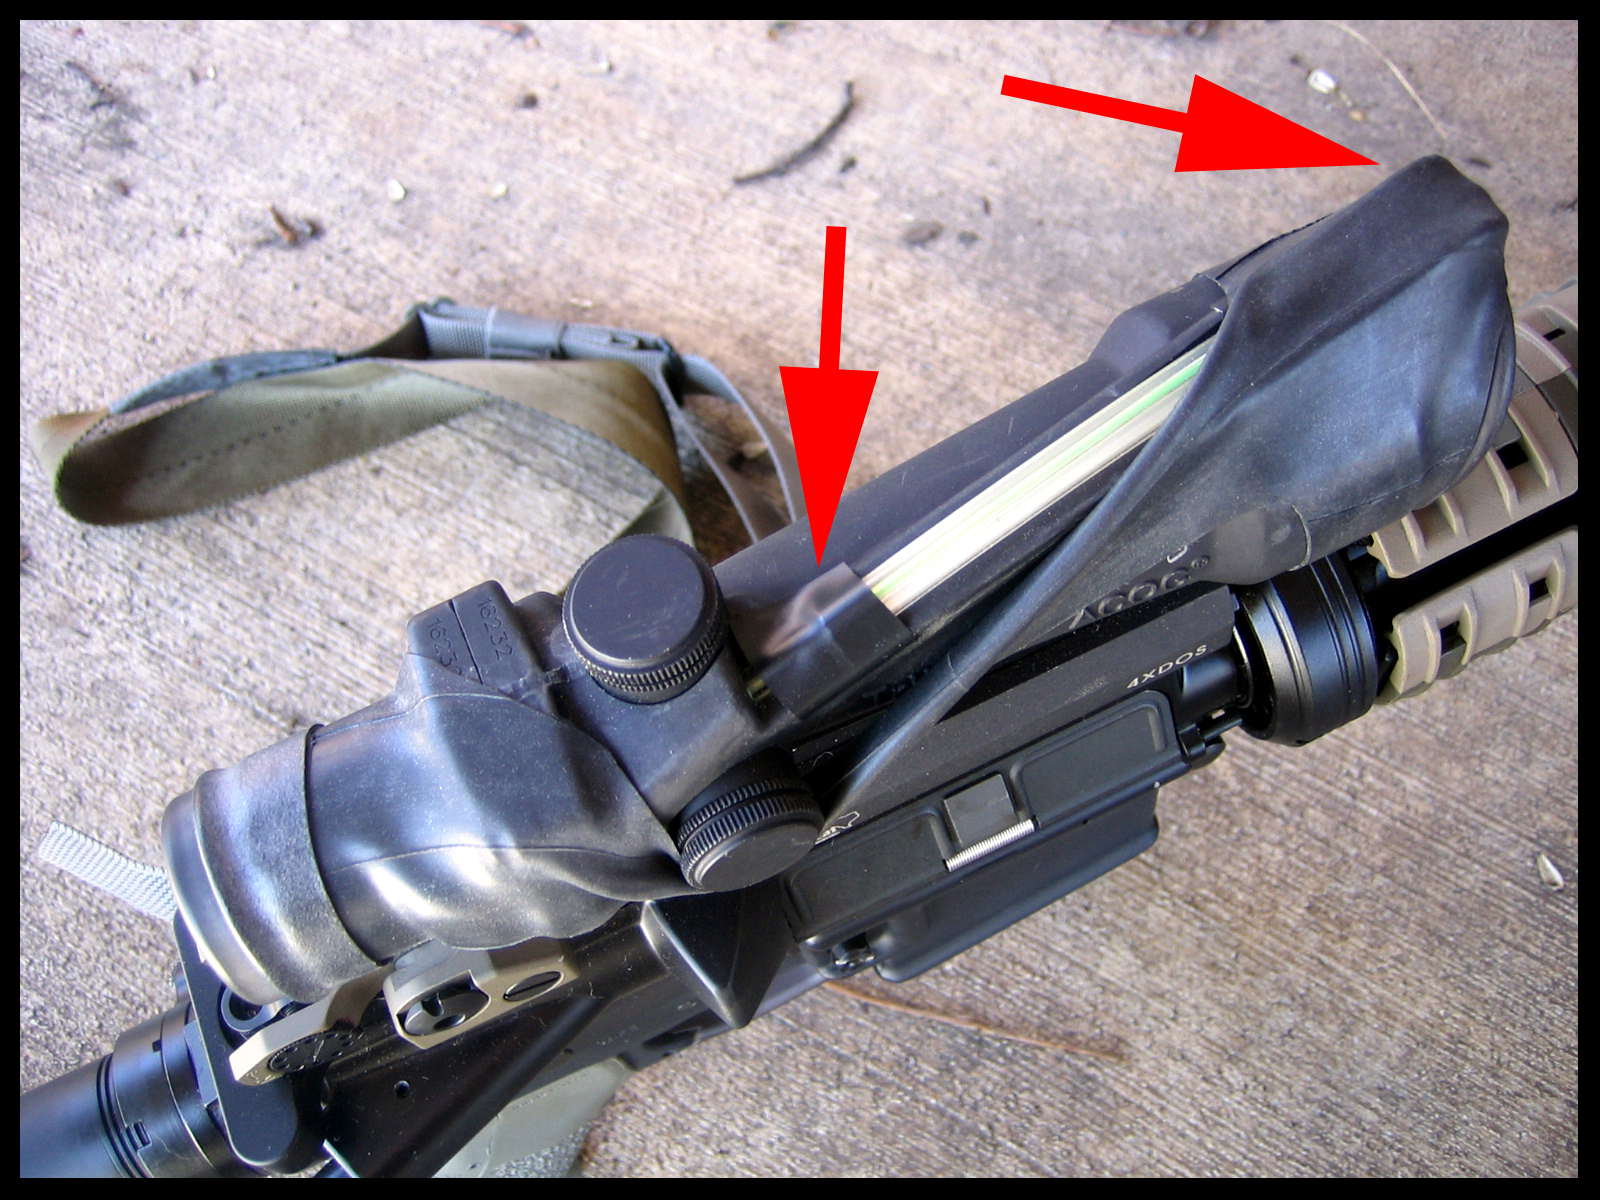
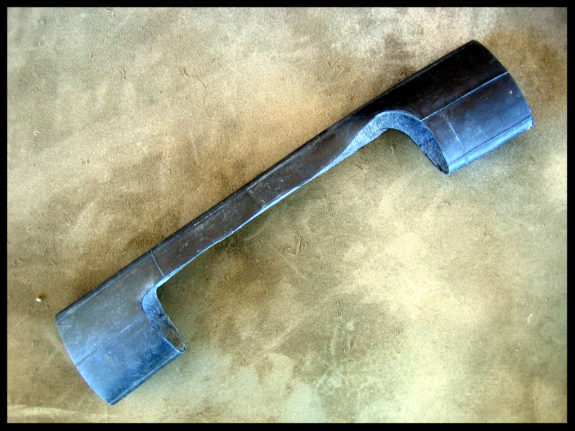
Here you can see the cover in place. It is basically one length of tube that has been cut into two loops connected by a strap.
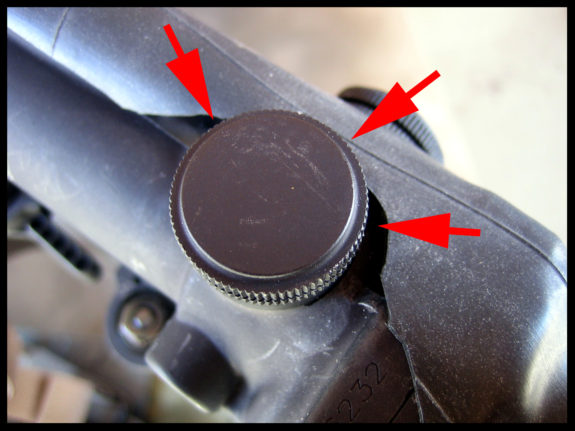
Pull the strap over the elevation knob to allow some light gathering. The short length of electrical tape is there to block the little bit of ambient light that can still to the back of the fiber optic.
Pull the strap over the windage knob to allow even more light. I have found that on the TA11 ACOGs, with their extra long fiber optic tube, this is more than enough exposed fiber optic for just about all lighting conditions.
What you will need:
- ACOG equipped rifle
- Bicycle tire inner tube – a piece roughly as long as your ACOG
- Sharp scissors
- Hobby knife (or any knife with a sharp point, I used a Swiss Army Knife)
- Electrical tape (optional)
Instructions:
- Check that your rifle is unloaded and remove all ammunition from your workspace.
- Check it again.
- Cut a length of inner tube to roughly the length of your ACOG using your scissors.
- Measure the length of the hole you will need to cut to clear the base by laying the tube over the ACOG and marking the locations indicated in the picture.
- Cut the hole about two/thirds of the way up the width of the inner tube. The idea is to leave a strap that is just wide enough to cover the fiber optic tube with some overlap.
- Trim all of your corners so that they are rounded. Any corners left pointed or square can create stress cracks in the cover as it is stretched.
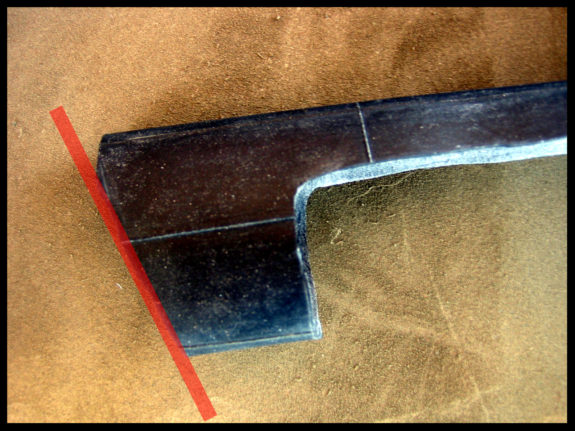
- Cut an angle that matches the leading edge of the ACOG on the leading edge of your inner tube. Shaping the front of the cover like this will help you cover the leading edge of the fiber optic tube.
- Stretch the inner tube onto the ACOG and twist it as necessary to cover the fiber optic tube. The fiber optic tube runs at an angle so you will need to the twist the cover so the strap covers the tube. It should be difficult to stretch.
- Adjust the fit as necessary by trimming excess material from the inner tube.
- Trim around the elevation turret cover with your knife. This will help the cover lay flatter over the fiber optic tube.
Optional Step: You may want to place some tape on the front 1/2 inch and back 1/2″ of the fiber optic tube. This will help cut down on light that may reach the tube from the front of the cover and around the elevation turret.

That Was Easy!
That was simple, cheap, easy, and effective. There aren’t many things in life that you can say that about. Is is easy to make another if this one ever breaks. You could even make a spare and keep it on your gear.
Problem solved.
Let me know if you have any questions!
NOTE: This works best with ACOGs that have long objective ends that project forward of the mount like the TA11 and TA33.
NOTE: Keep your cuts as clean and rounded as possible. Right angles and jagged cuts create stress risers that will cause the cover to rip prematurely.