Tag Archives | AR15

New from SIONICS – 16″ 416R SS “RECCE” Barrel

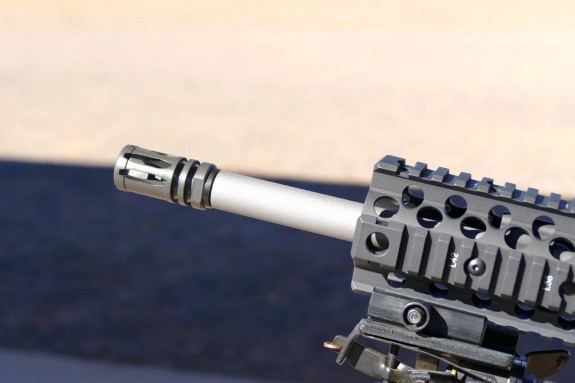
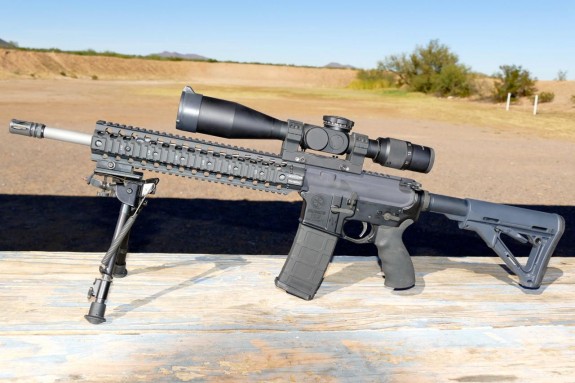
SIONICS Weapon Systems has released a new 16″ stainless steel barrel. The new barrel, the 16″ 416R SS “RECCE” Barrel, is currently available separately from their website and will be available as an option on their uppers/complete rifles next week. If these shoot anywhere near as well as their 18″ stainless barrels, they will be excellent performers.

TheĀ 16″ 416R SS “RECCE” Barrel has everything you expect from a SIONICS barrel including an in-house designed medium contour, 1 in 8″ twist, 5.56 chamber, M4 barrel extension, mid-length gas, and SIONICS’ own extensive QC processes. Check out the barrels on SIONICSWeaponSystems.com for more details.

sionics recce build sionics recce barrel

Dueck Defense Red Dot Adapter

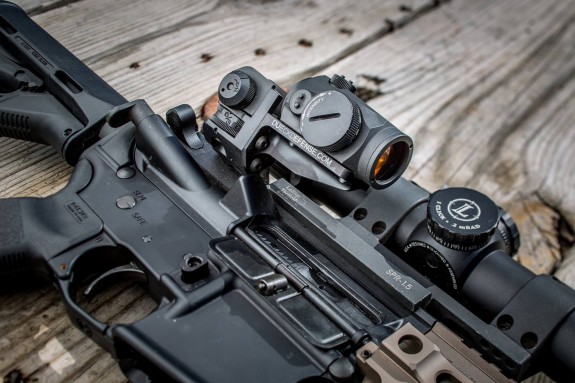
The new Dueck Defense Red Dot Adapter (RDA) is a compact mount that bolts directly to your Dueck Defense RTS rear sight. It allows you to attach your Micro Aimpoint or compatible red dot in such a way that it achieves a lower 1/3 co-witness with the RTS sights.

Dueck Defense adapter

It should be noted that this is designed to be used with the generation 2 versions of the RTS sights. To determine if your RTS rear sight is compatible with the RDA, check to see if the holes on the leading face of your rear sight are threaded. If they are threaded it will accept the new RDA.

Check out the RDA at Dueck Defense.

Set Up Your RDS Magnifier for Success

It wasn’t long after Aimpoint released their 3X Magnifier that I had one in hand. I basically waited to purchase mine just long enough for LaRue Tactical to come out with their LT755 QD Pivot Mount. Since that time, the magnifier concept has lost some of its cache likely due to the improved low power variable magnification optics that proliferate now and a better understanding of some of the shortcomings that are inherent to RDS magnifiers. Those shortcomings include narrow field of view (which isn’t that bad), significant extra weight, increased distortion of some red dot sights, and a clumsy transition between mounted and unmounted.

There were times in the last several years where I was tempted to sell my magnifier but I could never quite bring myself to do it mostly because, in spite of its flaws, it still does something that no other optic set up can. It offers useable magnification along side true non-magnified performance. As good as 1-4X and 1-6X optics have become, there is still a difference between the 1X setting of these low magnification variables and a quality RDS (see this previous article).

Now that I have literally years behind an RDS and magnifier setup, I have found that there are really three keys to making them work for me. That means there are three keys to mitigating the main drawbacks of the concept and all three are pretty simple.

JTT-Magnifier-Carbine

Choose a Good Mount

The mount is probably the single most important factor in ensuring that you have a good magnifier experience. I dislike mounts that require the magnifier be removed from the rifle in order to use the RDS by itself. I don’t want to have to worry about stowing my magnifier on my gear.

Choose a mount that allows you to quickly move the magnifier out of your field of view while keeping it attached to the rifle or remove it all together. I like the LaRue Tactical LT755 but there are other choices.

Choose the Right RDS

I use Aimpoints almost exclusively on my carbines and as much as I love them, I admit that not all of them work well (for me) in front of a magnifier. I first used the magnifier behind an Aimpoint Comp ML3 with a 2 MOA dot reasoning that the finer aiming point would be beneficial and it worked well for me but I saw some distortion of the red dot. I later tried it behind several Aimpoint Micros and Comp M4s but found that the dot turned into a series of star bursts or several dots swimming around each other when magnified. This may not happen for all users but it happened for me.

It turns out that the best combination that I have found so far is a Comp ML3 with the 4MOA dot. For whatever reason, I see Aimpoint’s 4 MOA dots much more clearly. This combination gives me a razor sharp aiming point and makes hits out to 300 yards very easy which is really all I can ask from this set up.

Whichever RDS you prefer, spend some time figuring out what works best in front of the magnifier.

Shed Weight from the Front of Your Carbine

Using an RDS and magnifier set up means having two optics and two mounts on your rifle. The capability that this setup offers comes at a fairly steep cost in weight. The best way I have found to mitigate this is the shed weight from your carbine, concentrating specifically on the front end.

The weight of the magnifier sits toward the rear of the receiver. You can really counteract the heavy overall feeling that this lends a carbine by reducing weight at the front. Choose a lighter barrel profile and a lighter hand guard. I think that in order to get the most out of a RDS and magnifier setup, you really need to build the carbine with this setup in mind.

You don’t have to go crazy. A lighter medium profile or pencil barrel and lightweight extended hand guard will make a big difference in how your carbine feels. It will also greatly reduce the overall weight. You should be able to build a carbine that weighs around 7-7.5 pounds (and feels lighter because of where the weight is) without much trouble at all.

If you have a magnifier and are thinking of giving up on it, gives these three tips a try before you boot it to the curb. If you are thinking of trying a magnifier, make sure to set yourself up for success. There really is a strong upside to this set up but it takes a little fore thought to get the most out of it.

Sub 6 with a Twist

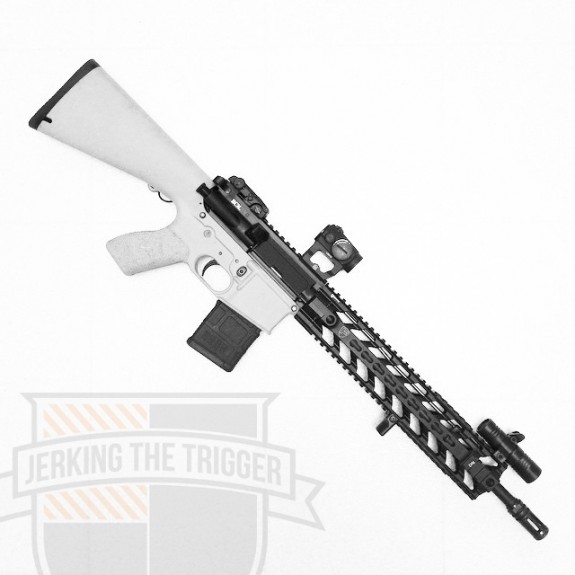
I recently added the Scalarworks LDM to my lightest carbine which shed 1.5 ounces from the total weight, lowering it to 6.13 pounds (unloaded). I stood there looking at the scale for moment and realized that I was so tantalizingly close to the 6 pound mark, that I would have to go for it. There are certainly AR-15 builds that are lighter than this but this one is different. It has a bit of a twist that sets it apart from most. I have a set of requirements that I will not compromise in order to maintain this carbine’s intended use as a defensive firearm and the idea for this project was to start with base components that I already owned to show what could be done with careful retrofitting versus building something from the ground up.

JTT Ultralight with a Twist

Throughout the project, these requirements have guided my decisions:

  • It must have an optic, light, back up sights, and a forward grip of some kind (hand stop, vertical grip, etc.). This alone sets it apart from many lightweight builds which are generally done with just an optic or just irons and no light in order to save weight.
  • It must be able to accept a two point sling.
  • It must have a rail that completely covers the gas block (11″ or greater since this is a midlength). This is to support the way I shoot, support practical field shooting positions, and make barricade shooting easier.
  • It must have an appropriate weight buffer (an H buffer in this case) and an M16 bolt carrier group. I do not want to get into adjustable gas systems and lightweight recoil parts.
  • It should have a forward assist… not because I use it often but because I like the idea of it and I have a hard time giving it up.
  • I will not resort to drilling holes in grips, stocks, or similar lightening methods.

Those requirements, coupled with the limitations of using an upper I already had, make this an interesting and challenging project. I could purchase a BCM upper with their KMR and excellent ELW profile barrel and be done but that strays outside my idea for working with what I already had (a BCM 14.5″ lightweight midlength with pinned A2X). I could add a low mass carrier and adjustable gas block and done but that goes against my requirements. So, that basically leaves me hunting and pecking for lighter weight options.

The carbine currently weighs 6.13 pounds which means I will have to find a way to shed a hair over 2 ounces. My current plan is go with a rail system that is lighter than my current Fortis REV. I will probably go with the Fortis REV II since it is about 1.4 ounces lighter than my current REV and uses the standard barrel nut as an attachment point which is important since I have a pinned muzzle device. I will also try to track down the lightest Keymod forward grip I can find. Those two items alone might take me to the sub 6 promised land.

Hopefully, this will serve as some inspiration for what can be done to reduce the weight of the carbine that you already own.
Here is a breakdown of the carbine as it stands:

You can find many of the parts listed above at Brownells. I purchase a lot of my parts there because of the trust they have built with me over the years.

Get Your Dream AR15 Today!

Armageddon Tactical GMS-15 Gen I Charging Handle

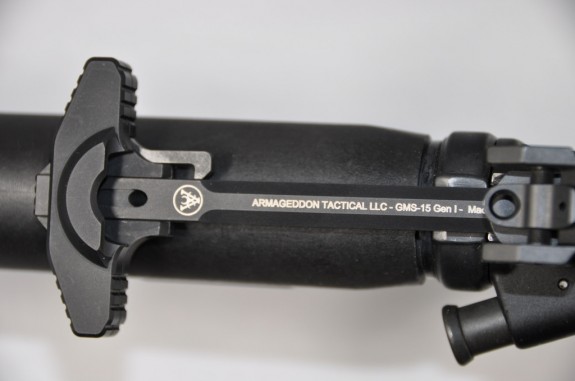
I have an Armageddon Tactical GMS-15 Gen I Charging Handle in hand for review and I am very impressed so far. It has a lot to offer in terms of functionality and it is fairly innovative in terms of design.

armageddontactical_gms15

Suppressor owners will like the GMS-15 for its special gas port and chamber. The port runs up diagonally from the underside of the charging handle to redirect the excess gas into a chamber on the handle. The chamber is a large, semi-circular void that is shaped in a way it contains the gases and slips slightly over the top of the receiver to form a better seal. It’s far simpler than it sounds.

The GMS-15 is ambidextrous in that it can be operated from both sides of the AR-15. However, you should note that it’s design requires tension on the charging handle so it will not release when pulled from the ejection port side on a locked back bolt. On the first pass that sounds like a big deal but it was accounted for with the addition of a fairly large textured button (for lack of a better term) that when pressed, provides the tension necessary. This is the only time this “button” is needed and it is fairly intuitive in its use.

The most exciting thing about the GMS-15 is it’s robust construction and mechanical nature. While other charging handles attempt to overcome the shortcomings of roll pins, the GMS-15 removes them from the equation entirely (they are present but not in any sort of load bearing way). The entire handle moves back on the shaft via a robust internal mechanism. Its rearward travel is stopped, not by a roll pin, but by a large rear lug and the internal structures.

armageddontactical_gms15

Most of the GMS-15 is machined from billet 7075 aluminum and the latch machined from heat treated 4140 steel. The aluminum components are finished with a Teflon impregnated hard anodized finish which, according to Armageddon Tactical, ” produces a durable non-reflective surface and reduces the coefficient of friction between moving parts”. The latch is Mag Phosphate finished.

I will be continuing to work with the GMS-15 to see how it holds up and how well the gas mitigation functionality works. So far, I am very impressed. The one fly in the ointment is the locked back bolt issue but a left-handed friend felt that this was overcome easily enough that he is very interested in spending more time with it.

Check out the Armageddon Tactical GMS-15 Gen I Charging Handle.

Powered by WordPress. Designed by Woo Themes