Archive | Tactics and Training

Kit Badger KBAT – Well Designed, Easy to Live With Targets for Shooters

There are a lot of human silhouette targets on the market and many of them share the same issues. They are larger than will fit in any reasonable range bag or than can be printed at home and they offer unrealistic target indicators to the shooter. Ivan at Kit Badger has set out to create a target, the Kit Badger Anatomy Target (KBAT), to address these issues.

The Problems

If you shoot anywhere other than an improved range with comfortable parking and easy access, you know the pain of hauling all your gear to your shooting spot. If an item doesn’t fit in a range bag that can mean it has to be carried outside the pack or worse – it requires an extra trip. Large targets that must be rolled are just another item to carry and you will likely never be able to print them yourself.

Even if getting your gear to the range isn’t an issue for you, the issue of unrealistic target indicators applies to most targets. The proportions and the very presence of things like scoring zones can skew the perception of the shooter. Anatomy doesn’t mimic the scoring zones on most targets and real people don’t have scoring zones tattooed on their bodies. The only real markers we have are things like ears, eyes, the nose, and the relative positions of anatomy in relation to the overall shape and orientation of the body.

The Fix

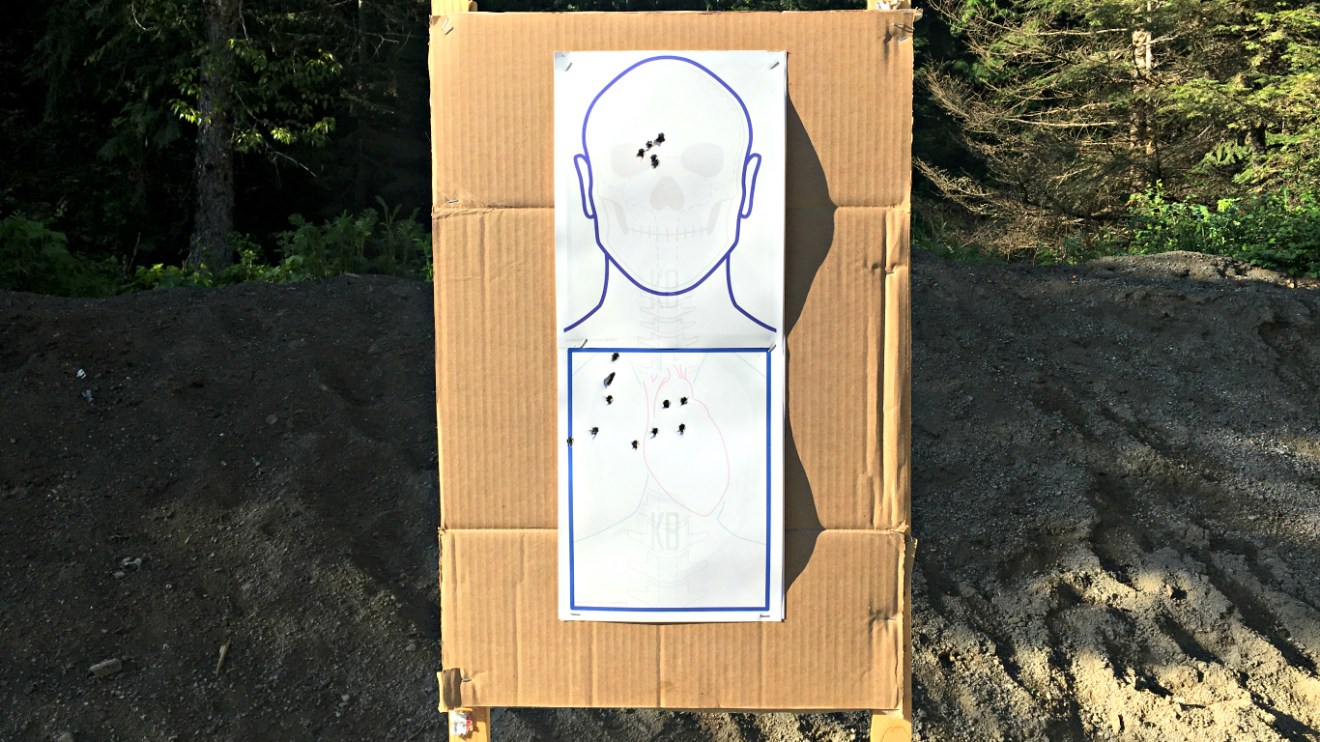
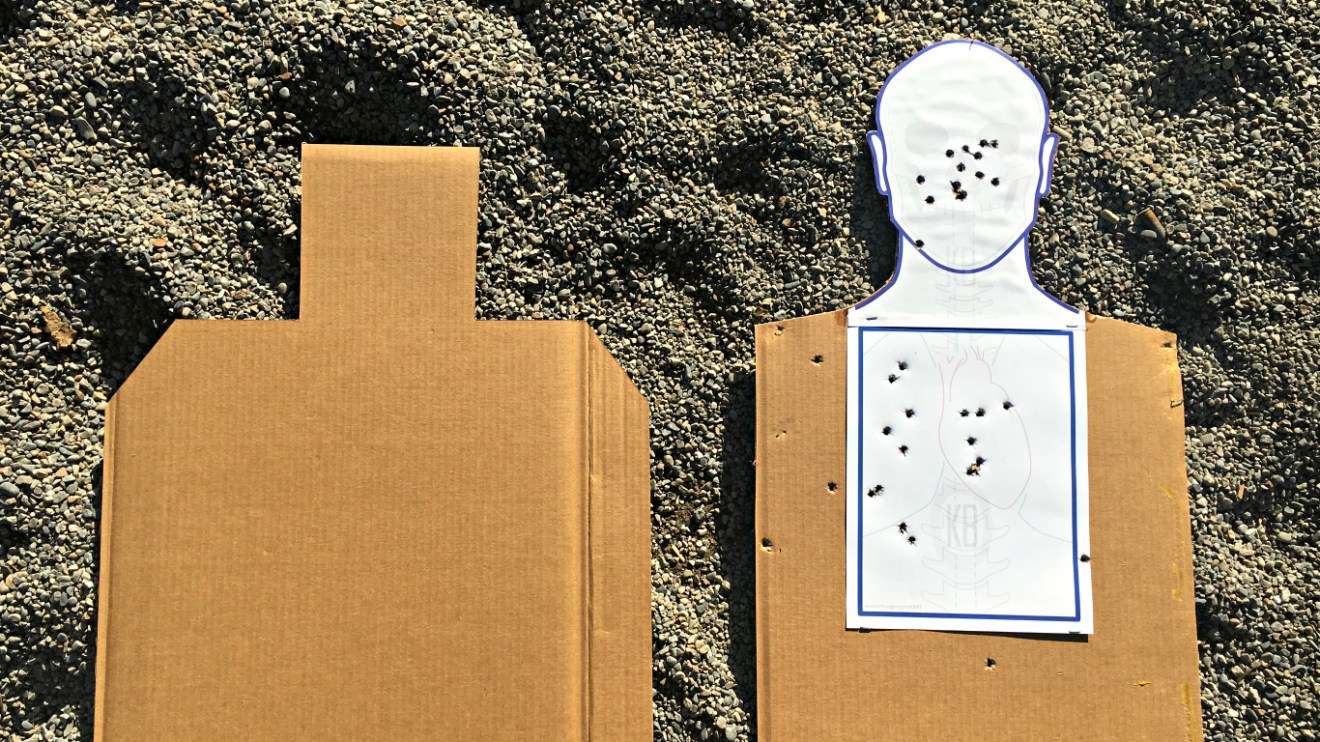
I’ve been fortunate enough to have access to the KBATs for a while now and they do a good job of addressing the issues above. The target is actually a pair of targets that can be used together to create a representation of all of the vital human anatomy or separately as a head and chest target depending on the shooter’s needs.

The KBATs can be printed on standard 8.5 x 11″ paper on your printer at home. They can then be applied to any backer or you can cut your own and trim it to the bold target lines. You probably have room in your range bad to store a whole stack of them.

All of the vital anatomy rendered in very light lines which makes them difficult to target specifically. The outline of the human form is rendered in heavier, bold lines so that the shape of the body and items like ears are really the only target indicators you have to work with. These various underlying anatomical elements are also rendered in realistic proportions so the brain stem area for instance, is rendered in its realistic size and location which is actually a bit lower than they way most of us train to target this area. If you want to color in other indicators like eyes or the nose, you can easily add it with a marker based on the underlying anatomy.

How to Add KBATs to Your Training

The KBATs are currently available as a free download from Kit Badger’s website here: KitBadger.com/KBAT

Soon, they will be available as a printed pad of targets that will offer the shooter even more utility (and a great price compared to many targets on the market). Stay tuned for more details on this.

I strongly suggest you read Kit Badger’s site and view the video so you can get the most out of this free resource. There are a number of ways these can be used and modified to suite your needs.

Tier 1 Citizen Stupid Simple Targets – DIY Targets and Stands

Abner Miranda at Tier 1 Citizen recently showed off his Stupid Simple Targets in a new video and it is worth sharing. He shows how to use found material, a single 2×4, some conduit clamps, and rebar to create lightweight, portable, and completely customizable targets with no fear of splash-back like you would have with steel. The targets in the video are CNC cut from HDPE but they could easily be cut from plywood or scrap plastic like political signs.

RE Factor Tactical Kill Card Challenge

RE Factor Tactical is prepared to give you a very cool and very exclusive Kill Card patch… but you are going to have to earn it! Their Kill Card Challenge is a shooting skills challenge that anyone can enter and, if you follow the rules and provide the prescribed proof, anyone who completes the challenge will receive a Kill Card Patch.

You’ll need the following:

Once you have your video proof, you can send it to info@refactortactical.com or tag @refactortactical on Instagram. Visit the Re Factor Tactical Blog for details: RE Factor Tactical Blog

Phokus Research Group Wound Cube

A good friend of the blog recently told me about his experience with the Phokus Research Group Wound Cube – a training aid in the form of a semi-transparent silicone cube with 4 common and realistic wound patterns molded into it. He was impressed.

The Wound Cube is designed to give students in a classroom setting, a chance to develop their skills at packing wounds. The different types of wounds offer the opportunity to pack 3 different gun shot wounds and 1 large laceration. The semi-transparent construction allows both the student and instructor to see the student’s work (especially when used with a flashlight). The durable construction allows the Wound Cube to be used over and over again.

Phokus Research Group offers a variety of different Wound Cube Packages from single Wound Cubes to entire classroom-ready kits. Check out the Wound Cube at PhokusResearch.com.

Review: Caldwell Stable Table – Portable Shooting Table

There was a time in my life when I thought I would never have need for a shooting table. Shooting tables were for the weak and soft. I would just use the prone position forever.

I do most of my shooting on public land or on my home range both of which are, shall we say… rustic. They generally aren’t graded perfectly and there can be tall, wild grasses that reach 2 feet in height or taller in the summer. On my home range, I shoot from an elevated ridge down into a berm at the back of a lower field. This sometimes places the precipice of the ridge in my line of sight if I am prone. The area that I shoot from is also an important access point for our trucks/tractors into the field and woods beyond it.

I need elevation to clear the terrain and vegetation. I also can’t clog up the area from which I shoot with a permanent shooting bench. All of this points to the need for something like a portable shooting table.

I tried several portable shooting tables that I could find locally but they all had major short comings for my intended use. Most of them were basically glorified folding chairs that didn’t seem like they would last any longer than the camp chairs it seems like we have to replace every two years. Most of them had runner style bases that would NEVER sit level in the locations where I shoot. Then I found the Caldwell Stable Table online and, while I couldn’t find one locally to see in person, it was clearly closer to what I needed. I rolled the dice and bought one on Amazon. I’m glad I did.

The Stable Table is exactly what I needed. First, it is constructed mostly from surprisingly thick steel round tube and steel square tube stock with welded reinforcement. The table top is a tough, blow-molded piece with steel inserts for bolting to the steel structure. The whole thing feels like it could last a lifetime.

Second, all that steel adds up to weight and weight equals stability. Weight is great for a permanent shooting table and good within reason for a portable shooting table. The Stable Table is heavy but I can still lift the whole unit at once and it breaks down VERY easily into smaller components which makes it quite easy to move. It strikes a nice balance between stability and portability.

The third feature that makes this table perfect for me (and probably anyone else who rarely shoots indoors or from a concrete pad) is the tripod base. The Stable Table has a very wide tripod leg setup that makes it easy to level the table, even on rough ground, because it only contacts the ground at 3 points. One of the legs is adjustable via a large thumb screw so that you can really fine tune the level.

Those are the just the features that made the Stable Table work for me. There are a lot of additional features that I have come to appreciate about it:

  • The seat is lightly padded and covered with some seemingly very durable vinyl that wipes off easily (very nice when it is covered in barn dust from storage).
  • The table top is attached to the central column near the back of the top (instead of centrally) so you can cant it to one side or the other depending on whether you shoot right or left handed.
  • The table top has molded channels and lips so items don’t roll off easily.
  • It comes with rifle cleaning forks that attach to the handles that are molded into the table top. I might even use them if I clean a rifle some day.
  • The seat is height adjustable which lets me bring it closer to the table top for my daughters to use. The table has been an important tool in training them to shoot without them having to hold the full weight of the rifle all the time.
  • The table top is well sized. There is plenty of room for a rifle with support of some kind (shooting bag, bipod, rest, etc.) and ammo, spare mags, paper and pen, and other items you might want while you are shooting.

I bought my Stable Table for just over $200 from Amazon. It can be found in the $170-175 range at other online retailers but be sure to check shipping costs. There is often a hefty oversized shipping fee for this table because it is quite large and heavy when boxed. If you have a shop locally that stocks Caldwell Shooting Supplies, it may be worth checking there. You might save yourself some money buying local.

Caldwell Stable Table on Amazon (affiliate link)

Powered by WordPress. Designed by Woo Themes