Archive | Preparedness

H&B Forge and Pine Fire GOShawk

Traditional, hand forged tomahawks haven’t changed much over the years but there is new tomahawk available that manages to teach the old workhorse some new tricks. The GOShawk is the result of a collaboration between Michael Herdson at Pine Fire and H&B Forge. It can do everything that a typical hammer pole tomahawk can do but it also boasts a few features that set it apart.

The GOShawk has a .85 pound hammer pole head on 23″ haft. A longer haft can be used to balance a heavier tomahawk head and adds speed to the swing. The head on the GOShawk a mid-weight compared to most tomahawks and when placed on a long handle, it should hit very hard.

In addition to the typical cutting edge, the GOShawk also features a utility edge on the lower edge of the bit. This edge can be used for scraping a ferro rod, tinder preparation, or other tasks that you might not want to risk damage or dulling to your main cutting edge. It also has a relief cut behind the bit that allows the user to get their hand behind the cutting for fine work and makes the head more comfortable to hold when it is off the haft.

Finally, the GOShawk also features a 3/8″ divet that can be used as a bow drill socket. The socket is usually the hardest part of a bow drill set to manufacture in the woods so having one with you, can be a great advantage if you have the skills to use a bow drill.

Check out the GOShawk at H&B Forge.

Compass Triangulation Doesn’t Always Work, Stop Resisting GPS

I’ve been through various land nav training courses and it is somewhat of a hobby for me with hours spent hiking around orienteering courses. It isn’t long in these types of settings before you meet the guy who tells you all about how GPS units are electronic, they will fail at the worst time, and you are a bad person if you even carry one. All he ever needed was a map and compass to triangulate his position. Lewis and Clark didn’t have GPS!

Triangulation Doesn’t Always Work

Anyone who has had some formal land nav training is likely familiar with how you triangulate your position using a map and compass but… Have you ever actually tried it outside of a training scenerio? It is a useful skill to have in your back pocket but I have been in more scenerios where it would be difficult or impossible than scenarios where it would actually work. It works great when you have clear views to map features that can easily be associated to landmarks. Cruising around in heavy timber, low visibility weather conditions, featureless areas, or areas where there are too many map features that all look similar can all make triangulation difficult or impossible.

Triangulation works great here…

Triangulation may not work so well here with an entire region shrouded in wildfire smoke…

The typical response to this is to tell you that you should never get lost in the first place and there is wisdom in that. We should be terrain associating along the way and tracking our position on the map but what happens when you don’t? What happens when you find yourself traveling through actual wilderness and suddenly you realize that maybe you made a mistake in terrain association a few miles ago and every assumption you have made about navigation since then was likely wrong. What then?

That is where GPS comes in. You should have all the map and compass skills. These skills don’t require batteries and are the bedrock foundation of land navigation but to act like GPS isn’t a proven technology with tremendous application in wilderness travel and preparedness is nuts. A GPS unit and some basic understanding of a simple coordinate system like UTM might be the difference between guessing where you and knowing exactly where you are.

Stop Resisting GPS

Coming to these realizations changed the equipment I carry. It allowed me to downsize and simplify my navigation tools.

I no longer feel the need to carry a sighting compass when a baseplate compass will do. In fact, a good baseplate compassĀ (I like the Suunto M-3 G) generally has more useful features like a larger/longer baseplate for map work, more scales, and UTM roamers. That means I don’t need any other map tools. If you learn how to aim a baseplate compass from the waist, you can remove a lot of parallax when sighting and can actually take very accurate bearings. They are generally smaller and lighter too.

Many of the situations that make triangulation difficult make a sighting compass difficult to use efficiently but there is nothing wrong with a good mirrored sighting compass if you prefer. I use the Suunto MC-2 G. The MC-2 G USGS has tools for common 1:24000 USGS maps.

I have multiple GPS units, most with mapping capability. Mapping can be useful but I always carry a paper map so my most carried GPS is actually a little Garmin Foretrex 401. It spits out a UTM coordinate whenever I need one, runs for a long time on 2 AAA batteries, weighs little, and doesn’t take up much room in my Kit Bag or pack. The Foretrex line has been updated but my 401 still works so I haven’t purchased a new 601. The ability to have a UTM coordinate at my finger tips means the ability to instantly locate myself on a map and a GPS doesn’t have to weigh you down with the existence of compact, proven GPS units like the Foretrex line.

Speaking of maps and UTM, they can’t help you unless you set them up your maps with UTM grids. I generally use CalTopo so I can create my own maps however I want for free. It’s an incredible tool.

GPS isn’t some new technology that is going to get you killed. Modern, purpose built electronics are fairly reliable and spare batteries aren’t hard to carry (you are probably carrying some already). Total reliance on GPS at the expense of map and compass skills is unwise. However, when used as part of a larger land nav skill set, GPS might actually save your bacon in ways that a map and compass can’t. Stop resisting GPS.

Hill People Gear Kit Bag or GunfightersINC Kenai Chest Holster – Get Both!

Our review of the GunfightersINC Kenai Chest Holster is one of the most visited reviews ever posted on this site and we get a number of emails asking questions about it. One of the most common questions I receive regarding the Kenai is how it compares to the Hill People Gear Kit Bag. Well, I happen to be a long time user of both and that sounds like an idea for a post to me!

Links:

Kenai Chest Holster

Hill People Gear Kit Bag

The Same but Different

At the most basic level, the Kenai and Kit Bag are similar. They are both designed to carry a handgun in the most advantageous position for many outdoor pursuits – on the chest. However, the functionality and materials used are drastically different. This leads to different strengths and weaknesses for both, enough that I have purchased and use both depending on the situation.

Both are better than tucking your handgun into your backpack or not carrying it at all!

Background with the Kit Bag

My background with the Hill People Gear Original Kit Bag is fairly long. I’ve owned one since the first or second run. This was before they added a dummy cord loop and Velcro in the handgun compartment. I simply wanted a way to carry a handgun that was comfortable and concealed while backpacking. The Kit Bag worked well for that but I never really completely filled all the carrying capacity offered by the Original Kit Bag. I eventually sold it and replaced it with a Runners Kit Bag.

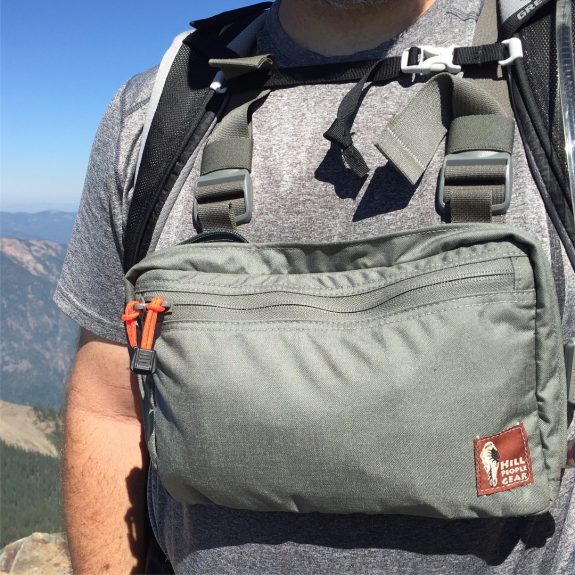
The Runners Kit Bag is ideal for me. It has the same footprint as the Original Kit Bag but is slimmer overall since the “middle” cargo pocket has been removed. It is large enough to keep my full sized handgun concealed but significantly slimmer while still offering more than enough carrying capacity to carry some basics.

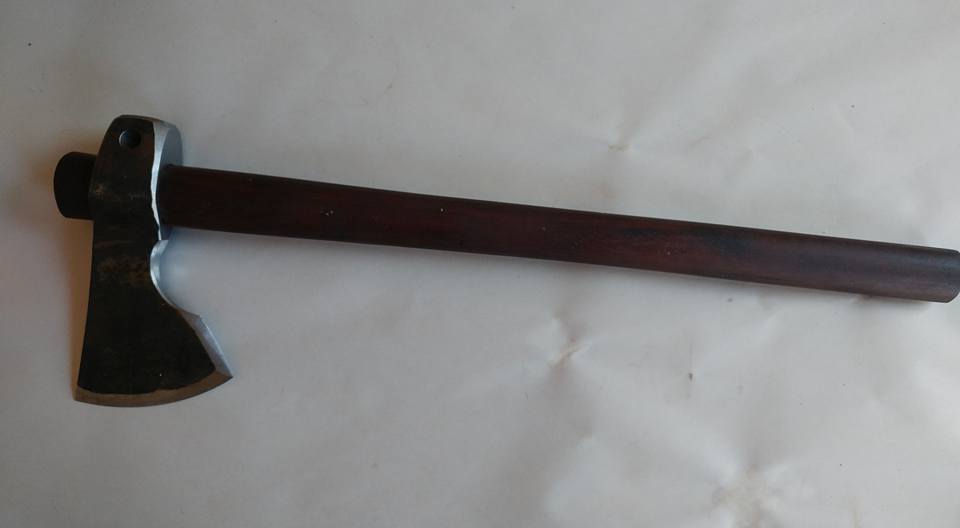
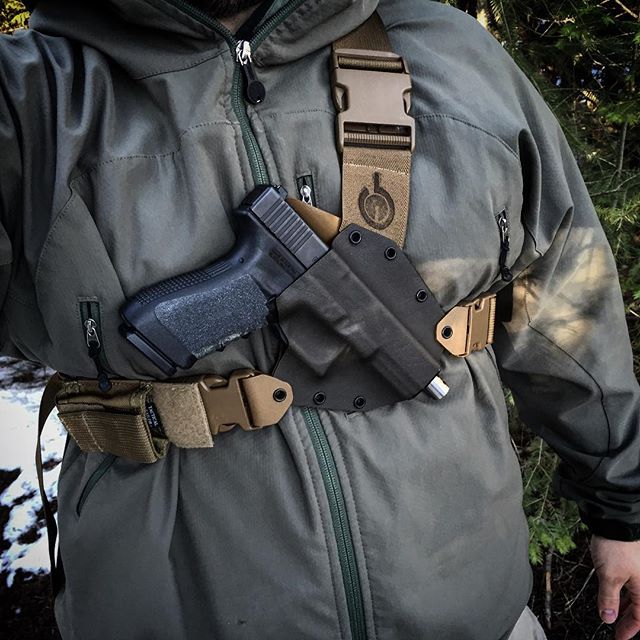
Background with Kenai Chest Holster

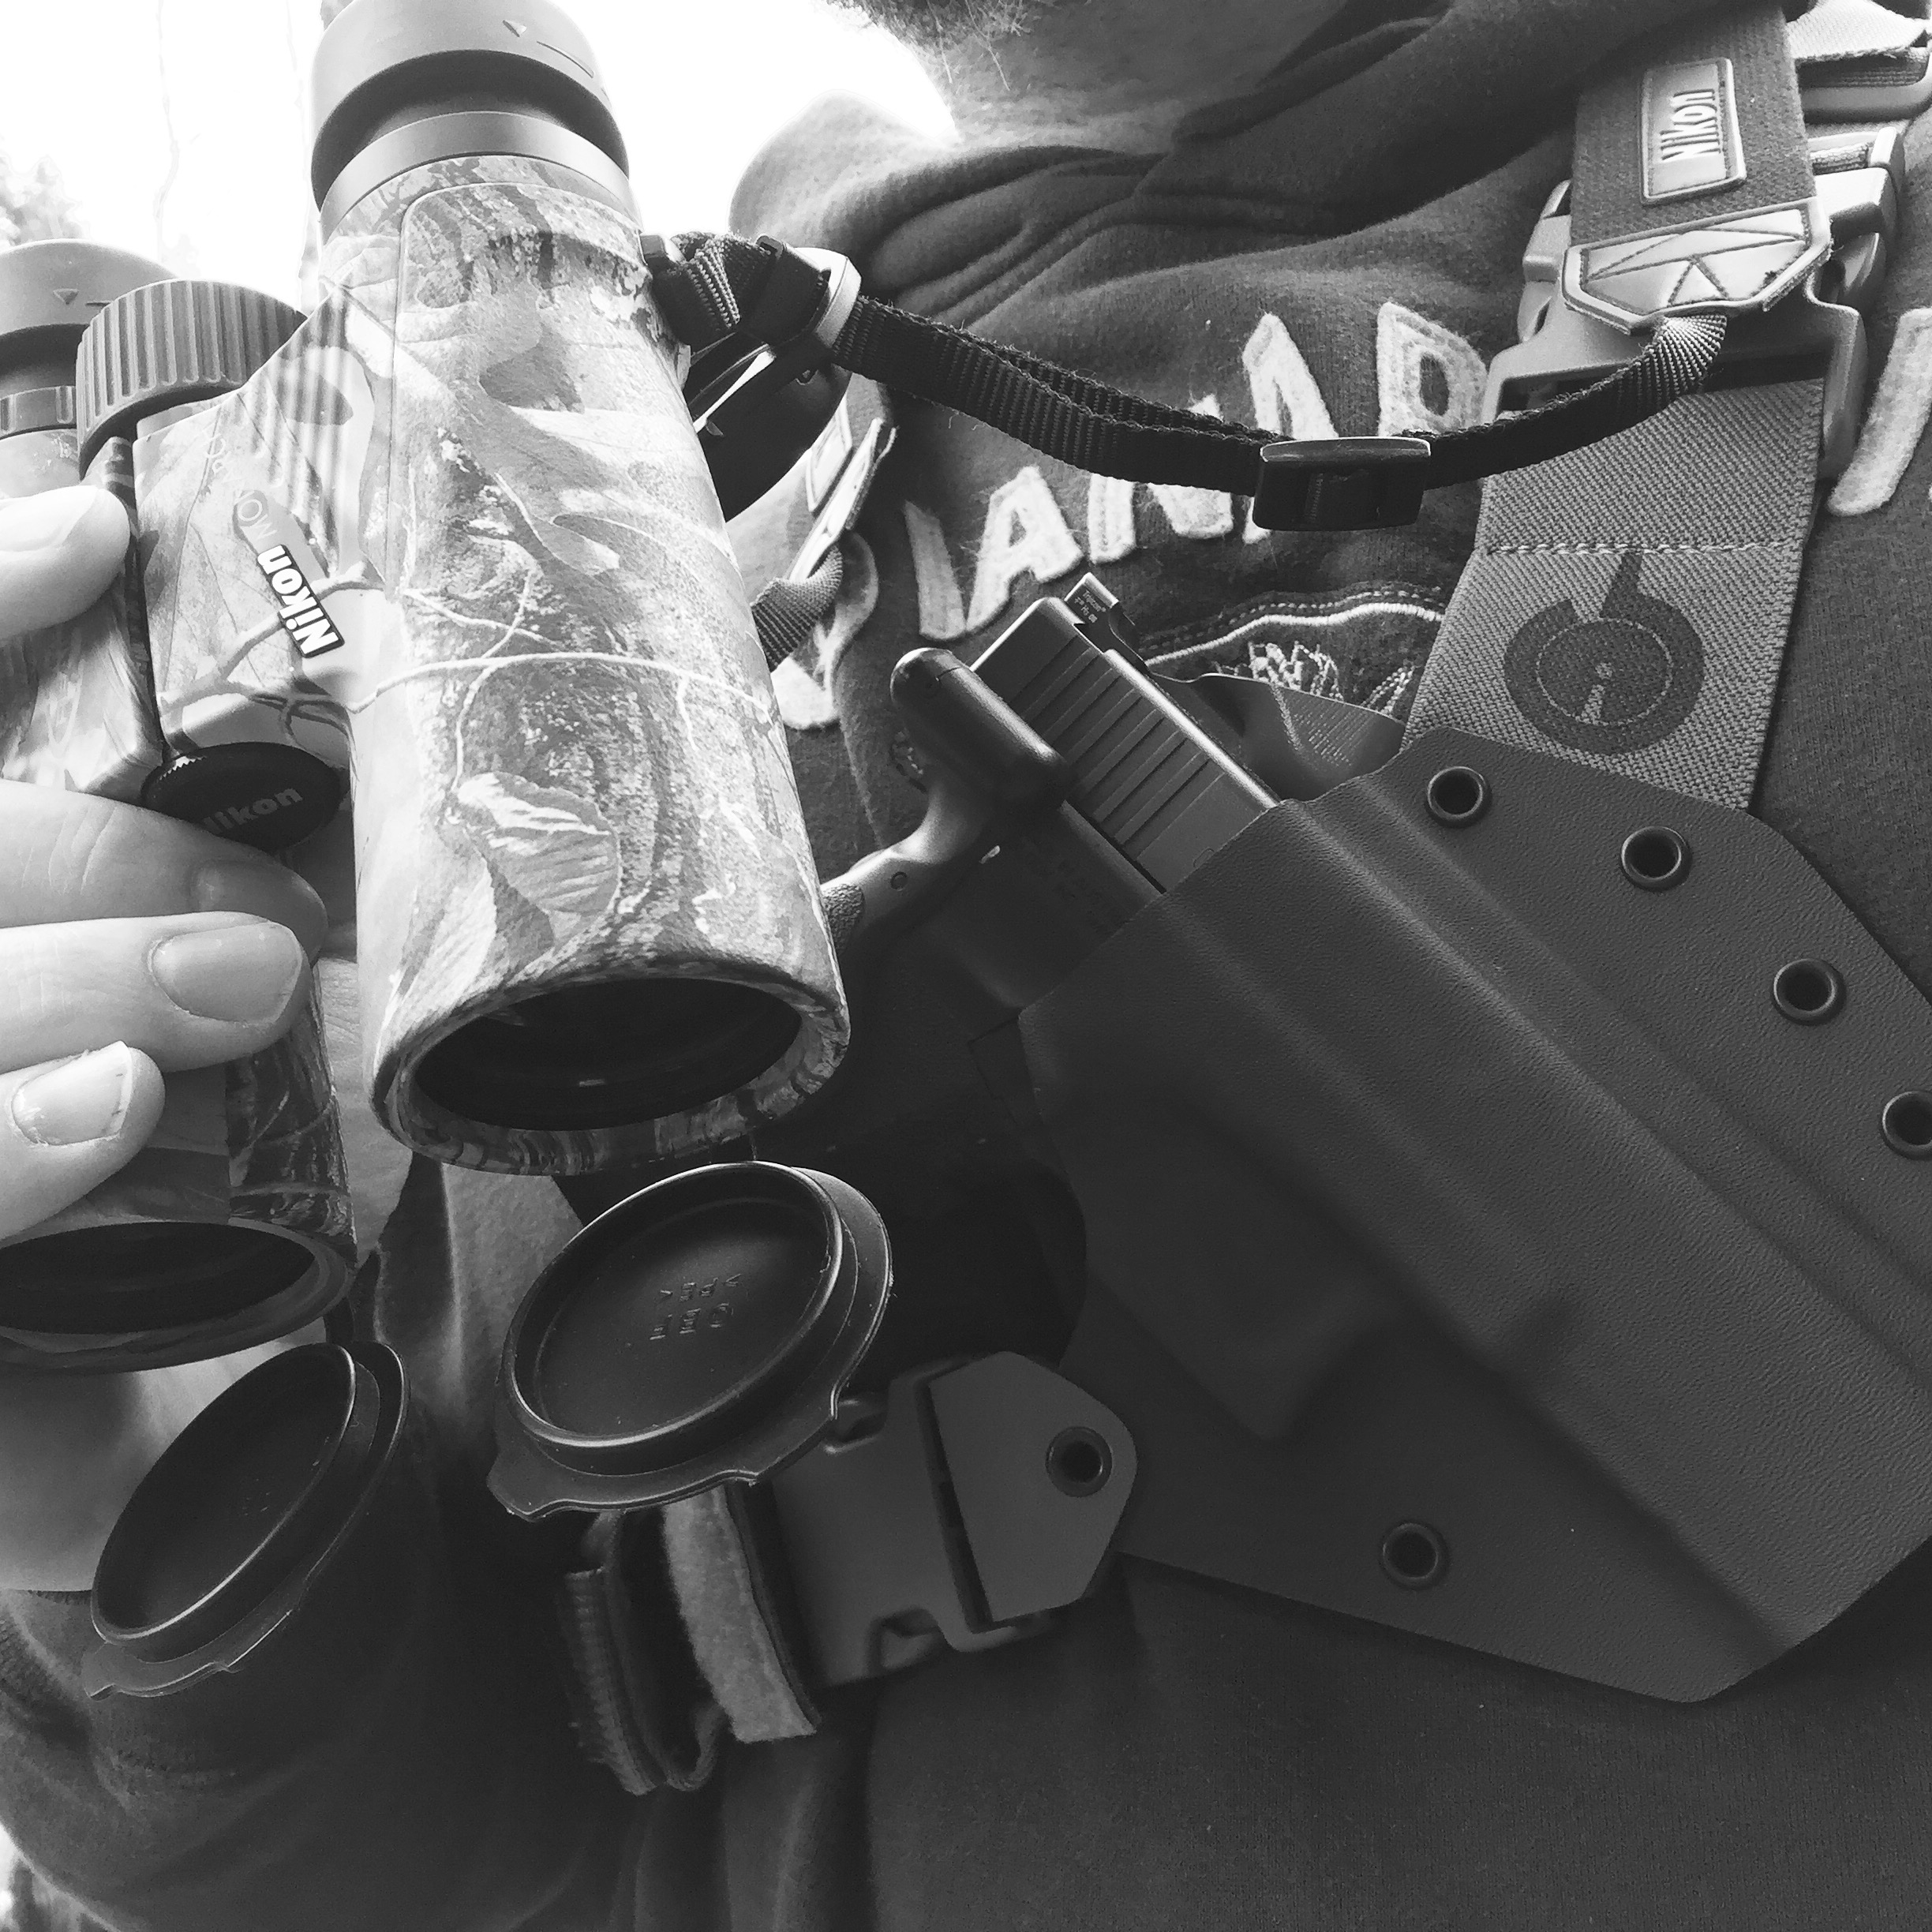
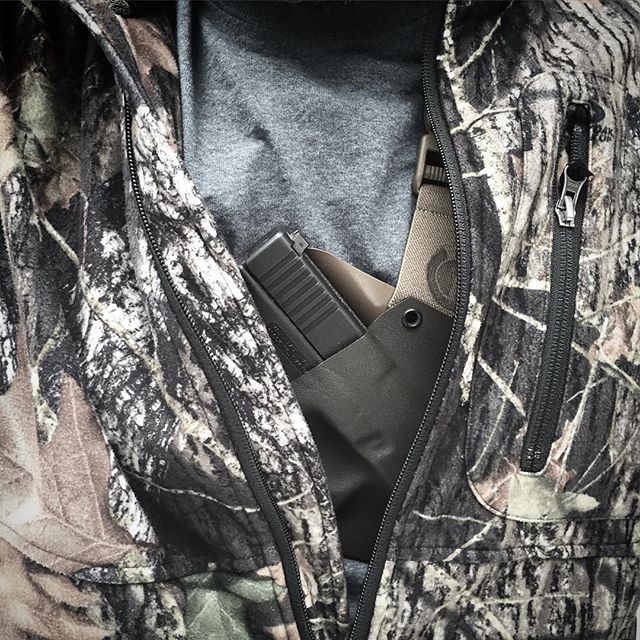
I’ve been using a Kenai Chest Holster since late 2015. I find it to be the best interpretation of a “guide holster” available. GunfightersINC used their experience in the outdoors and some modern materials to bring the guide holster concept into the current century. It is slimmer than any traditional leather guide holster could ever hope to be, offers better retention without the need for a strap, creates a better draw stroke, and its modular.

I’ve worn this holster extensively and I find it to be extremely comfortable and extremely easy to draw from. They even designed the harness so none of the adjusters had to be positioned on the back where it could catch on wader shoulder straps or cause hotspots under a backpack. This is the level of thoughtfulness that went into this holster.

Get Both!

For a long time, the Original Kit Bag was the only way I had to carry a handgun on my chest and it worked. When I added the Kenai Chest Holster to my gear bin, I wondered if it would replace my Kit Bag but it hasn’t. It has only highlighted the strengths of both carry methods.

I can’t replace the Kit Bag because it offers three important benefits over the Kenai:

  • It can conceal a handgun without the use of a covering garment.
  • It can carry a huge variety of handguns from small to large.
  • It can carry additional items in a location that is easy to access.

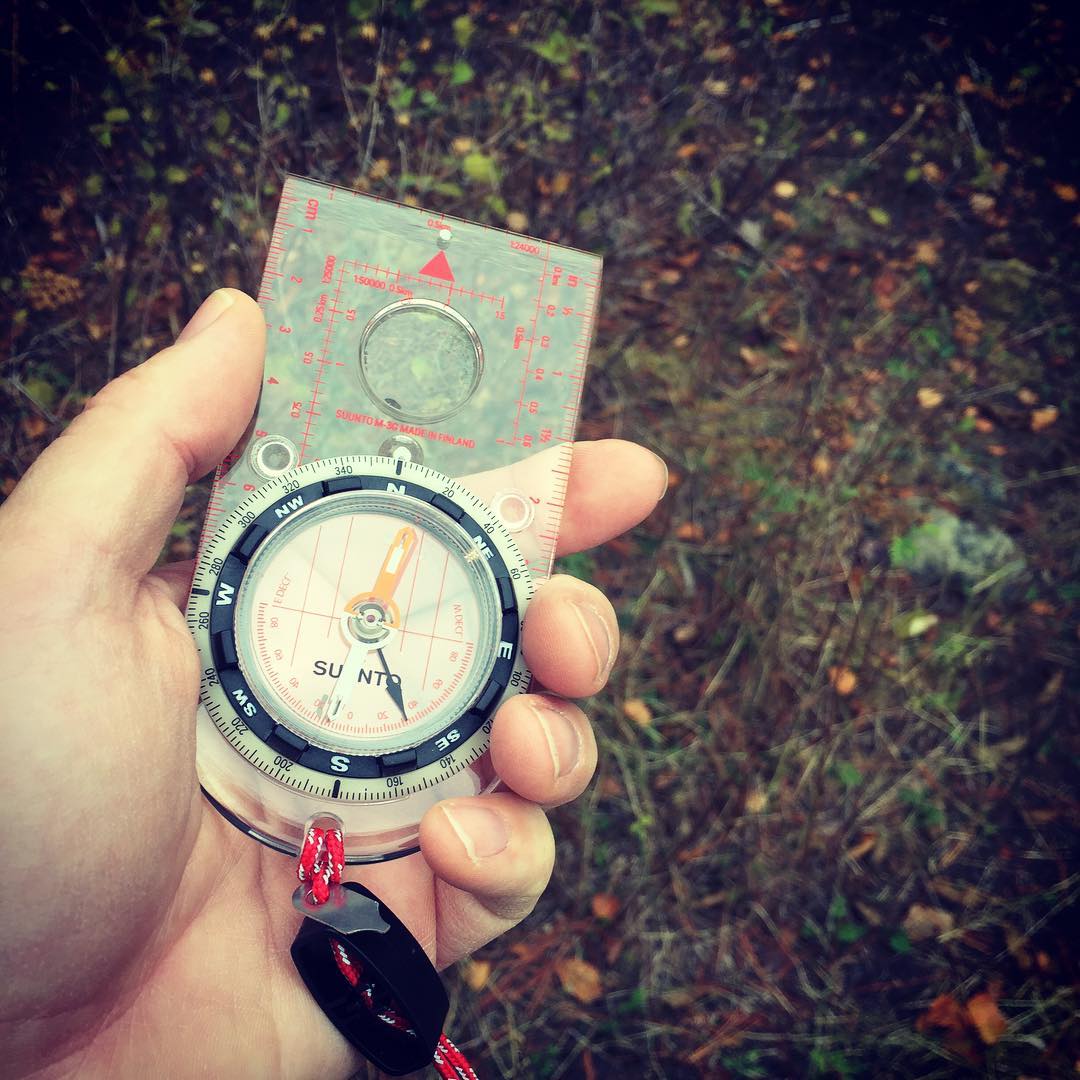
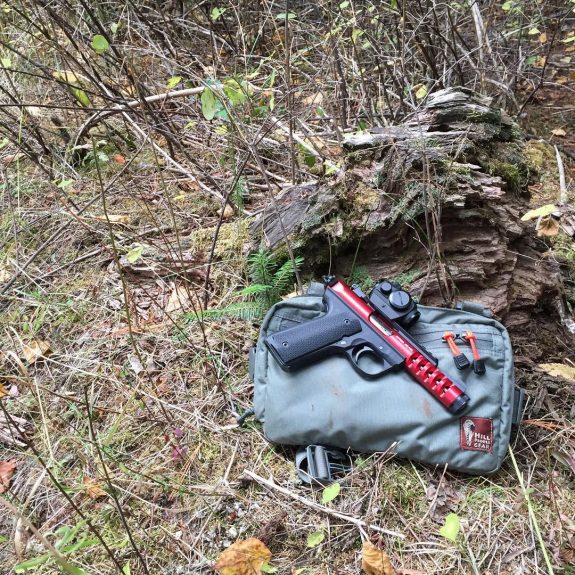
The Kenai is surprisingly concealable under a cover garment but I live in an area that sees triple digit heat in the summer. I can’t always use a covering garment. I’ve used my one Kit Bag to carry everything from a Glock 43 or J-Frame, to a Ruger 22/45 Lite with RDS, to a large frame revolver. Additionally, the Kit Bag is great for carrying items like nav tools (compass, GPS, UTM grid, etc.), basic survival goodies (lighter, some bits of tinder, etc.), and other items you may want close at hand. It may not seem like a big deal but the efficiency of reaching to your chest for gear like chapstick or a GPS unit versus having to stop and remove your pack is not trivial when you are trying to cover ground.

I can’t replace the Kenai Chest Holster because it offers three important benefits over the Kit Bag:

  • It is more compact.
  • It offers a faster, more streamlined draw stroke.
  • It is more concealable.

The Kenai Chest Holster is smaller and slimmer than the Kit Bag that makes it a little easier to dress/pack around. That also means it is cooler to wear and that can be big deal when it is 95+ with less than 15% humidity. The Kenai’s draw stroke is very fast and straightforward. There is nothing between your hand and a full firing grip on your handgun with Kenai. The Kit Bag is fast but the Kenai is faster – how much faster will depend on your specific gear and some training. Finally, if I absolutely need to conceal the fact that I am carrying and the weather permits, the Kenai conceals under a coat easily.

I live in a very rural area that is a destination for outdoor recreation. That means that we have a healthy mix of the NRA crowd and Sierra Club crowd. Our property is on the outskirts of National Forest land that contains Grizzly habitat. My choice for which carry “system” to use often comes down to balancing those factors.

If I am headed to a popular trail, I know I am more likely to encounter the Sierra Club side of the house and prefer to remain discreet in how I carry. I usually reach for the Kit Bag in that case. If I am working or hiking on our own property, I don’t have to worry about concealment and I almost always use the Kenai. If I am going on a very long day hike (or overnighter), I am more likely to reach for the Kit Bag because of the convenience of carrying important items in the outer pocket. If I am going into an area where the grapevine says there was recent bear activity, I am inclined to take the Kenai.

Wrap Up

There are always factors to balance when deciding which gear works for you. If you are knee deep in big coastal brown bears while fishing for salmon you might choose differently than you would if you were knee deep in college kids while hiking the Appalachian Trail. For me, both the Kenai Chest Holster and Hill People Gear Kit Bags have been invaluable and I am glad I have both in my gear box.

Mountain Ridge Gear Duffel Bags Are Back

Mountain Ridge Gear has been making overbuilt duffel bags in a number of sizes for a long time. In fact, we mentioned them here on Jerking the Trigger way back in 2010! They never stopped making them but they were only available under another well known pack maker’s brand name for a last few years. Now the bags are back under the Mountain Ridge Gear name and they are a still a bargain.

The bags are built from 1000D Cordura with #10 YKK zippers andĀ  available in 4 sizes: Extra Small, Small, Medium, and Large.


  • XS: 9″ x 4″ x 4″
  • SM: 13″ x 6.5″ x 6″
  • MD: 18″ x 8″ 8″
  • LG: 23″ x 11″ x 11″

Check out Mountain Ridge Gear’s Duffels at MountainRidgeGear.com.


Powered by WordPress. Designed by Woo Themes